DataFrames are one of the most popular data structures for handling and analyzing tabular data in data science and analytics. Python libraries like pandas provide robust tools for working with DataFrames, allowing data manipulation, transformation, and visualization. Once the analysis is complete, it’s often necessary to export DataFrames to a CSV (Comma-Separated Values) file for sharing, further analysis, or archiving.
The CSV format is widely used because of its simplicity and compatibility with various tools, including Excel, databases, and other programming environments. In Jupyter Notebook, the process of exporting DataFrames to CSV is seamless and highly customizable. The DataFrame.to_csv() method in Pandas enables users to export data with options to include/exclude headers, customize delimiters, handle missing values, and more.

Table of contents
- How to Save DataFrame to CSV?
- Parameters of to_csv() Function
- sep (str, default ‘,’)
- na_rep (str, default ”)
- columns (list of str, optional)
- header (bool or list of str, default True)
- index (bool, default True)
- index_label (str or sequence, optional)
- mode (str, default ‘w’)
- encoding (str, optional)
- date_format (str, optional)
- compression (str or dict, optional)
- chunksize (int, optional)
- Conclusion
- Frequently Asked Questions
How to Save DataFrame to CSV?
Step 1: Import pandas and Create a Dataframe
You can either create a dataframe manually, import it from an external source (e.g., a CSV or Excel file) or use an inbuilt dataset from sklearn library. Here’s an example of creating one manually:
1st Method: Create a DataFrame Manually
import pandas as pd
# Creating a dataframe manually
data = {
    "Name": ["Alice", "Bob", "Charlie"],
    "Age": [25, 30, 35],
    "City": ["New York", "Los Angeles", "Chicago"]
}
df_manual = pd.DataFrame(data)
print(df_manual)
2nd Method: Import DataFrame from an External Source
# Importing a CSV file
df_csv = pd.read_csv("sample.csv")
print("\nDataFrame imported from CSV:")
print(df_csv)
3rd Method: Use an Inbuilt Dataset from sklearn
from sklearn.datasets import load_iris
import pandas as pd

# Load the Iris dataset
iris = load_iris()

# Create a dataframe from the dataset
df_sklearn = pd.DataFrame(data=iris.data, columns=iris.feature_names)

# Add the target column
df_sklearn['target'] = iris.target

print("\nDataFrame created from sklearn's Iris dataset:")
print(df_sklearn.head())
Step 2: Export the dataframe to a CSV file
When exporting a DataFrame to a CSV file in Pandas, you can specify the file path in the to_csv() method. This path determines the directory where the file will be saved. Below are several scenarios explaining how to save the file in different directories:
1. Save in the Current Working Directory
To check the current working directory, use:
import os
print(os.getcwd())  # Prints the current working directory
Output:

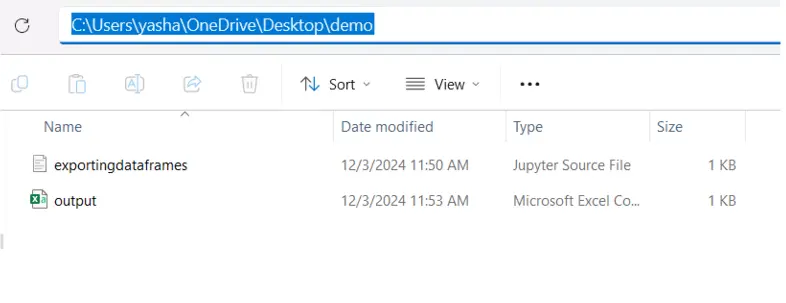
By default, if you provide just the file name (e.g., output.csv), the file will be saved in the current working directory where you are using your jupyter notebook or python file to export the dataframe
import pandas as pd
# Create a sample DataFrame
data = {"Name": ["Alice", "Bob"], "Age": [25, 30]}
df = pd.DataFrame(data)
# Save in the current working directory
df.to_csv("output.csv", index=False)
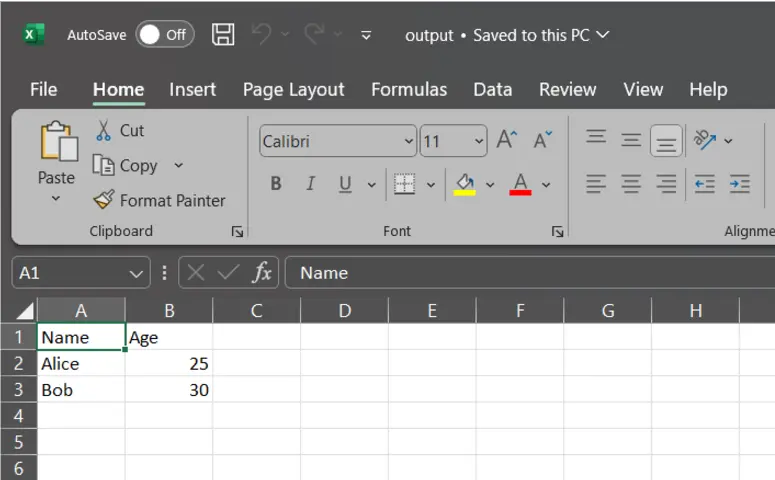
As you can see the output.csv is exported in the same directory where our jupyter notebook is saved
2. Save in a Subdirectory
If you want to save the file in a subdirectory of the current directory, include the subdirectory in the file path. Ensure the subdirectory exists, or you will get a FileNotFoundError.
If the directory doesn’t exist, create it:
import os
if not os.path.exists("data"):
    os.makedirs("data")
df.to_csv("data/output.csv", index=False)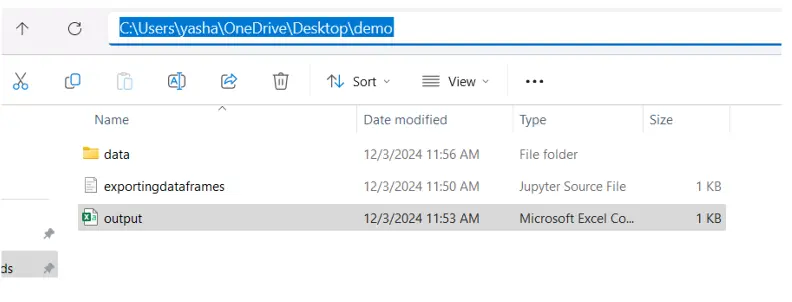
# Save to a subdirectory (e.g., "data" folder)
df.to_csv("data/output.csv", index=False)
3. Save in an Absolute Path
To save the file in an absolute directory (e.g., C:\Users\YourName\Documents or /home/user/documents), provide the full path.
# Save to an absolute path on Windows
df.to_csv(r"C:\Users\yasha\Videos\demo2\output.csv", index=False)  # Use raw string (r"") to avoid escaping backslashes
Parameters of to_csv() Function
Here are the parameters of to_csv() function:
1. sep (str, default ‘,’)
Specifies the delimiter to use in the CSV file.
df.to_csv("output.csv", sep=";") # Use semicolon as a delimiter
2. na_rep (str, default ”)
Specifies how missing values (NaN) are represented in the output.
import pandas as pd
# Create a sample DataFrame
data = {"Name": ["Alice", "Bob",None], "Age": [25, 30,None]}
df = pd.DataFrame(data)
df.to_csv("output.csv", na_rep="N/A")  # Replace NaN with "N/A"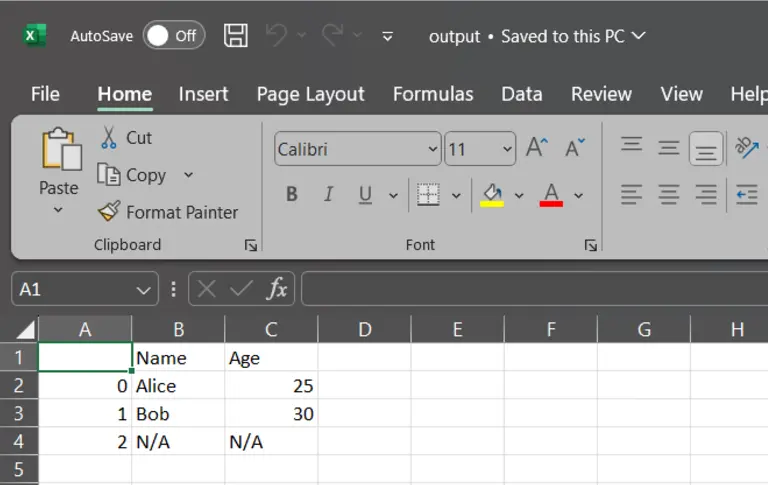
3. columns (list of str, optional)
Selects specific columns to write to the CSV.
import pandas as pd
# Create a sample DataFrame
data = {"Name": ["Alice", "Bob",None], "Age": [25, 30,None]}
df = pd.DataFrame(data)
df.to_csv("output.csv", columns=["Name"])  # Export only "Name" column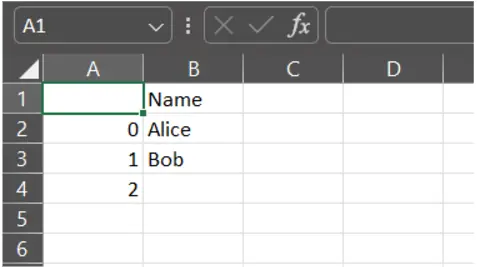
4. header (bool or list of str, default True)
Controls whether to write column names in the CSV. You can also pass a custom list of header names.
import pandas as pd
# Create a sample DataFrame
data = {"Name": ["Alice", "Bob",None], "Age": [25, 30,None]}
df = pd.DataFrame(data)
df.to_csv("output.csv", header=False)  # Do not write column names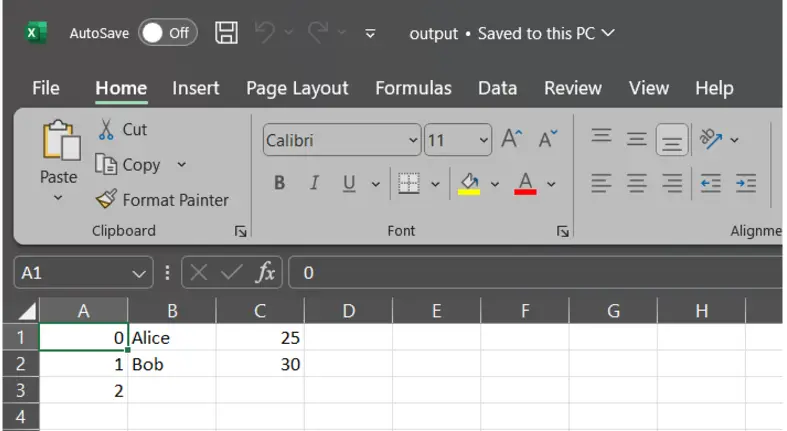
Here, the column names “Name” and “Age” are not visible in the sheet
import pandas as pd
# Create a sample DataFrame
data = {"Name": ["Alice", "Bob",None], "Age": [25, 30,None]}
df = pd.DataFrame(data)
df.to_csv("output.csv", header=["Col1", "Col2"])  # Use custom column names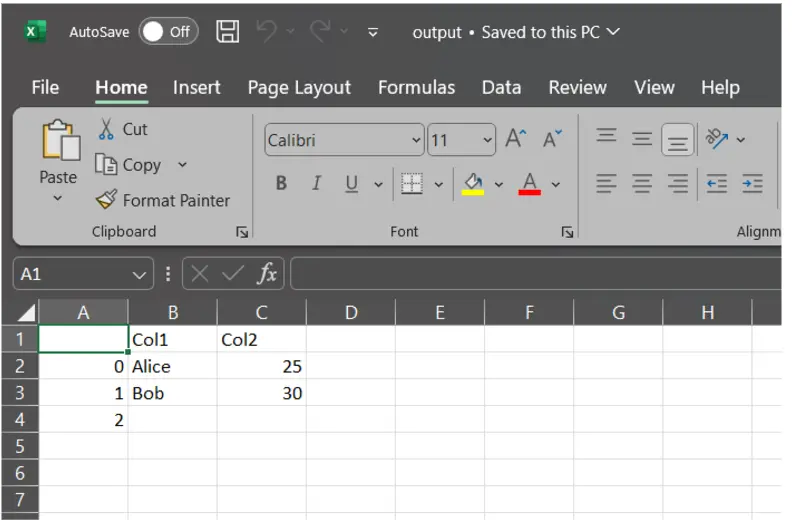
As you can see the name of the columns have now been changed, instead of “Name” and “Age” its “Col1” and “Col2” now
5. index (bool, default True)
Controls whether to write the row index to the CSV.
import pandas as pd
# Create a sample DataFrame
data = {"Name": ["Alice", "Bob",None], "Age": [25, 30,None]}
df = pd.DataFrame(data)
df.to_csv("output.csv", index=False)  # Do not include row indices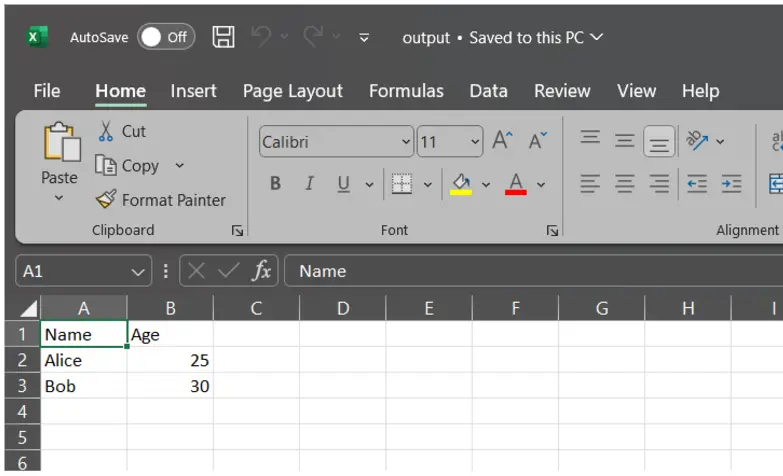
import pandas as pd
# Create a sample DataFrame
data = {"Name": ["Alice", "Bob",None], "Age": [25, 30,None]}
df = pd.DataFrame(data)
df.to_csv("output.csv", index=True)  # Do not include row indices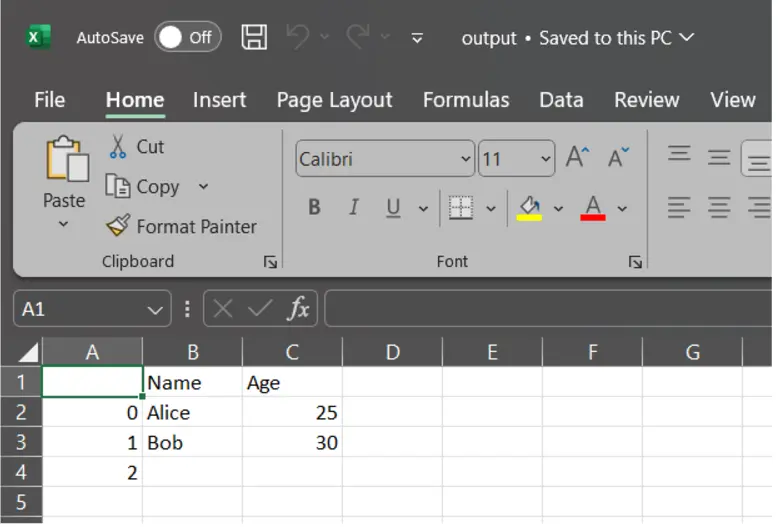
6. index_label (str or sequence, optional)
Specifies a custom label for the index column(s) if index=True.
import pandas as pd
# Create a sample DataFrame
data = {"Name": ["Alice", "Bob",None], "Age": [25, 30,None]}
df = pd.DataFrame(data)
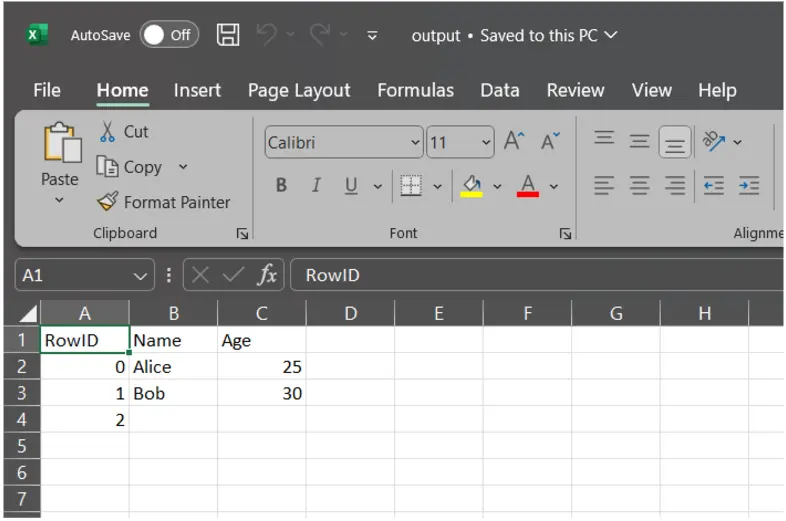
df.to_csv("output.csv", index=True, index_label="RowID")  # Label index column as "RowID"
7. mode (str, default ‘w’)
File mode to open the file. ‘w’ for write (overwrite), ‘a’ for append.
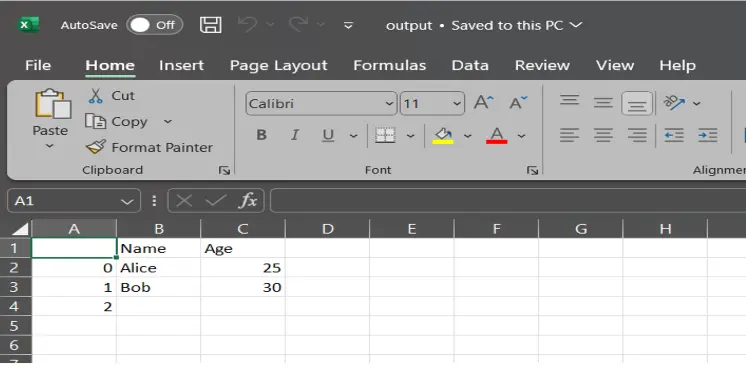
Original Data in output.csv
data1 = {"Name": ["Aaron", "Bella"], "Age": [30, 35]}
df1= pd.DataFrame(data1)
df.to_csv("output.csv",mode="a")  # Append to the file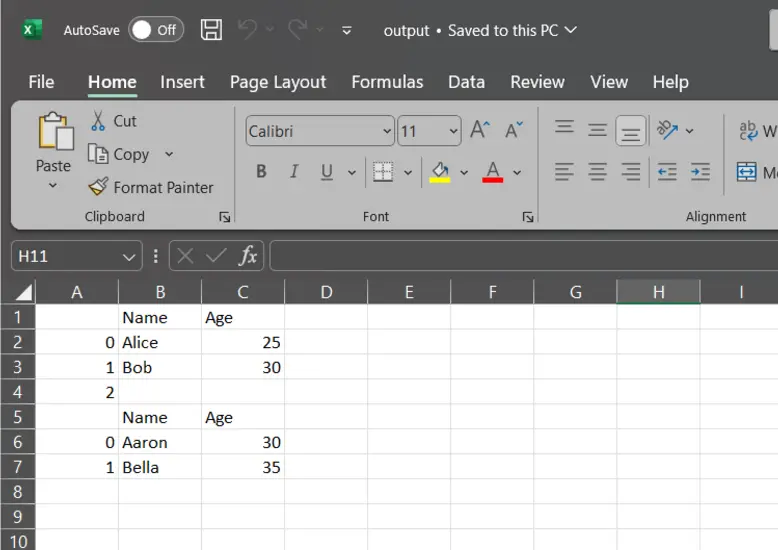
8. encoding (str, optional)
Specifies the encoding for the CSV file (e.g., utf-8, latin1).
df.to_csv("output.csv", encoding="utf-8") # Save with UTF-8 encoding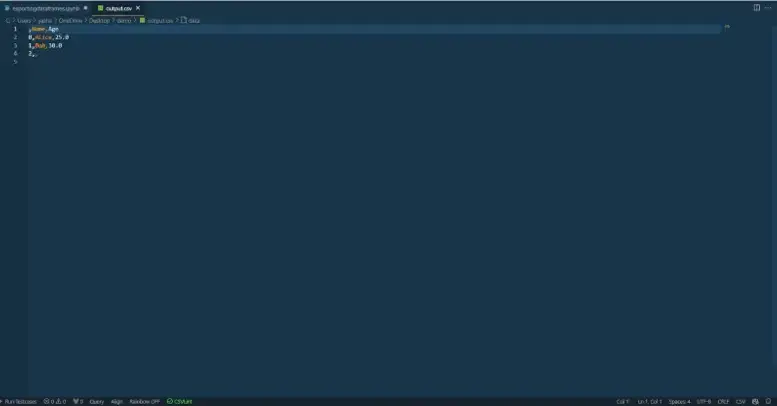
After opening the output.csv file in vs code on right bottom side there is a status bar where you can see that the encoding is utf-8

9. date_format (str, optional)
Specifies a custom date format for datetime objects.
import pandas as pd
# Sample data with date columns
data = {
    "Name": ["Alice", "Bob", "Charlie"],
    "Joining Date": ["2024-12-01", "2023-11-25", "2022-10-15"],
    "Last Login": ["2024-12-03 14:23:00", "2023-11-30 09:15:00", "2022-10-20 18:45:00"],
}
# Create a DataFrame
df = pd.DataFrame(data)
# Convert columns to datetime
df["Joining Date"] = pd.to_datetime(df["Joining Date"])
df["Last Login"] = pd.to_datetime(df["Last Login"])
# Save DataFrame to CSV with date formatting for date columns
df.to_csv("output.csv", date_format="%Y-%m-%d", index=False)
df.to_csv("output.csv", date_format="%m-%Y-%d", index=False)

10. compression (str or dict, optional)
Specifies the compression mode for the output file (e.g., ‘gzip’, ‘bz2’, ‘zip’, ‘xz’).
df.to_csv("output.csv.gz", compression="gzip") # Save as a gzip-compressed file
11. chunksize (int, optional)
Writes the file in chunks of specified size, useful for large datasets.
df=pd.read_csv("data.csv")
print(df.shape)
df.to_csv("output.csv", chunksize=1000)  # Write 1000 rows at a time

Conclusion
Exporting DataFrames to CSV files in Jupyter Notebook is a straightforward yet powerful way to save your processed data for further use, also, by leveraging the pandas.DataFrame.to_csv() method, users can seamlessly export their data with a high degree of customization. This method allows you to save DataFrames in various directories, whether it’s the current working directory, subdirectories, or even absolute paths. This flexibility ensures that your data can be organized and stored exactly where it is needed.
The to_csv() function provides extensive options to tailor the CSV output to specific requirements. For example, you can customize the file’s delimiter, handle missing values, include or exclude headers, specify index behaviour, and control encoding formats. These features allow you to create CSV files that are optimized for compatibility with different software, tools, and workflows.
Additionally, the function supports advanced use cases, such as compressing files for efficient storage or exporting large datasets in manageable chunks using the chunksize parameter. These capabilities make it easier to work with large or complex data structures while maintaining performance and reliability.
Finally, the CSV format is a universally accepted standard for data exchange, ensuring interoperability with tools like Excel, databases, and other programming environments. By mastering the to_csv() function, you can effectively save, share, and archive your data, streamlining your workflow and enabling better collaboration in data-driven projects.
Frequently Asked Questions
Ans. CSV (Comma-Separated Values) files are simple, universally compatible, and easy to manage. They are plain text files where records are separated by commas, making them human-readable and editable with basic tools like text editors or spreadsheets. CSV files are widely supported across systems, programming languages, and data tools, making them ideal for data exchange. They are compact, without extra metadata, which helps keep file sizes small, especially for large datasets. Additionally, most programming languages offer built-in support for reading and writing CSV files, making them versatile for various data processing tasks.
Ans. The to_csv method in Python, used with pandas DataFrames, allows easy export of tabular data to CSV format, ensuring cross-language and system compatibility. It offers flexibility, letting users customize delimiters, include headers or indices, specify encodings, and append data. Its efficiency with large datasets makes it ideal for both simple and complex data storage needs.
Ans. You can export pandas DataFrames to CSV using methods beyond to_csv. For numerical data, use NumPy’s savetxt, where you can manually format the data and add headers. Alternatively, the built-in csv module lets you write DataFrame rows to a file with a csv.writer. You can also use open() and manual file I/O for full control over formatting. These options offer flexibility when to_csv doesn’t meet your needs.


