Introduction
Art has always transcended eons of human existence. We can see its traces from pre-historic time as the Harappan art in the Indus Valley Civilization to the contemporary art in modern times. Mostly, art has been a means to express one’s creativity, viewpoints of how we perceive the world. As legendary Leonardo Da Vinci has said,
“Painting is poetry that is seen rather than felt”.
What we sometimes forget that most of the art follows a pattern. A pattern that pleases us and makes sense in our brain. The next time you see a painting, try to notice the brush strokes in it. You will see a pattern arising out of the painting. We as humans are skilled in recognising these patterns. Our neural mechanisms has developed to be exceptionally great over the years recognising patterns in the wild.
Now you may ask why I am ranting away about art and patterns? This is because I will show you how to create art with the help of artificial brains! In this article, we will build an artificial neural network which will extract style from one image and replicate it on the other. So are you ready?
Table of Contents
- What is Neural Art?
- Familiarizing with the crux
- Coding it up
- Where to go from here?
- Additional Resources
What is Neural Art?
Let’s try to understand this topic with an example.
.jpg!Large.jpg)
Source [1]
The above image is the famous “The Starry Night” by Vincent Van Gogh. Just look at the painting for a few minutes. What do you see? Do you notice the bush strokes? Do you see the curves and edges that define each and every object which makes it so easy for you to recognise them?
Now let’s do a quick assignment. Try to remember the patterns you see. Just cram your brain with every little detail. Done? Ok now take a look at the next image.

Source [2]
This is a photograph taken of a town called “Tubingen” located in Germany. For the next step of the assignment, just close your eyes and try to replicate the style of a starry night with this image. Ask yourself, if you are Van Gogh (hypothetically of course!) and are asked to draw this photograph keeping in mind the styles you memorized before, how would you do it?
Think
.
.
.
.
Did you do it? Great! You just made a neural art!
.
.
.
Want to see what an artificial neural network can do?

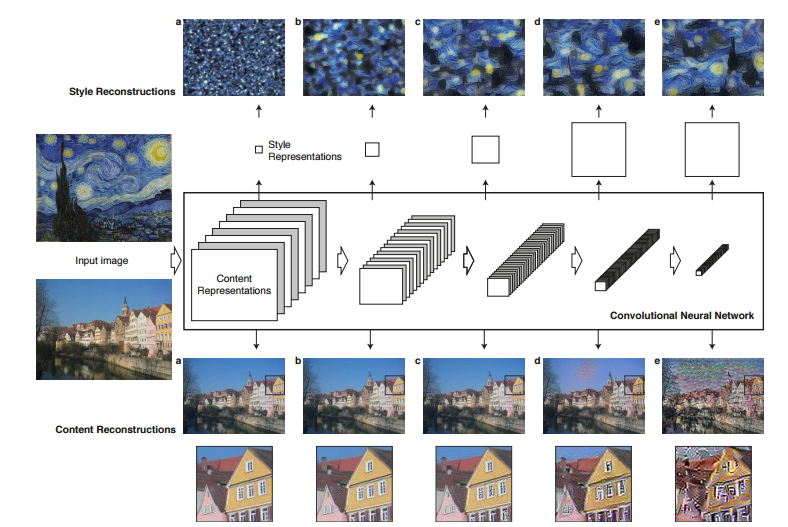
Source [2]
You may ask how did a machine accomplish such a task. It’s simple once you get the gist of it!
What neural network does is, it tries to extract the “important points” from the both the images, that is it tries to recognize which attributes define the picture and learns from it. These learned attributes are an internal representation of the neural network, which can be seen as below.
So you got to know the theoretical concepts involved in neural art, now let’s get to know the practical aspects of implementing it.
Getting into the brain of artificial artist:
Neural Art works in the following way:
- We first define the loss functions necessary to generate our result, namely the style loss, content loss and the total variational loss
- We define our optimization function, i.e. back propagation algorithm. Here we use L-BFGS because it’s faster and more efficient for smaller data.
- Then we set our style and content attributes of our model
- Then we pass an image to our model (preferably our base image) and optimize it to minimize all the losses we defined above.
We will get to know some of the important points you ought to know before we jump in. While most of the fundamentals of Neural Networks are covered in this article, I will reiterate some of them and explain a few extra things.
- What is a loss function? Loss function is a function that calculates the difference of the predicted values from the original values. It essentially says how much error has occurred in a calculation. In any machine learning algorithm, loss function is used to estimate how the model performs on data. This is especially helpful in case of neural networks, where you iteratively try to make your model perform better. When implementing neural art, you have to keep check of three loss functions, namely:
- Content loss, i.e. the difference between “content” of resulting image and base image. This is done to ensure that your model does not get much deviated from the base image
- Style loss, i.e. the difference between “style” of resulting image and base image. To do this, you have to first calculate gram matrix of both the images and then find their difference. Gram matrix is nothing but finding covariance of an image with itself. This is done to maintain style in the resulting image.
- Total Validation loss, i.e. the difference between a pixel of resulting image with its neighbouring pixel. This is done so that the image remains visually coherent.
- What is an optimization function? When we have calculated the loss function, we try to minimize our losses by changing parameters. Optimization function helps us find out how much change is required so that our model is better “optimized”. Here we implement a method of optimization called Broyden–Fletcher–Goldfarb–Shanno algorithm (BFGS). BFGS is a variant of gradient descent algorithm in which you do a second order differentiation to find the local minimum. Read this article to get a mathematical perspective of the algorithm.
Now that we’ve understood what our flow will be to build a neural art, let’s get down and start hacking stuff!
Coding it up!
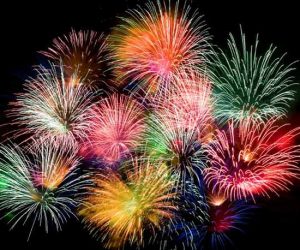
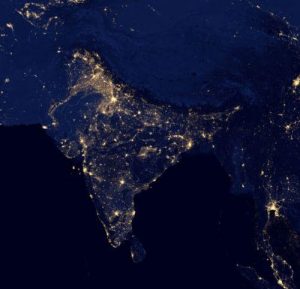
This Diwali was an interesting one for me. I decided to do some research on neural art and how India illuminates during the Diwali day. I came across this image “India on Diwali night”. And I thought of creating something similar on the same lines. To do that, we will be combining the two images below with the help of neural art.
Source [3]
So first we will first set the groundworks.
Step 0: Install Keras and its dependencies . For this, we will be using a Theano backend. Change your backend by following the steps mentioned here. Also additionally you have to set the proper ordering for image. In the keras.json file, where you have changed the backend, replace image_dim_ordering with ‘tr’. So it should look like this,
"image_dim_ordering": "th"Step 1: Then go to your working directory and set your directory structure as below
|-- keras_NeuralStyle                 # this is your working directory
|   |-- base_image.jpg                # this is your base image
|   |-- reference_image.jpg           # this is your reference image
Step 2: Start a jupyter notebook in your working directory by typing jupyter notebook and implement the following code. I will just provide you a step by step overview of what each block does.
- First, you have to import all the modules necessary to implement the code
- Then set the paths of the images you want to carry out the project on.
- Define the necessary variables and give them values as below. Note that these values can be changed but that may change the output drastically. Also, make sure the value of img_nrows variable is same as img_ncols. This is necessary for gram matrix to work.
- Then we define a helper functions. These are responsible for handling image preprocessing.
- Create input placeholders to pass images to the model
- Load a pre-trained neural network model (If you don’t know what pre-training is, go through this discussion)
- Print the model summary to see what the model is
- Store the names of all the layers of the neural network as a dictionary along with their outputs
- As defined above, we set the loss functions
- We then set the content and style attributes …
- And set the gradients and final output function for neural art
- We define the functions to calculate loss and gradients
- Now we take the base image as input and iterate through it to get our final image. On my local machine, it takes a minute to get the output in one iteration. Based on your resources (and patience) it would take at most 5 minutes to get the output. You can also increase the number of iterations to more optimize the result.
- And after a long wait, we will get this beautiful image!
NOTE: The code file can be viewed on github here.
Where to go from here?
We have seen a small demo of a significant discovery in the art world. There have been many modifications done to this method to make it aesthetically pleasing. For example, I really like this implementation in which they have taken different styles and applied them to different regions.
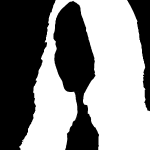
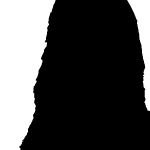
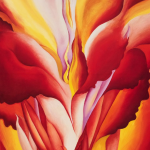
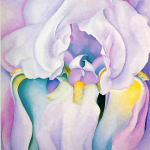
The first two images are the masks, which help to set which part should be stylized. The next two images represent the styles to be used. The last image is the base image that has to be stylized.
Below is the output that is generated by neural art.
Looks awesome, doesn’t it? I am sure like me, you are also fascinated to try your hands on neural art. To help you get started with it, I have covered the basics of neural art and how can you create your first image. I am sure you are eager to explore more and hence I am adding some additional resources only for you.
Additional Resources
These are some of the best resources I have come across on neural art. Go ahead and enter the fascinating world of neural art.
- Neural Art implementation using Torch
- Neural Art implementation in Tensorflow
- Another noteworthy Neural Art implementation in Keras
- Deep Forger: A twitter bot that generates Neural Art on demand
- Neural Art on Videos
- DEEPART.io: A webapp for Neural Art
- Prisma-ai: A mobile app for Neural Art
References
- Neural Artistic Style research paper
- Keras Neural Style by François Chollet
Image Sources
[1] https://www.wikiart.org/en/vincent-van-gogh/the-starry-night-1889 [2] https://arxiv.org/abs/1508.06576 [3] Google
End Notes
I hope you found this article inspiring. Now, it’s time for you to go through it and make art yourself! If you create an art do share it with the community. If you have any doubts, I’d love to interact with you in comments. And to gain expertise in working in neural network don’t forget to try out our deep learning practice problem – Identify the Digits.




We generally use backpropagation to train a neural network to better estimate the weights during the training phase, but here the usage is much different as in the model used is already trained, if that is the case why do we need a loss function and why do we need backpropagation?
Hi Jack, Pre-training doesn't necessary mean that the model is trained on the "intended" dataset. It maybe trained on another dataset and the knowledge can be transferred to another dataset (refer this dicussion https://discuss.analyticsvidhya.com/t/pre-trained-deep-learning/11003/2?u=jalfaizy ). The model we've loaded here is trained on ImageNet dataset, and our motive of using it is as a fine-tuned feature extractor. Thats why we need a loss function and thats why we're optimizing it with backprop. I intend an article on an explaning pre-training & fine tuning in the future. Do check it out.
Just want to make sure when training the neural networks, the base image is the input and the reference image is the output. the blended image is actually the intermediate one in the cnn? Thanks!
Hi Chiuyee, both base image and reference image are inputs, and the blended image produced by the CNN is the output.
Generally my question is what is the training image and what is the target image in this case? Are they both the base image?
In neural art, you basically trying to extract attributes from both base image and reference image, so that the resulting image would have some of both but not exactly one of them. So you can say that both base image and reference image are training images, because you use them in optimizing losses. Also, unlike normal machine learning problems, you don't have a concrete "target". The output depends on what kind of blend you want. Try changing the initialized weights in block [3] (i.e. style_weight etc) and try it for yourself.