Introduction
One of the biggest challenges that deep learning faces today is the addition of newer labels to the neural models without altering the architecture or storing previous datasets. The issues generally revolve around the fact that storing data over time causes the system memory to bloat up and also significantly increases the training time. As for the neural architecture it pretty much is defined at the first stage of training or we can call it Model Zero, and using the previous learnings while adding new labels is practically impossible.
The usual solution we resort to is transfer learning that helps us to use the weights and biases of trained models and using it for training it over custom models, the catch here is that the previous labels aren’t carried forward. So either we need all the data that the system was ever trained for, or we need something out of the box.
This is where incremental learning in a modified system with hybrid neural architectures can help us attain the desired results, without compromising on accuracy, or without the need for huge volumes of data. In this article we will be looking at incremental reinforced learning for image classification.
Table of contents
- What is Incremental and Reinforced Learning?
- Incremental and Reinforced Learning for Image Classification
- 1. Import All the Necessary Libraries
- 2. Building Architecture
- 3. Create a Function
- 4. Custom Pre-processing
- 5. Create Prediction Function for Users
- 6. Alter the NumPy Array
- 7. Create a training script for the model
- 8. Create a GAN Model Architecture
- 9. Create the Wrapper Function
- 10. Save the Labels
- 11. Create Possible Scenarios
- 12. Final Result
- Conclusion
- Frequently Asked Questions
What is Incremental and Reinforced Learning?
Incremental learning involves continuously updating a model’s knowledge with new data while retaining previous knowledge. It adapts to changing patterns over time, refining its capabilities without starting from scratch. Reinforcement learning, on the other hand, is a subset of machine learning where an agent interacts with an environment, learning to perform actions that maximize rewards. It involves trial and error, with the agent adjusting its strategies based on feedback. Both methods enhance a model’s performance: incremental learning refines existing knowledge, while reinforcement learning trains agents to make optimal decisions in dynamic environments.
Incremental and Reinforced Learning for Image Classification
Without wasting much time, let’s get right to it. You can find the code below right here. The steps below mention the necessary code snippets and the explanations for the requirements of the respective functions:
1. Import All the Necessary Libraries
import tensorflow as tf
from tensorflow.keras.layers import Input, Conv2D, Dense, MaxPooling2D, Flatten, BatchNormalization, Reshape, LeakyReLU, multiply, Embedding, UpSampling2D, Dropout
from tensorflow.keras.models import Model, load_model, Sequential
from tensorflow.keras.optimizers import Adam
from tensorflow.keras.preprocessing.sequence import pad_sequences

import os
import numpy as np
import json
import cv2
import matplotlib.pyplot as plt
import random
from tqdm import tqdm
2. Building Architecture
We define a very simple architecture for test purposes. You can build your custom architectures to suit your requirements.
def req_model(no_of_labels):
    input_layer = Input(shape=image_inp_shape_conv)
    conv_1 = Conv2D(filters=64, kernel_size=(2,2),activation='relu', padding='same')(input_layer)
    flatten_1 = Flatten()(conv_1)
    out_layer = Dense(no_of_labels, activation="softmax")(flatten_1)

    model = Model(input_layer, out_layer)
    model.compile(optimizer='adam', loss='sparse_categorical_crossentropy', metrics=['accuracy'])
    return model
3. Create a Function
Create a basic function that would keep a track of your labels and make the necessary updates to the file as need be.
def labels():
    if os.path.isfile(labels_file_path):
        labels_file = open(labels_file_path, "r")
        labels = json.load(labels_file)
    else:
        labels_dict = {0:"noise"}
        with open(labels_file_path, "w") as f:
            json.dump(labels_dict, f)
        labels = labels_dict
    return labels
4. Custom Pre-processing
For a simple image classification type problem, let’s not create any fancy pre-processing. If need be you can create your own custom pre-processing pipeline and replace the existing one.
def preprocess(image):
    image_arr = cv2.imdecode(np.frombuffer(image, np.uint8), -1)
    image_processed = cv2.resize(image_arr, image_inp_shape)
    image_processed = cv2.cvtColor(image_processed, cv2.COLOR_BGR2GRAY)
    image_processed = (image_processed) / 255.0
    return image_processed

def preprocess_gan(image):
    image_arr = cv2.imdecode(np.frombuffer(image, np.uint8), -1)
    image_processed = cv2.resize(image_arr, image_inp_shape)
    image_processed = cv2.cvtColor(image_processed, cv2.COLOR_BGR2GRAY).reshape((dense_output,))
    image_processed = (image_processed) / 255.0
    return image_processed
5. Create Prediction Function for Users
Create a prediction function for your user to be able to utilize the model.
def predict(image):
    labels_read = labels()
    if os.path.isfile(model_file):
        model = load_model(model_file)
    else:
        model = req_model(no_of_labels=len(labels_read))
    test_image = np.expand_dims(image, axis=0)
    results = model.predict(test_image)
    predicted_label = labels_read.get(str(np.argmax(results[0])))
    return predicted_label
6. Alter the NumPy Array
Now comes the challenging part. Essentially what we need to write in the next function is to be able to alter the NumPy array of the weights and biases of the neural architecture.
For the new labels to be added to the system the final layer of the neural model needs to have an additional element to accommodate the alterations. Along with that, the previous weights of the model need to be carried forward into the updated shape of the network.
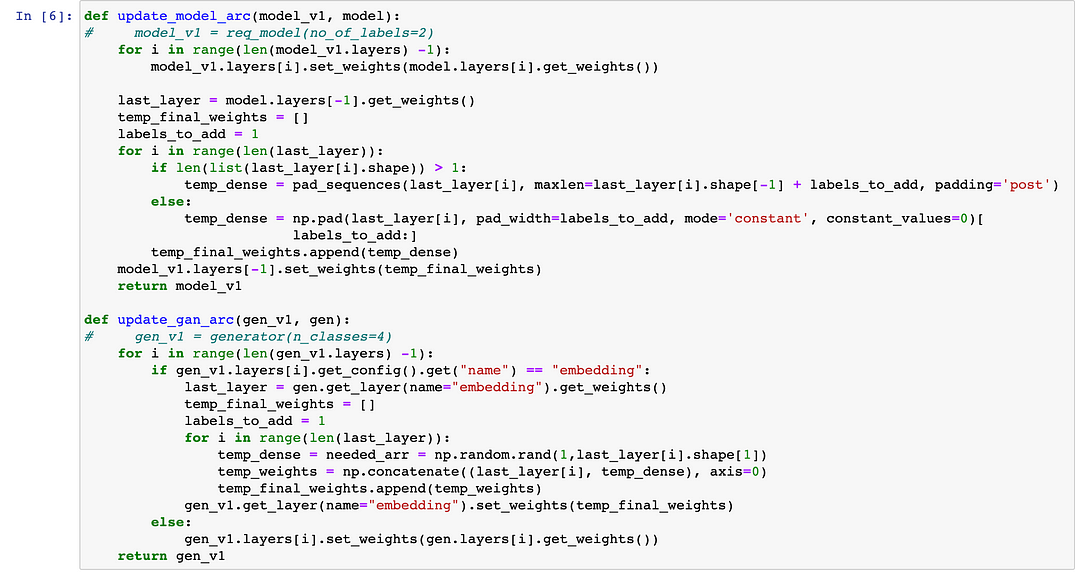
As you can see there is an updated script for the GAN model as well. Don’t worry we will come to that in the later steps.
7. Create a training script for the model
def train(image, ground_truth, add_label:bool):
    labels_read = labels()
    if os.path.isfile(model_file):
        if add_label:
            model_old = load_model(model_file)
            model_new = req_model(no_of_labels=len(labels_read))
            model = update_model_arc(model_v1=model_new, model=model_old)
        else:
            model = load_model(model_file)
    else:
        model = req_model(no_of_labels=len(labels_read))
    test_image = np.expand_dims(image, axis=0)
    ground_truth_arr = np.asarray([float(ground_truth)])
    for i in tqdm(range(0,max_iter), desc="training req model..."):
        history = model.train_on_batch(test_image,ground_truth_arr)
    model.save("model.h5")
8. Create a GAN Model Architecture
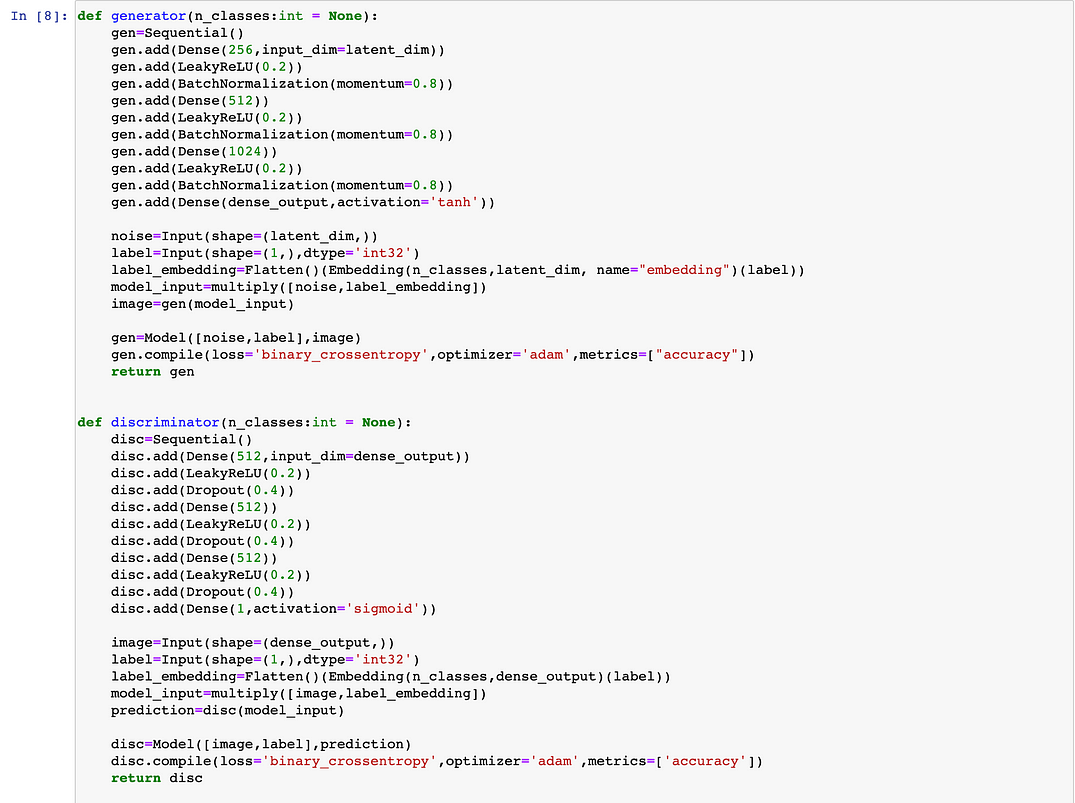
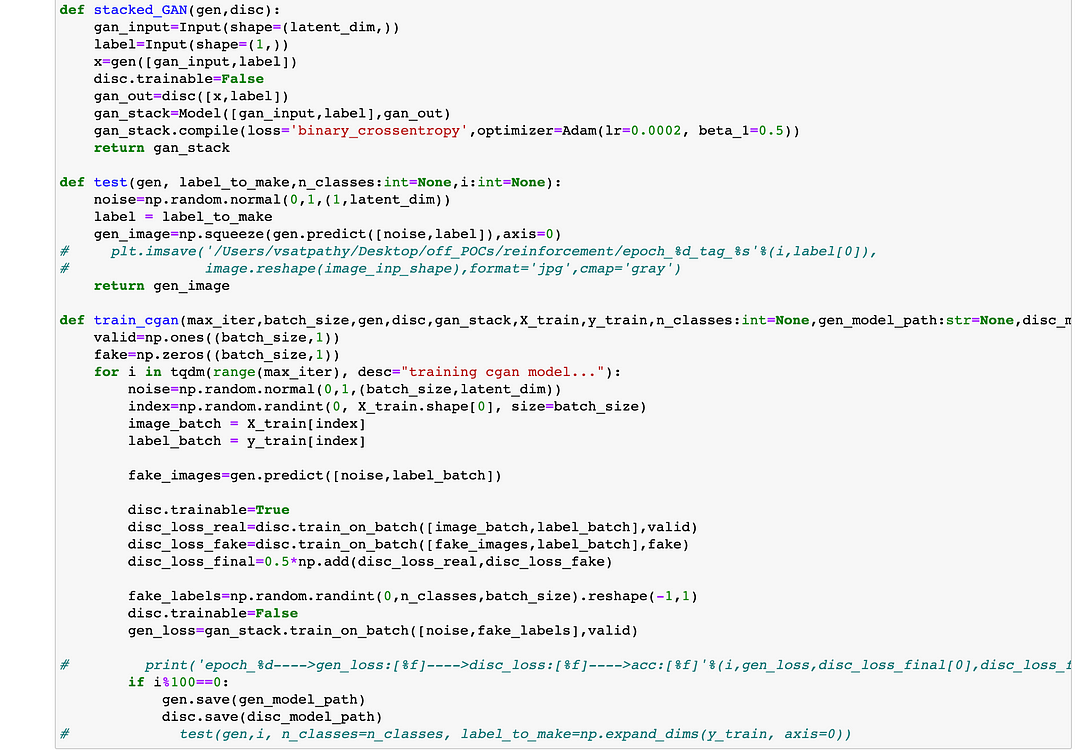
Before we process further let’s discuss the need for the same. Reinforcement for the system can be made by feeding the samples that the user is uploading while testing the system, for training purposes and validation. The question is what happens when too many samples of a new label are shown to the system for training.
In a single line — it would create a bias in the system. In order to avoid this, we can use a Conditional GAN that would essentially create dummy data for all the labels that were already trained in the system and will pass the latest user data along with it.
Thereby creating a balance in the number of samples or variety that the system is trained on.
9. Create the Wrapper Function
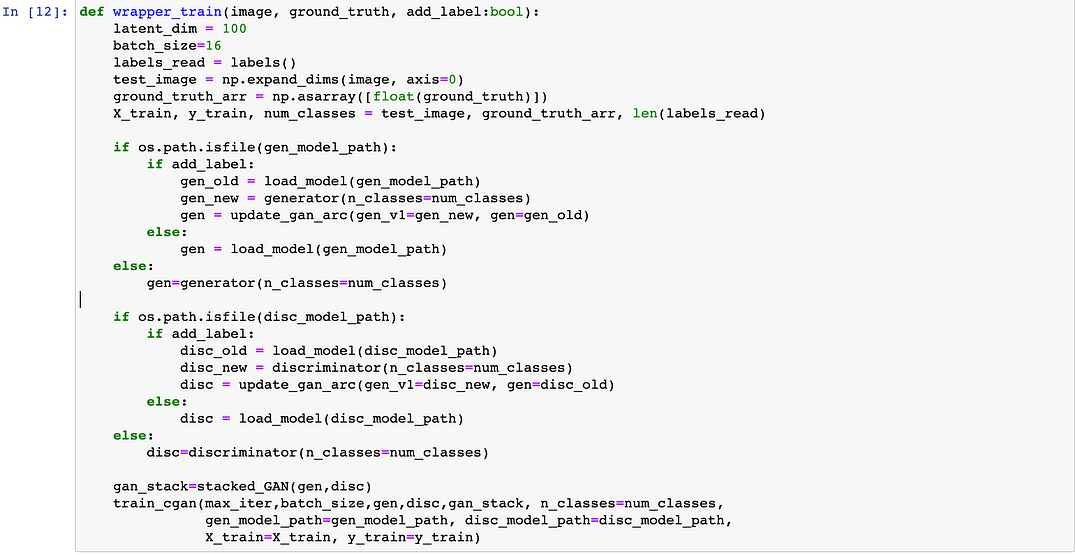
Let’s now create the wrapper function that would be needed to train and update the models. Training and use of CGAN is optional. To get immediate results avoid training with CGAN and comment out the training pipeline for the same.
10. Save the Labels
Save the labels so that they can be reused for prediction and reinforcement.
def rev_labels(labels_dict):
    rev_labels_read = {}
    for key,val in labels_dict.items():
        rev_labels_read[val] = key
    return rev_labels_read
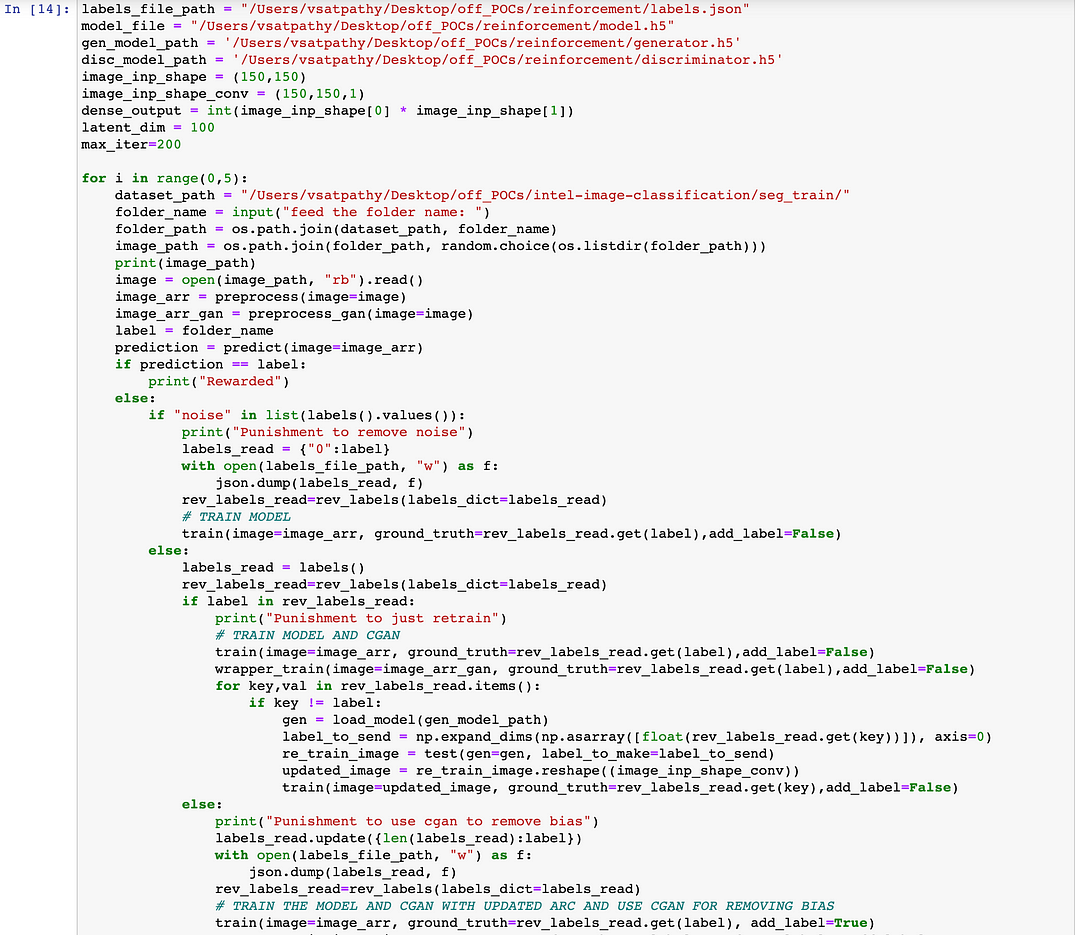
11. Create Possible Scenarios
Now all we need to do is compile everything and create the possible scenarios.
- Scenario 1 — Your model is being trained for the first time.
- Scenario 2 — Your model was trained but requires updates as predictions were wrong
- Scenario 3 — Your model was trained on certain labels and now a new label needs to be added.
12. Final Result
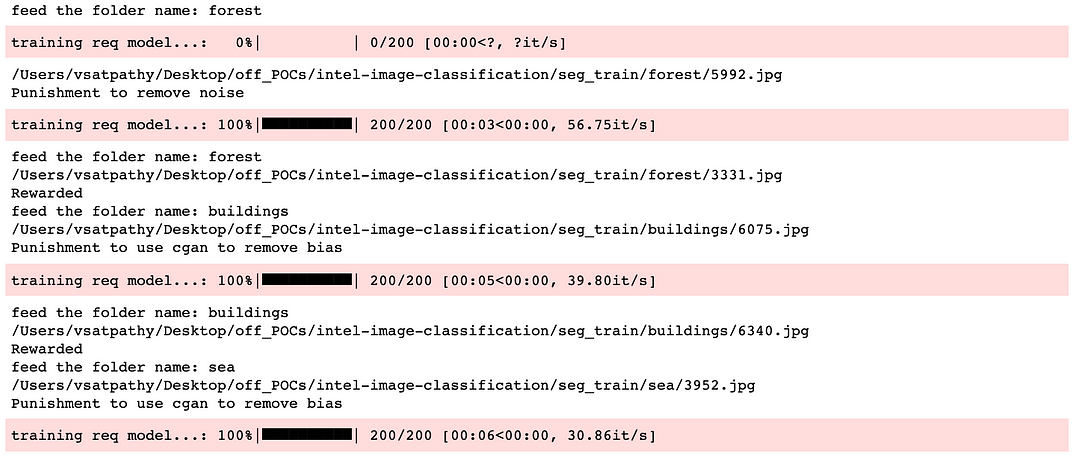
And finally let’s see the results of our extensive coding
Conclusion
The power of incremental and reinforcement learning cannot be understated. These techniques empower you to train models dynamically, adapt to evolving environments, and achieve higher accuracy without overwhelming data storage. This adaptable approach has many applications, from image classification to sentiment analysis. If you want to master these innovative strategies and drive impactful AI solutions, consider enrolling in Analytics Vidhya’s BlackBelt+ program. Equip yourself with the knowledge to excel in the ever-evolving world of AI and machine learning.
Frequently Asked Questions
A. Yes, reinforcement learning can be used for image classification by training models to make decisions based on rewards or penalties from interacting with an environment.
A. The incremental reinforcement learning method gradually updates the model’s parameters as new data arrives, improving its performance over time.
A. Transfer learning using pre-trained convolutional neural networks (CNNs) like ResNet, VGG, and Inception are often used for image classification tasks due to their ability to capture features.
A. The three types of incremental learning are Instance-Based Incremental Learning, Feature-Based Incremental Learning, and Model-Based Incremental Learning.v


Good Day! There were some errors regarding the code when we ran it on python. There appears to be missing information with regards to the documentation above. We truly hope you could help us. Thank you.