This article was published as a part of the Data Science Blogathon
Introduction
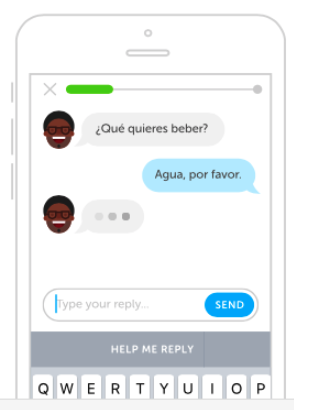
A Chatbot is an application(software) that is used to manage an online chat conversation through text or text to speech format. Most of the chatbots are accessed online through various websites or assistances(virtual) with a popup.
Examples:- E-commerce websites, health, news, etc.

Agenda of this article:
1) Data and Libraries
2) Initialize Training of Chatbot
3) Build the Deep Learning Model
4) Build GUI of Chatbot
5) Run the Chatbot
6) Conclusion
Data and Libraries
We need the following components to be required for running our chatbot.
1. train_chatbot.py:- coding for reading natural language text/data into the training set. Also, we are using a sequential neural network to create a model using Keras.
2. chat_gui.py:- code for creating a graphical user interface for a chatbot.
3. classes.pkl:- here is the list of various types of classes of responses.
4. word.pkl:- here is the list of various words which is used for pattern recognition.
5. intent.json:- list of javascript objects which have different tags with respect to word patterns.
6. chatbot_model.h5:- whatever model we have created in train_chatbot.py and chat_gui.py is saved in.h5.
Now let’s start by importing all the necessary libraries. Make sure you have installed python properly on your machine.
import nltk
nltk.download('punkt')
nltk.download('wordnet')
from nltk.stem import WordNetLemmatizer
lemmatizer = WordNetLemmatizer()
import json
import pickle

import numpy as np
from keras.models import Sequential
from keras.layers import Dense, Activation, Dropout
from keras.optimizers import SGD
import random
Here we have imported libraries like nltk (Natural Language ToolKit), which contains a whole bunch of tools for cleaning up the text data and prepare it for deep learning algorithms, json, which can load JSON files directly to Python, pickle, which loads the pickle files, numpy, which performs linear algebra operations and Keras, which is the deep learning framework or library.
Initialize Training of Chatbot
Now here we are going to initialize all the lists where we can store our natural language data/text.
words=[]
classes = []
documents = []
ignore_words = ['?', '!']
data = open('intents.json').read()
intents = json.loads(data)
We will use the JSON module to load the file and save it in the variable “intents”.
for intent in intents['intents']:
    for pattern in intent['patterns']:

        # take each word and tokenize it
        w = nltk.word_tokenize(pattern)
        words.extend(w)
        # adding documents
        documents.append((w, intent['tag']))

        # adding classes to our class list
        if intent['tag'] not in classes:
            classes.append(intent['tag'])
Next part, we will take the words list and lemmatize it, and lowercase all the words too. For example, the words “running”, “runs”, all have the same lemma, which is just “walk” and that is nothing but a root word. It is similar to stemming.
Build the Deep Learning Model
# initializing our training data
training = []
output_empty = [0] * len(classes)
for doc in documents:
    # initialize bag of words
    bag = []
    # list of tokenized words for the pattern
    pattern_words = doc[0]
    # lemmatize each word
    pattern_words = [lemmatizer.lemmatize(word.lower()) for word in pattern_words]
    # create our bag of words array with 1, if word match found in current pattern
    for w in words:
        bag.append(1) if w in pattern_words else bag.append(0)

    # output is a '0' for each tag and '1' for current tag
    output_row = list(output_empty)
    output_row[classes.index(doc[1])] = 1

    training.append([bag, output_row])
# here shuffle our features and turn into np.array
random.shuffle(training)
training = np.array(training)
# create train and test lists. X_patterns, Y_intents
train_x = list(training[:,0])
train_y = list(training[:,1])
print("Training data has created")
We initialize here training data with variable training. We also have a feature called output_row which is key of the list. Then we shuffle our training set and perform a train_test_split, with the patterns i.e the x_variable and the intents i.e the y_variable.
# Creating model of 3 layers. First layer contains 128 neurons, second layer contains 64 neurons and 3rd output layer contains number of neurons
# equal to number of intents to predict output intent with softmax function
model = Sequential()
model.add(Dense(128, input_shape=(len(train_x[0]),), activation='relu'))
model.add(Dropout(0.5))
model.add(Dense(64, activation='relu'))
model.add(Dropout(0.5))
model.add(Dense(len(train_y[0]), activation='softmax'))

# Compile model. And Stochastic gradient descent with Nesterov accelerated gradient gives good results for this model
sgd = SGD(lr=0.01, decay=1e-6, momentum=0.9, nesterov=True)
model.compile(loss='categorical_crossentropy', optimizer=sgd, metrics=['accuracy'])

#fitting and saving the model
hist = model.fit(np.array(train_x), np.array(train_y), epochs=200, batch_size=5, verbose=1)
model.save('chatbot_model.h5', hist)

print("model created")
So we ready with our training and test data, we will use a deep learning model from Keras called the Sequential model.
Once the model is trained, the whole data is turned into a numpy array and it gets saved as chatbot_model.h5.
Build GUI of Chatbot
from keras.models import load_model
model = load_model('chatbot_model.h5')
import json
import random
intents = json.loads(open('intents.json').read())
words = pickle.load(open('words.pkl','rb'))
classes = pickle.load(open('classes.pkl','rb'))
We have to extract all information from our file. Let’s see…
def clean_up_sentence(sentence):
    sentence_words = nltk.word_tokenize(sentence)
    sentence_words = [lemmatizer.lemmatize(word.lower()) for word in sentence_words]
    return sentence_words

# return bag of words array: 0 or 1 for each word in the bag that exists in the sentence

def bow(sentence, words, show_details=True):
    # tokenize the pattern
    sentence_words = clean_up_sentence(sentence)
    # bag of words - matrix of N words, vocabulary matrix
    bag = [0]*len(words)
    for s in sentence_words:
        for i,w in enumerate(words):
            if w == s:
                # assign 1 if current word is in the vocabulary position
                bag[i] = 1
                if show_details:
                    print ("found in bag: %s" % w)
    return(np.array(bag))

def predict_class(sentence, model):
    # filter out predictions below a threshold
    p = bow(sentence, words,show_details=False)
    res = model.predict(np.array([p]))[0]
    ERROR_THRESHOLD = 0.25
    results = [[i,r] for i,r in enumerate(res) if r>ERROR_THRESHOLD]
    # sort by strength of probability
    results.sort(key=lambda x: x[1], reverse=True)
    return_list = []
    for r in results:
        return_list.append({"intent": classes[r[0]], "probability": str(r[1])})
    return return_list

def getResponse(ints, intents_json):
    tag = ints[0]['intent']
    list_of_intents = intents_json['intents']
    for i in list_of_intents:
        if(i['tag']== tag):
            result = random.choice(i['responses'])
            break
    return result

def chatbot_response(msg):
    ints = predict_class(msg, model)
    res = getResponse(ints, intents)
    return res
Here we need some functions which are necessary for running the GUI and bind them into Units. We have the function clean_up_sentence() which cleans any sentences(inputted).The function bow() is used to create a bag of words.
The function getResponse() takes the output list and checks for the JSON file and outputs the response with the probability(highest).
Finally, our chatbot_response() takes in a message(input through GUI) and predicts the class with the predict_class() function. We can now tell the bot something in the form of text, and bot will respond after that.
#Creating GUI with tkinter
import tkinter
from tkinter import *


def send():
    msg = EntryBox.get("1.0",'end-1c').strip()
    EntryBox.delete("0.0",END)

    if msg != '':
        ChatLog.config(state=NORMAL)
        ChatLog.insert(END, "You: " + msg + 'nn')
        ChatLog.config(foreground="#442265", font=("Verdana", 12 ))

        res = chatbot_response(msg)
        ChatLog.insert(END, "Bot: " + res + 'nn')

        ChatLog.config(state=DISABLED)
        ChatLog.yview(END)


base = Tk()
base.title("Hello")#by default
base.geometry("400x500")
base.resizable(width=FALSE, height=FALSE)

#Create Chat window
ChatLog = Text(base, bd=0, bg="white", height="8", width="50", font="Arial",)

ChatLog.config(state=DISABLED)

#Binding scrollbar to Chat window
scrollbar = Scrollbar(base, command=ChatLog.yview, cursor="heart")
ChatLog['yscrollcommand'] = scrollbar.set

#Create Button to send message
SendButton = Button(base, font=("Verdana",12,'bold'), text="Send", width="12", height=5,
                    bd=0, bg="#32de97", activebackground="#3c9d9b",fg='#ffffff',
                    command= send )

#Create the box to enter message
EntryBox = Text(base, bd=0, bg="white",width="29", height="5", font="Arial")
#EntryBox.bind("<Return>", send)


#Place all components on the screen;you can change its heightand width
scrollbar.place(x=376,y=6, height=386)
ChatLog.place(x=6,y=6, height=386, width=370)
EntryBox.place(x=128, y=401, height=90, width=265)
SendButton.place(x=6, y=401, height=90)

base.mainloop()
We can also create our Graphical User Interface with tkinter(library), and the python library allows us to create it.
Run the Chatbot
Finally, we can run our chatbot!
I have run my program on a Windows 10 machine, so I had to download a server Xming.
If you need it, you can download it from the given link; Xming

Conclusion
So we have built our simple chatbot!
I hope you liked this blog. Do share with your colleagues and friends. Thank You!
The media shown in this article are not owned by Analytics Vidhya and are used at the Author’s discretion.


I'm trying to do a similar projecct but with a custom knowledge base about a certain book. My goal is to make the chatbot be able to answer queries based on that book. Do you have any suggestion?