This article was published as a part of the Data Science Blogathon.
Overview
So we have previously worked with face detection using Mediapipe library only but there was a problem with detecting the landmarks points as they were not that clear when we were visualizing the other elements of the face i.e. the major facial key points in different angles so to cope up with this problem only we have the alternative method which is to detect all the landmarks points, total landmarks points are 468.
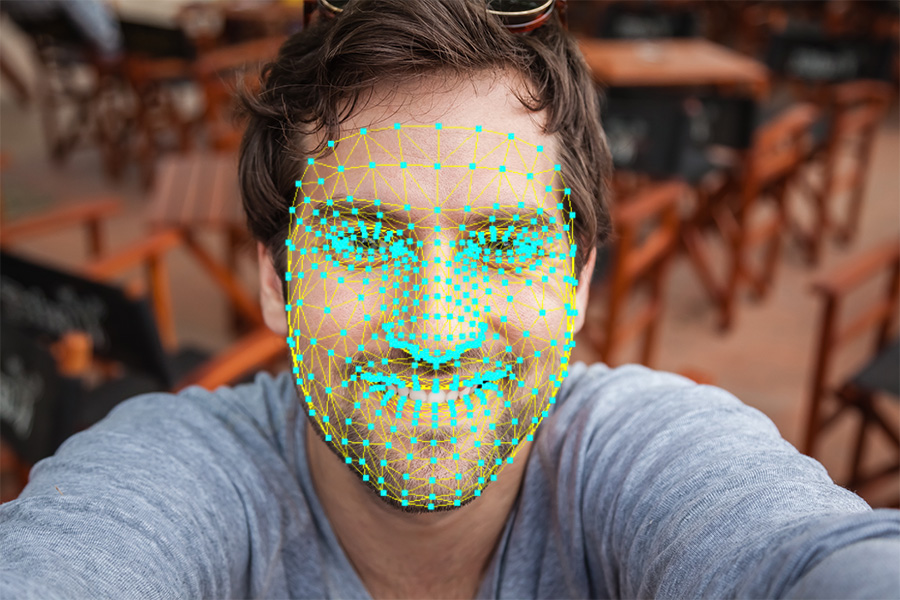
Real-world Application of Face Mesh
Iris detection: This application can be very useful in healthcare and for simplicity in this article we will be majorly focusing on eye landmarks detection only.Snapchat's filters: So we have often seen a filter that acts whenever we change our facial moments so behind that pipeline there is one process that is known as detection of facial landmarks.Drowsiness detection: This application can be very useful to detect driver drowsiness from eye blink detection and yawn detection.
Steps Involved in Building Facial Landmarks Detection Application
- Importing all the essential libraries
- Reading a sample image
- Performing facial landmarks detection and printing the result
- Drawing the results on the sample image
So let’s build our face mesh application using Mediapipe.
Import the Libraries
Let’s start by importing the required libraries.
import cv2
import itertools
import numpy as np
from time import time
import mediapipe as mp
import matplotlib.pyplot as plt
Now, we should first initialize the facial landmarks points detection model using Mediapipe.
So if you have gone through my previous articles related to Mediapipe then you must have encountered that the very first step which I do is to initialize the model because that is the mandatory step so for that reason we will do the initialization of the Facial landmarks detection model here first and for that, we will be using the face_mesh method of Mediapipe’s solutions class. In the face_mesh method, we have our main function which will perform the landmarks detection which is FaceMesh() before using this we have to understand its arguments first. so let’s look into this:
static_image_mode: This argument takes only two boolean types of values which are either True or False. If we will set the argument as False then it will detect the frames and not in the manner of images i.e. in the format of video streaming which can be helpful when we will try to detect the facial landmarks in real-time but in this case we want to detect the landmarks in the images so for that reason we will be using the True as the parameter. The default value is False.
max_num_faces: This argument will specify how many faces the model should detect in the image or frame at one particular instance i.e in one frame/image the model can detect more than one face, it takes integer type of value i.e. numeric value and the default value is 1 (only one face to be detected).
min_detection_confidence: This argument is basically for setting up the threshold value for the confidence of detection of the model i.e how much our model is confident that in the image/frame it has detected all the landmarks position. The typical range of values it takes is [0.0,1.0] and the default value is 0.5 i.e the confidence of detection is set to 50% confidence.
min_tracking_confidence: This argument will be ignored when the static_image_mode parameter is set to True which is the case for images the default value of this argument is 0.5 i.e 50% confidence of tracking the confidence which also improves the robustness of the detection process.
After all, these parameters are well defined we will initialize our drawing method i.e. drawing_styles which provides us with lots of unique and different styles to detect the landmarks on the images.
mp_face_mesh = mp.solutions.face_mesh

face_mesh_images = mp_face_mesh.FaceMesh(static_image_mode=True, max_num_faces=2,
                                         min_detection_confidence=0.5)

mp_drawing = mp.solutions.drawing_utils

mp_drawing_styles = mp.solutions.drawing_styles
Code breakdown:
- As discussed we will first initialize the
face_meshclass from the Mediapipe library. - Then we will be using the
FaceMeshfunction with all the relevant features that are already discussed (this one is for images). - We have discussed the drawing_styles method which would give us some extra styles of drawing the results on the image though for the real implementation of the same we will also need traditional drawing_utils too.
Read an Image
Now we will be using the cv2.imread function to read the image from the specific path and then we will display the sample image that we will use.
sample_img = cv2.imread('media/sample.jpg')

plt.figure(figsize = [10, 10])

plt.title("Sample Image");plt.axis('off');plt.imshow(sample_img[:,:,::-1]);plt.show()
Output:
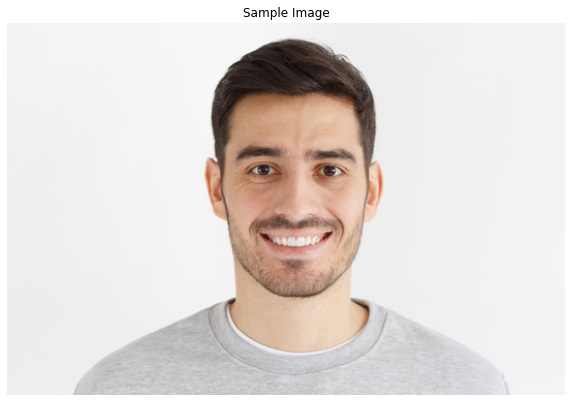
Code breakdown
- First, we have read the image from the particular path we have to mention the complete path only if the image is not present in the same folder.
- Then we will be using the figure function of the matplotlib library to set the figure size i.e image size.
- At the last, we will display the image on which we want to test our facial landmarks detection model.
Perform Face Landmarks Detection
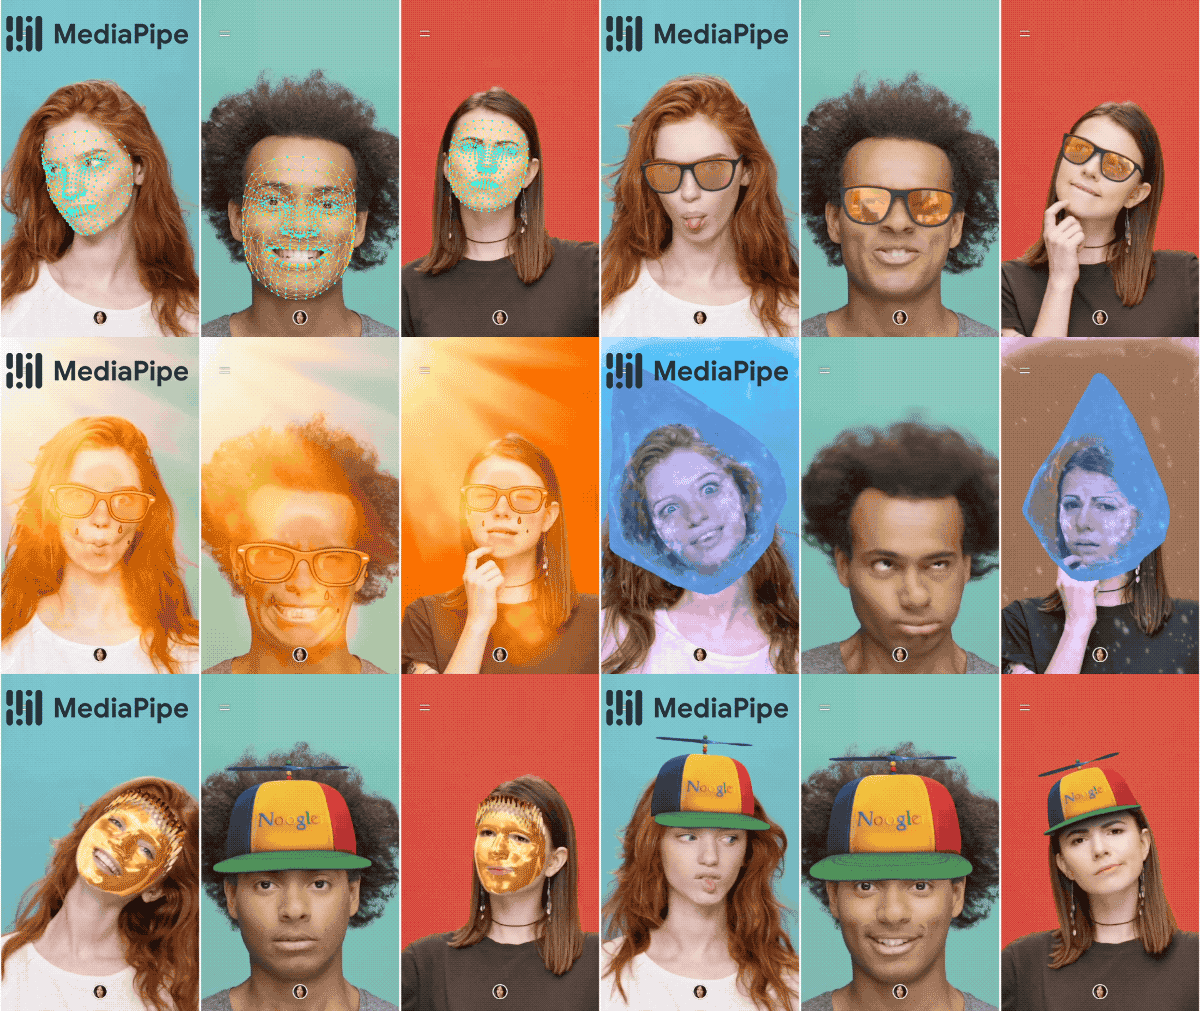
Source: Face mesh – Mediapipe
Now as we have initialized our face mesh model using the Mediapipe library its time to perform the landmarks detection basis on the previous pre-processing and with the help of FaceMesh's process function we will get the 468 facial landmarks points in the image.
face_mesh_results = face_mesh_images.process(sample_img[:,:,::-1])

LEFT_EYE_INDEXES = list(set(itertools.chain(*mp_face_mesh.FACEMESH_LEFT_EYE)))
RIGHT_EYE_INDEXES = list(set(itertools.chain(*mp_face_mesh.FACEMESH_RIGHT_EYE)))

if face_mesh_results.multi_face_landmarks:

    for face_no, face_landmarks in enumerate(face_mesh_results.multi_face_landmarks):

        print(f'FACE NUMBER: {face_no+1}')
        print('-----------------------')

        print(f'LEFT EYE LANDMARKS:n')

        for LEFT_EYE_INDEX in LEFT_EYE_INDEXES[:2]:

            print(face_landmarks.landmark[LEFT_EYE_INDEX])

        print(f'RIGHT EYE LANDMARKS:n')

        for RIGHT_EYE_INDEX in RIGHT_EYE_INDEXES[:2]:

            print(face_landmarks.landmark[RIGHT_EYE_INDEX])
Output:
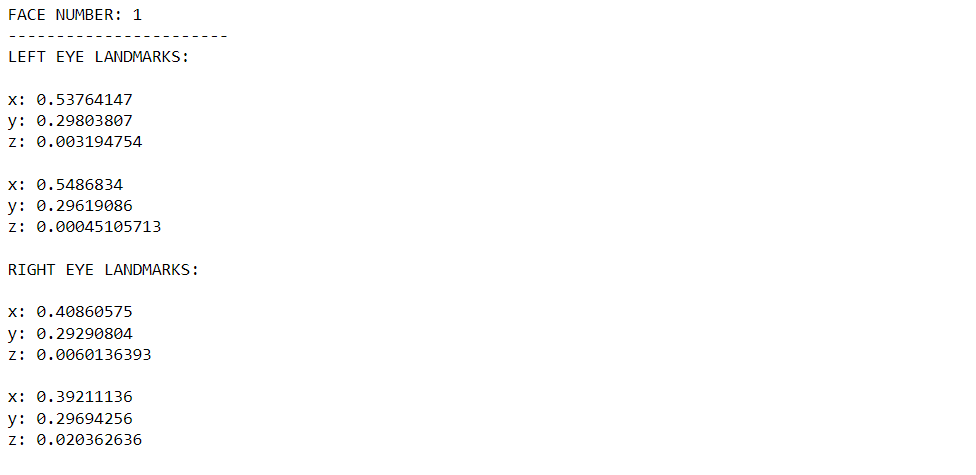
Code breakdown
- As discussed we will perform the face landmarks detection using
processthe function but before that, we will be converting the color format of the image from BGR to RGB. - Now we will store the left eye and right eye coordinate values in separate variables using the
iter toolschain method. - Before heading towards the main functionality it’s always a better idea to do some validations for that we will first check whether we have found the faces or not.
- So, now only if the above statement is correct then only we will iterate over all the faces depending on the arguments.
- Then we will display the face number upon successfully detecting all the faces.
- As of now, we are looking for the landmarks points of the left eye and right eye so we will display the name of them too.
- First, we will iterate over two landmarks points of the left eye.
- Then we will do the same for the right eye using for loop.
- Then finally we will display the landmarks points but those indexes will be in the normalized form so that the ML pipeline behind this detection can give equal weightage to each point.
Drawing the Results
So by far, we have seen the numerical kind of output but that output is not something like a real application because the real application shows the output visually so that even the one who don’t understand code and stuff still recognize that the result is correct or not so we will use the values that we have got from previous processing and use them to draw the result on the image using draw_landmarks() the function of the drawing_utils class has a note that we have already initialized our drawing utils class at the beginning.
Before moving forward with code let’s first understand the arguments of the draw_landmarks() function.
image: This argument will take the image that will be in the RGB format on which we need to draw the landmarks.landmarks_list: This list will consist of all the landmarks points but in the normalized format.connection: As the name suggests this argument will have a list of arguments that will tell us how the facial landmarks will be connected when we will draw them on the image.landmark_drawing_spec: This argument sets the basic thing of drawing i.e it will select the color, thickness of lines, and the circle’s radius of the landmarks that will be drawn on the image.connection_drawing_spec: As we have seen in the connection argument we have the list of landmarks that will connect other facial points so here we will be setting up the drawing settings of the connection lines.
img_copy = sample_img[:,:,::-1].copy()

if face_mesh_results.multi_face_landmarks:

    for face_landmarks in face_mesh_results.multi_face_landmarks:

        mp_drawing.draw_landmarks(image=img_copy,
                                  landmark_list=face_landmarks,connections=mp_face_mesh.FACEMESH_TESSELATION,
                                  landmark_drawing_spec=None,
                                  connection_drawing_spec=mp_drawing_styles.get_default_face_mesh_tesselation_style())

        mp_drawing.draw_landmarks(image=img_copy, landmark_list=face_landmarks,connections=mp_face_mesh.FACEMESH_CONTOURS,
                                  landmark_drawing_spec=None,
                                  connection_drawing_spec=mp_drawing_styles.get_default_face_mesh_contours_style())

fig = plt.figure(figsize = [10, 10])
plt.title("Resultant Image");plt.axis('off');plt.imshow(img_copy);plt.show()
Output:
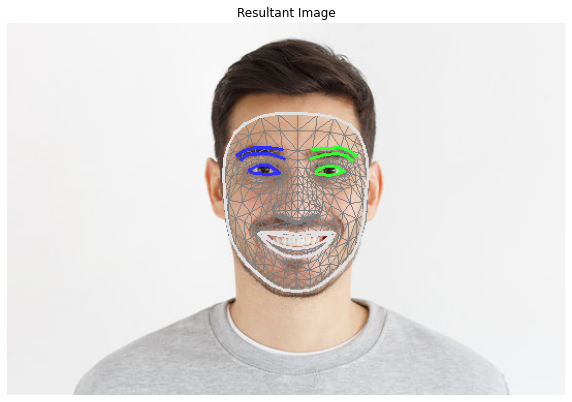
Code breakdown
- Firstly we will create a copy of our sample image and convert it into the RGB format because we have to visualize the result now.
- Then the process from here seems to be the same as we will now first check whether the faces are found or not and then we will iterate over the faces which we have found.
- Then we will draw the results or landmarks points on the image and here we will be using the default setting i.e. face mesh tesselation style in the connection argument.
- And then for displaying the face mesh contours too we will be using the same default setting.
- At last, we will set the figure/image size and then display all the results on the image.
Conclusion
So the very first thing which we can take away from this article is that facial landmarks detection can be very much handy in real-world application whether it is for healthcare or for entertainment.
- We can detect the facial landmarks then we can also build Snapchat-like filters which are booming in the entertainment industry.
- We also not only printed the results but also saw how to draw the results using the draw_landmarks() function.
- The main takeaway from the article is that here you can segregate all the predefined functions so that we could learn the in-depth intuition behind these algorithms.
Endnotes
Here’s the repo link to this article. Hope you liked my article on Facial Landmarks Detection using the Mediapipe library. If you have any opinions or questions, then comment below.
Read on AV Blog about various predictions using Machine Learning.
About the Author
Greeting to everyone, I’m currently working in TCS and previously, I worked as a Data Science Analyst in Zorba Consulting India. Along with full-time work, I’ve got an immense interest in the same field, i.e. Data Science, along with its other subsets of Artificial Intelligence such as Computer Vision, Machine Learning, and Deep learning; feel free to collaborate with me on any project on the domains mentioned above (LinkedIn).
The media shown in this article is not owned by Analytics Vidhya and are used at the Author’s discretion.


Hello! Is there a way we can find the colour of the Landmarks at the corner of the eye, or any Landmark in particular? I would also like to ask whether these landmarks are spread over the face in a particular ratio, and how to find that ratio. Will these ratios be different in the FaceMesh of a healthy person and an unhealthy person? If you know the answer to any of these questions, it would be the greatest help to me. :)