This article was published as a part of the Data Science Blogathon.
Introduction on Docker Image
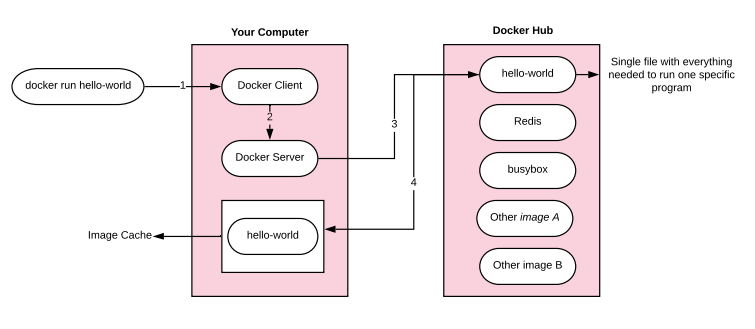
I created this flow diagram for you to get a simpler idea before deep diving into docker. By looking at this diagram you can understand what is really happening while we are using docker. After docker is installed I simply call the docker run command, docker is looking for the image in our local machine, if it is installed, it runs that image, if not Docker search for the image from our docker hub (You will learn about docker hub in the following article). Once the image is found by docker it downloads the image to our local machine. Then it creates a local container and starts the program. Do you think it is looking like a software installation? Logically yes, but technically not. You will get the answer after reading this article.
Do We Really Need Docker?
Before getting into the Docker, let’s look at the traditional system we are using instead of docker and understand why we are moving to Docker.
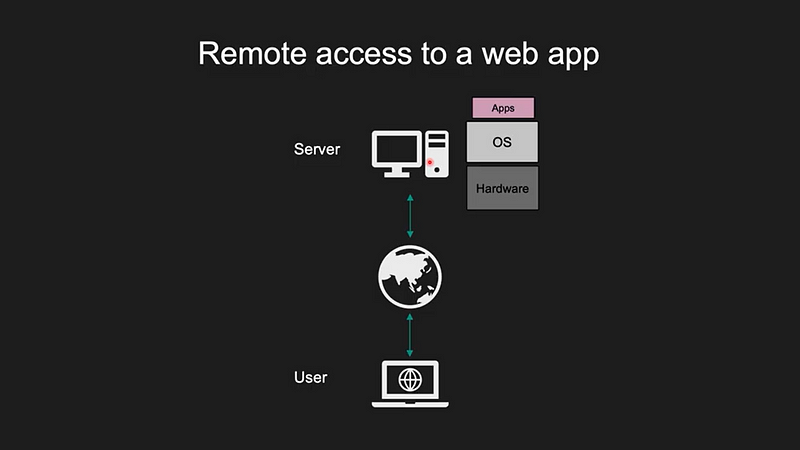
In this picture we can see the traditional web browsing method, let’s think about what will happen if millions of user access the same server at once, the server gets slower and slower right. To solve this issue let’s see the classic strategy.
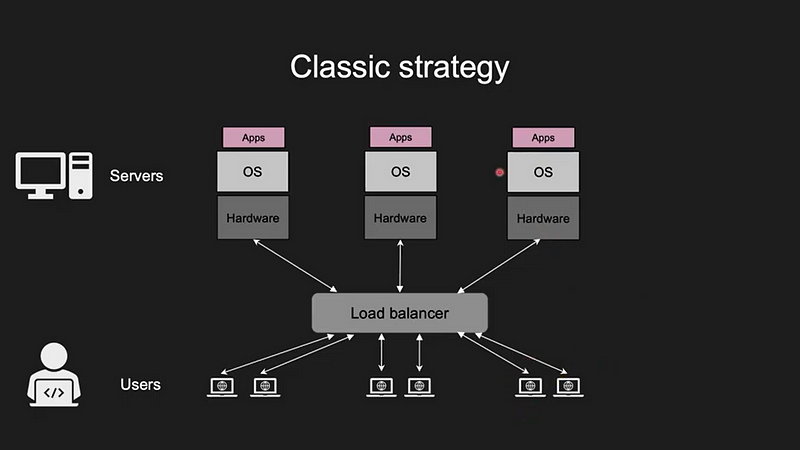
Problems that arise in this strategy are, that if one server or hardware shutdown for any reason the user will face difficulties. To solve this there were multiple solutions came, and one of the best solutions is the docker.
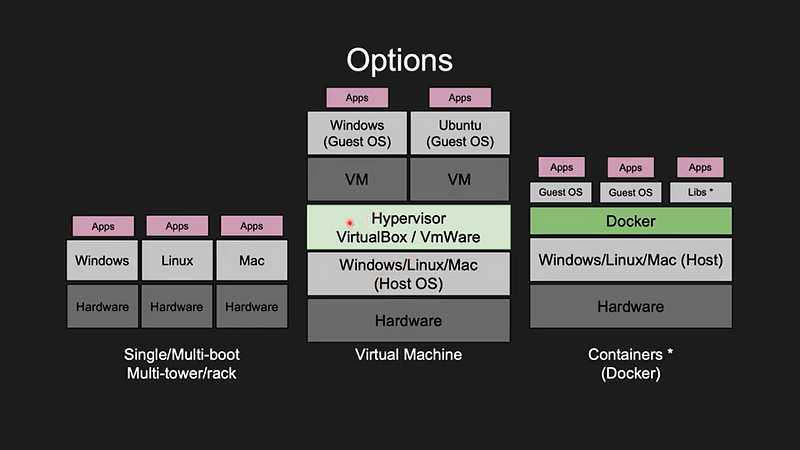
The reason for moving the virtual machine to docker is, that the virtual machines completely running with a full operating system, which requires high memory requirements.
If we use docker Containers rather than Virtual machines.
- Lightweight
- Isolation
- Quick deployment
- Re-usability
What is Docker?
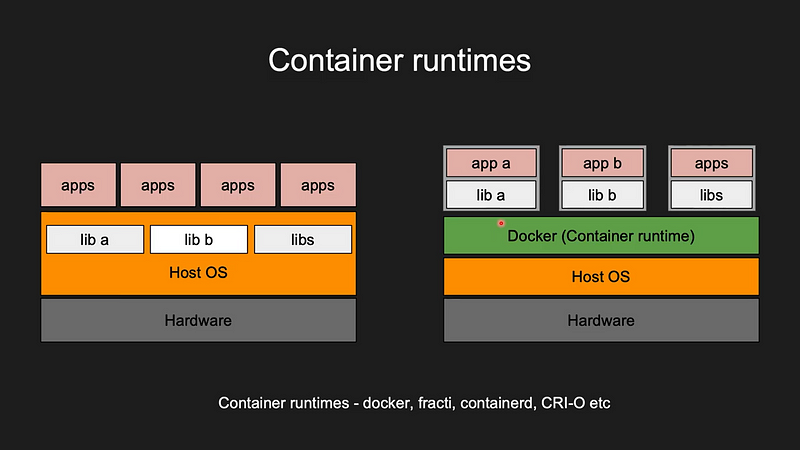
Wow! finally we arrive into our topic. Docker is an open source platform for building, deploying, and managing containerized applications. This ecosystem around creating and running containers. Docker is a software using as a container runtime.
For example, the ecosystem contains:
1. Docker Client
2. Docker Server
3. Docker Machine
4. Docker Images
5. Docker Hub
6. Docker Compose
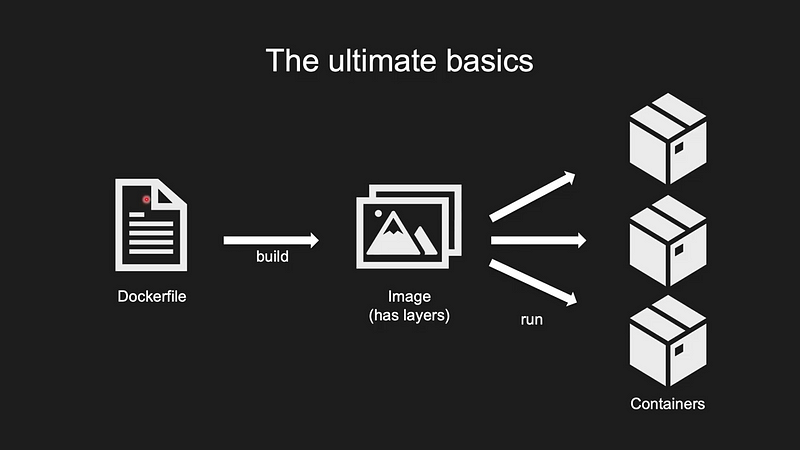
Containers simplify the delivery of distributed applications and have become increasingly popular as organizations shift to cloud-native development and hybrid multi-cloud environments.
Simply says, Docker makes it really easy to install and run software without worrying about setup or dependencies.
Simple Architecture
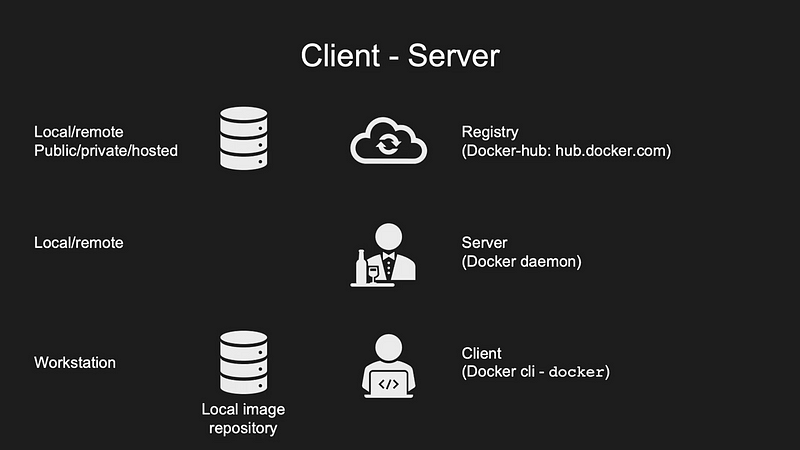
Here the client talks to the server (docker ps). If the client needs a particular image it will ask that image (docker pull ) to the server, the server will find the image in the registry and give it back to the client. (The registry contains images uploaded by various developers freely)
Simple Example for Client-server Methodology
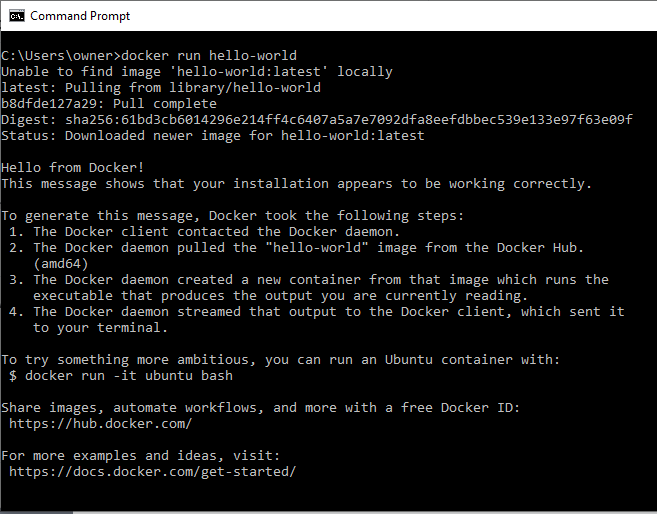
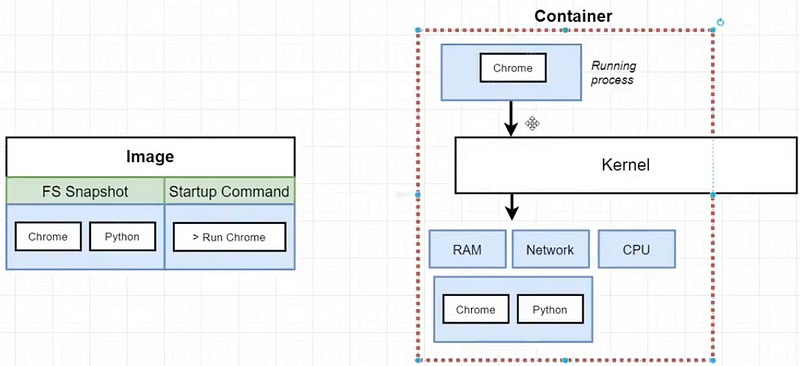
What is Container?
- Actual problem in normal system
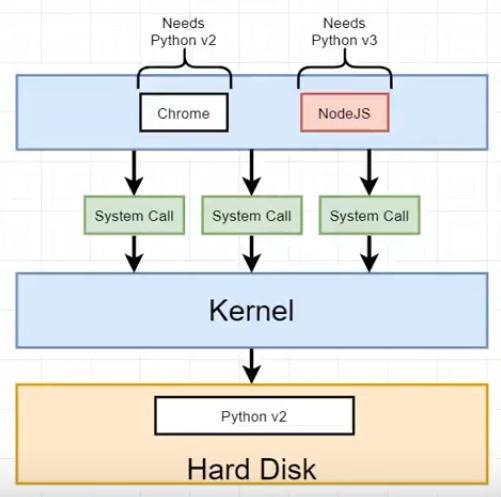
2. Solution in normal system
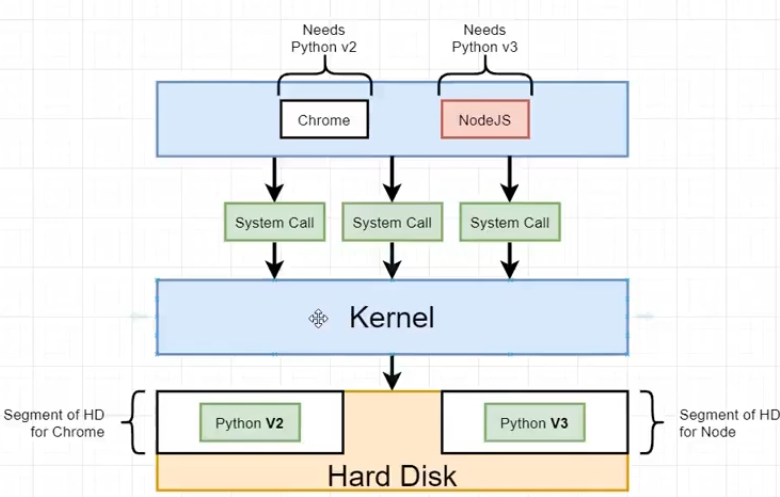
3. How the Container Works
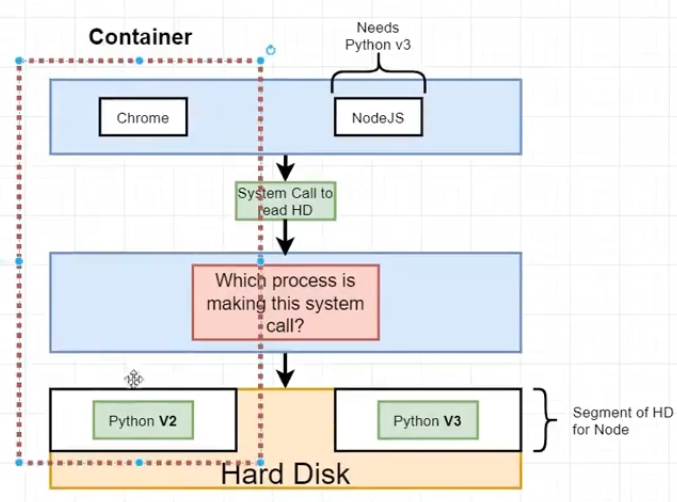
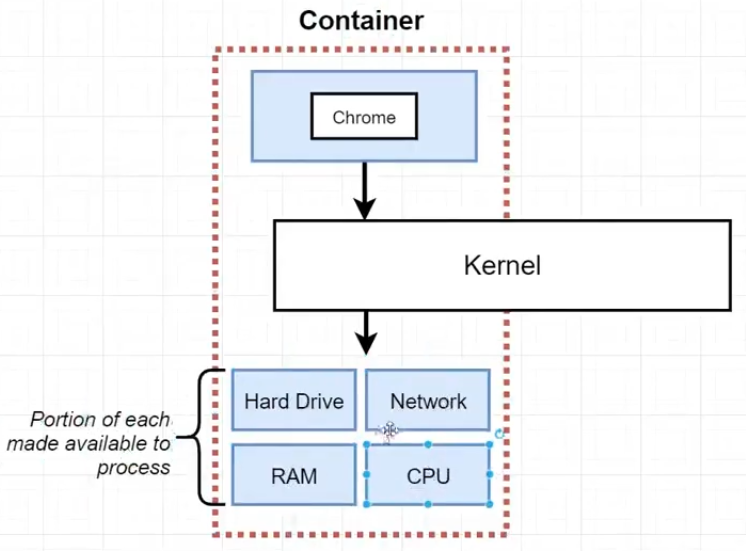
Install Docker
Windows: https://docs.docker.com/desktop/windows/install/
Ubuntu: https://docs.docker.com/engine/install/ubuntu/
Mac: https://docs.docker.com/desktop/mac/install/
Docker Layers, Create Image and Sharing
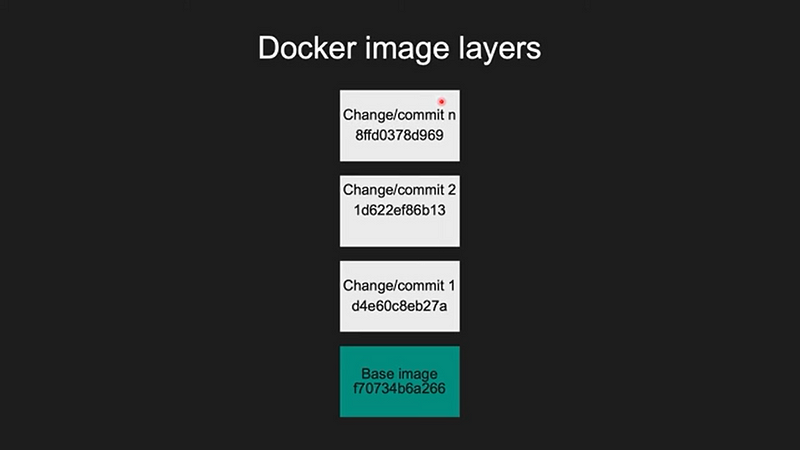

Here you can see the IMAGE ID, it is considered the top latest id of the created image. The docker always updates the latest layer to the image. Exactly what it means is, take an image (layer) and do modifications, finally, you will get the modified image (top most layer). For every modification docker is giving different ids to its layer, so the image is getting the latest layer id at last.
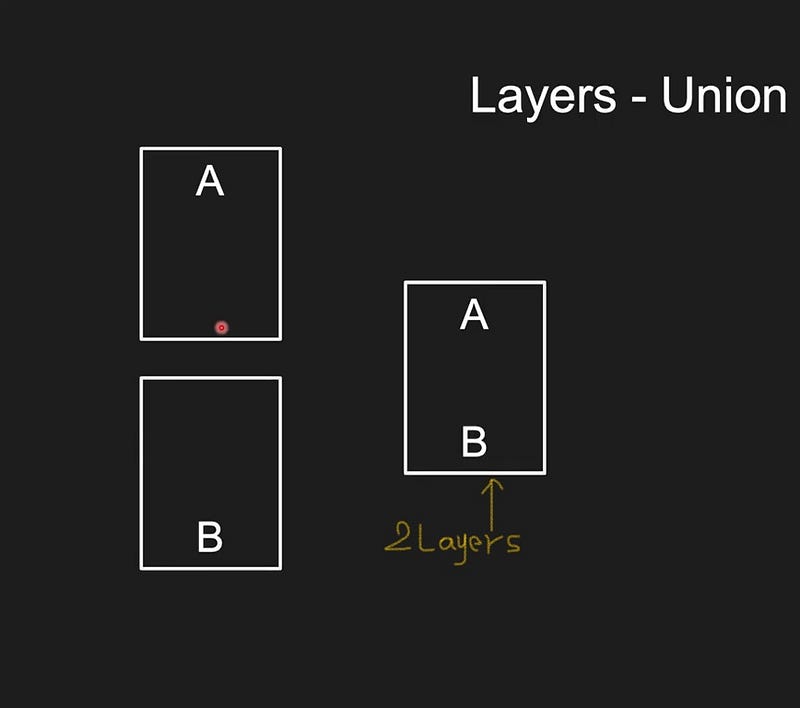
Last added layer should be at the top
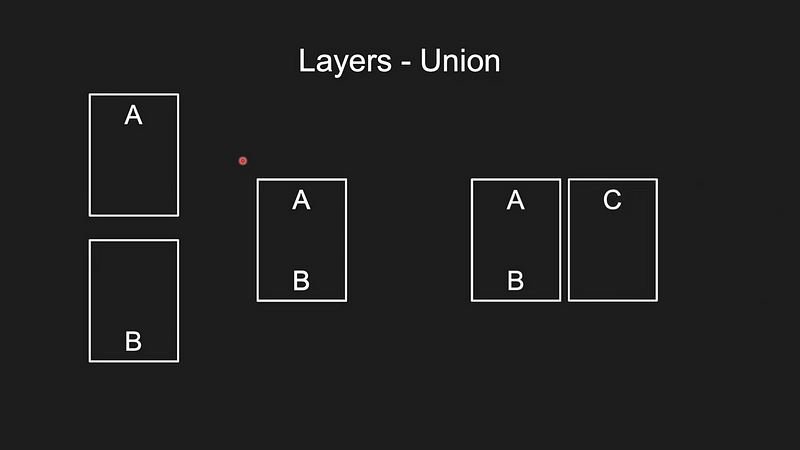
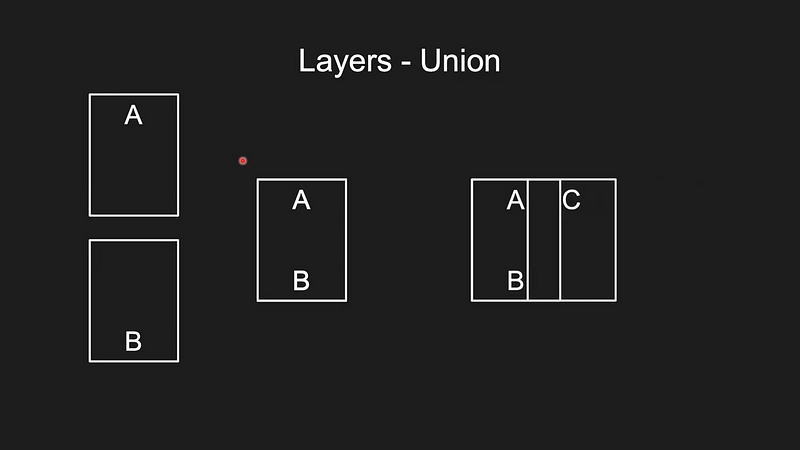
Add C image layer at the top of AB layer
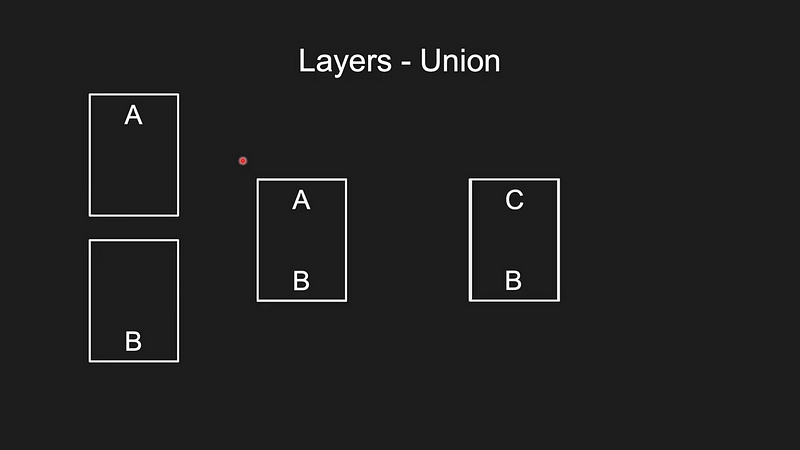
You can simply understand the layered mechanisms that we are using in Photoshop.
Now we will create one website and run it via one server.
- Pull a server (httpd image) — Here I already have this image

2. Create a container with a name & run it in a detached mode (background process), to access via the local machine we need to expose our port number. The Default web server port is 8080, but I am forwarding it to 9090.

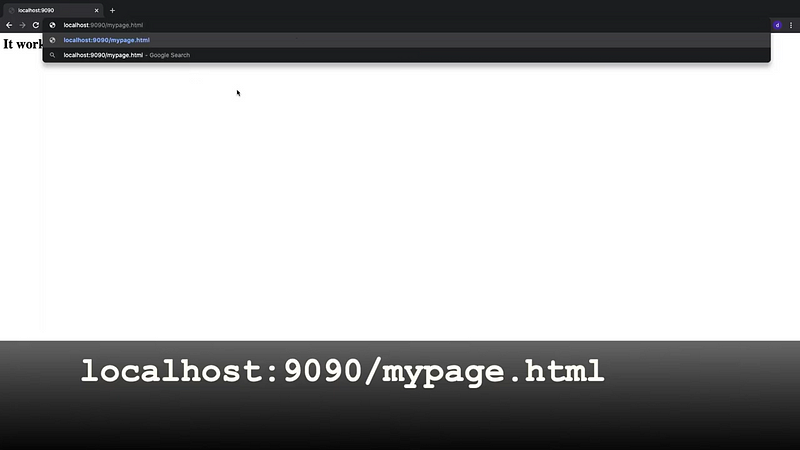
Then we can check our web server in localhost:9090
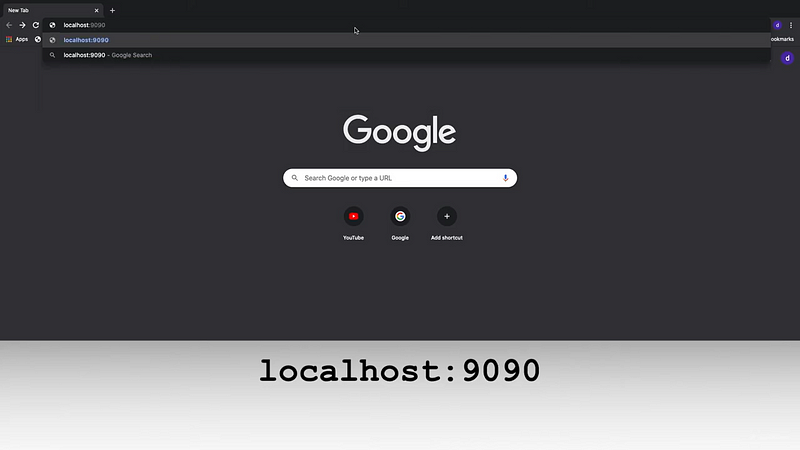
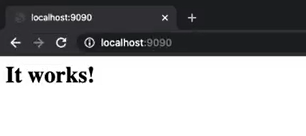
We can see the index.html file inside our docker image

Let’s create a new mypage.html. once created to exit from the bash use ctrl + D

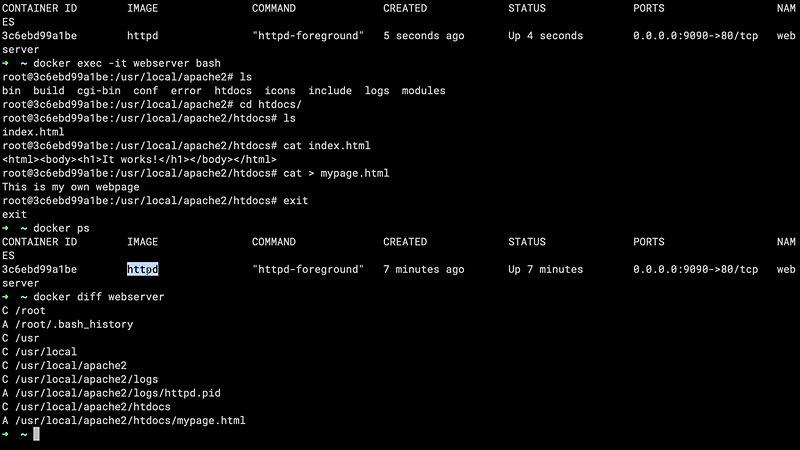
Now we can see the layer modification by using the docker diff command. C means changed, A means added
Note: It is a big disadvantage because while we are doing modification all the previous unwanted layers are also behind the layer. To overcome this issue we can use the docker file. Before going to the docker file, By using this we will create the image.
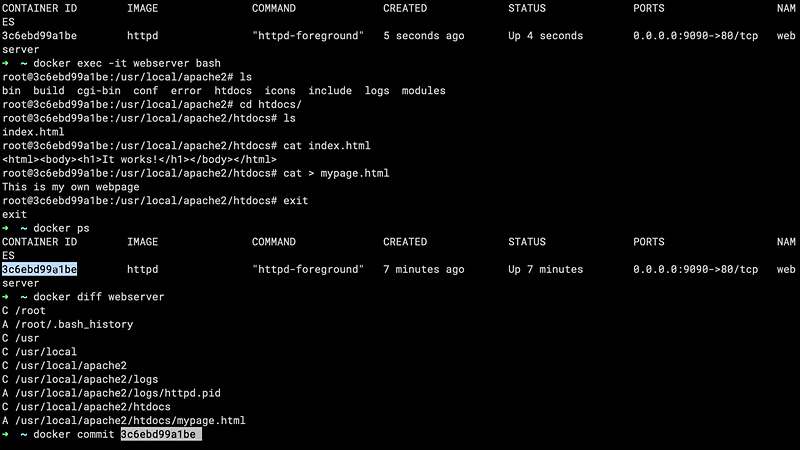
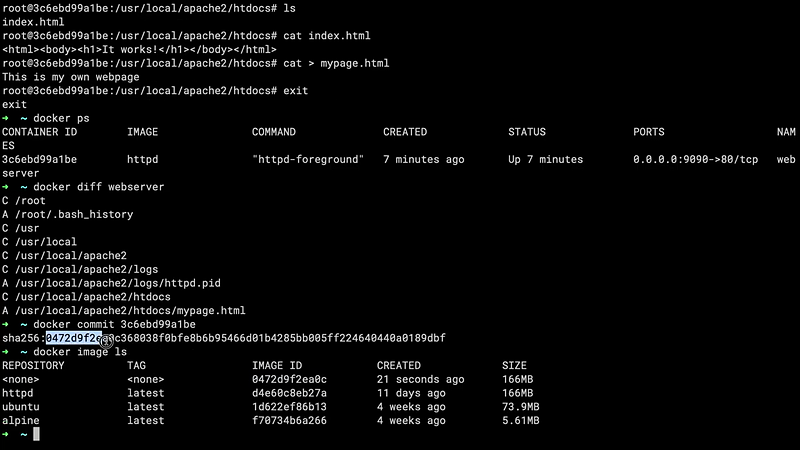
Now, stop the web server, and create the new container by using the same image, with a different port.
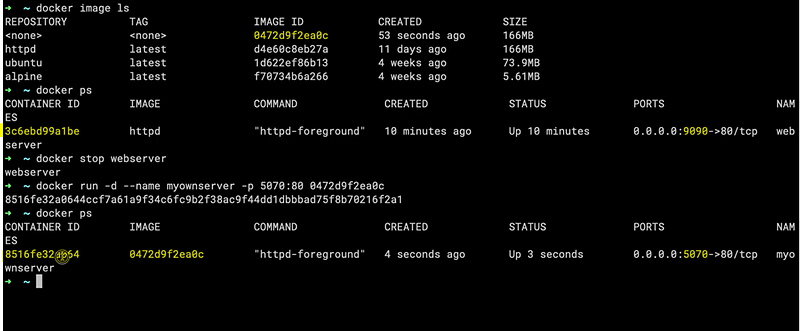
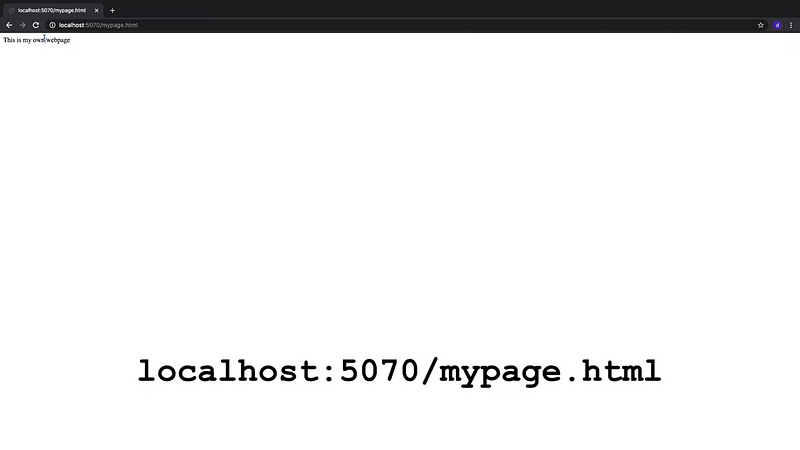
To identify the image in the future, let’s give the tag & repository name.
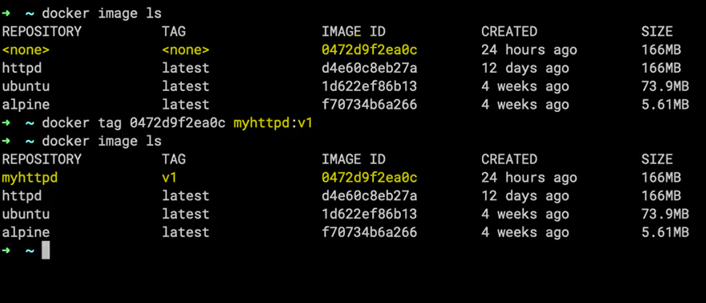
Share the Image by Saving the File
Now we can share our images with our friends by saving and redirecting the file.


Alternatively, we can save image by using the following command

After saving the file we can share the file with the friend. Once the friend receives the file he can load the file using the following command

Share the Image by Uploading the Docker Hub
- Create an Account in hub.docker.com
- Create a repository at the hub.docker.com — can push the docker image that you created
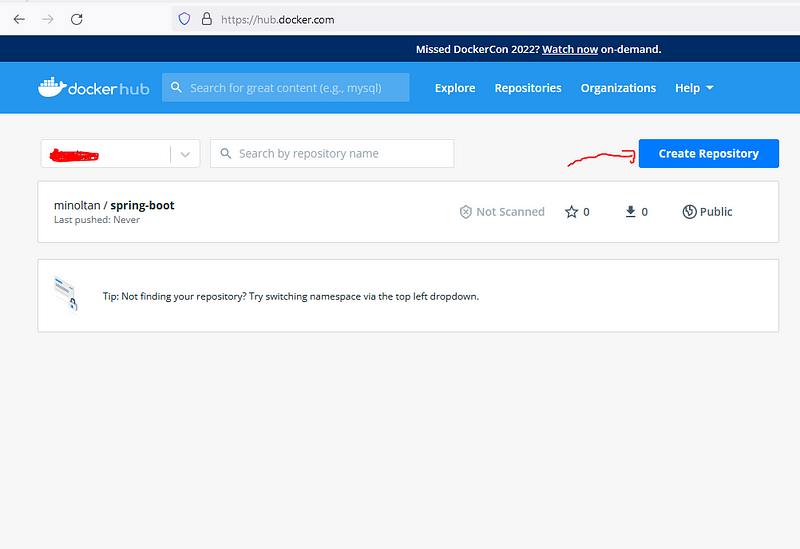
You should use the same repository name that you created earlier.

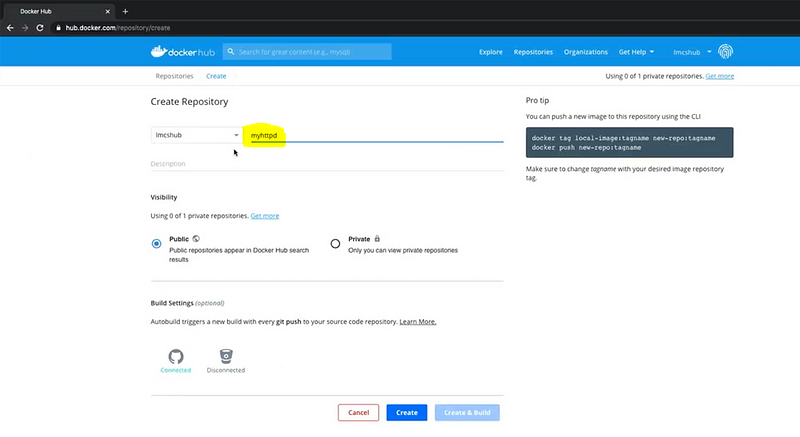
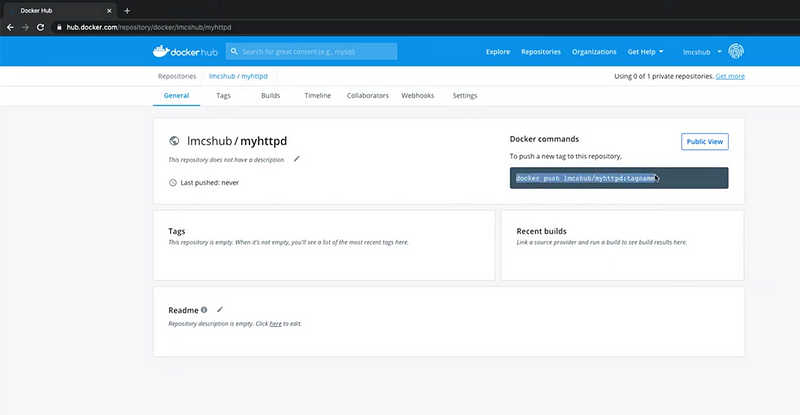
After creating your repository you will get the command to upload.
docker push lmcshub/myhttpd:v1 (this is just an example command)
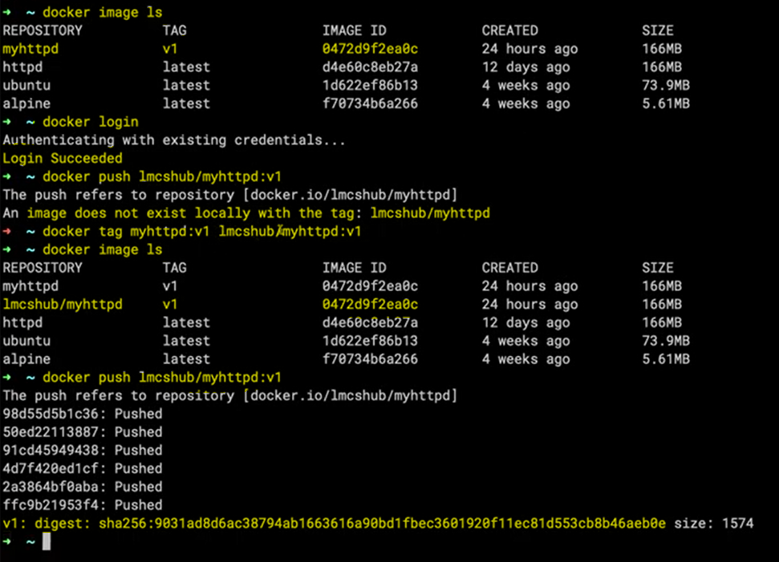
You have to log in to the docker account using the docker login command. You will ask for the username & password. After login success, use docker push lmcshub/myhttpd:v1 (this is just an example command), here you will get an error because the container name is different from the docker hub repository. So we will need to create the container with that name (the prefix — lmcshub/ is used to avoid the name duplication from different accounts) with the same image. Finally push it will work.
Conclusion on Docker Image
I hope that you learned why we are using docker, why we moved to docker from our traditional systems, how to install docker, how to pull images, and how to run containers. From my simple example, you also got clear knowledge about docker commands. So please install docker and ready for my next article. My next article will be on Docker Using Docker file.
What we learned So far on Docker Image
- Docker images and containers.
- Traditional Strategies we used before Docker and the Drawbacks.
- Push and Pull Images from Docker Hub.
- Docker architecture and Layered principle.
The media shown in this article is not owned by Analytics Vidhya and is used at the Author’s discretion.


