This article was published as a part of the Data Science Blogathon.
Introduction
Most of the time we focused on securing our application with a strong security mechanism, but we always missed protecting our credentials from hackers. We directly use our client ID and secret without considering the threats and attacks. Instead of giving our credentials, we are going to use the PKCE mechanism. Before getting into our topic I recommend you read my previous article to get a better understanding. In my previous “Spring Security OAuth2 with keycloak” article I already covered the basics of OAuth2 and understood what is Authorization Code Flow grant type and how to implement using the Spring MVC application. Check out my previous article here.
What is PKCE?
PKCE stands for Proof key code enhanced authorization code flow. This grant type was created to be used for public-facing clients, like web applications developed
using angular, react, vue and etc, and also mobile applications. PKCE authorization code flow is mainly considered a best practice to follow when we are using public clients.
Why PKCE?
The main reason for using these kinds of different authorization code flow is because, as you can remember in my previous Spring Security Oauth2 with Keycloak article, as part of the authorization code flow, to get access token and idToken pair from the authorization server the client needs to make a post request with the client id, client secret, and the authorization code. This is very risky because any developer can use the source code and find the client’s secret if we store it in the client. The same thing applies in the mobile application, if we have apk file we can de-compile the source file. So for this reason a new type of authorization code flow was designed which is the PKCE Authorization code flow.
This flow is similar to the authorization code flow but with a couple of additional steps. Here there is no need to maintain the client secret anymore inside of the application or source code. For the PKCE authorization code flow, I am additionally using code_challenge and code_challenge_method as parameters.
.png)
code_challenge — which is a base 64 encoded random string which is generated by hashing and encoding in another value generated by the client called a code verifier.
code_challenge_method — it should be configured inside our authorization server when we are first configuring the client. The recommended value for this is S256, which is a cryptographic hashing function.
Flow
1. Once the client makes this request to the authorization server the server responds with a login page asking the user to authenticate.
2. Once the user logged in the authorization server returns the authorization code similar to the authorization code flow but does not request the access token the client should send the code verifier value along with the authorization code as part of the post request to the token endpoint.
3. The authorization server receives the post request, validates the authorization code and the code verifier values, and then responds with the access token and idToken pair.
Practical
Let’s see our flow with the practical example.
Keycloak Dashboard Configurations
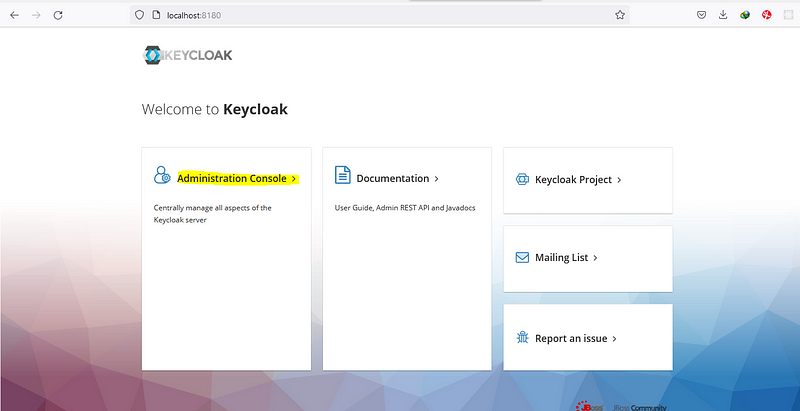
For this keycloak dashboard configuration, you need to install and run the keycloak server.
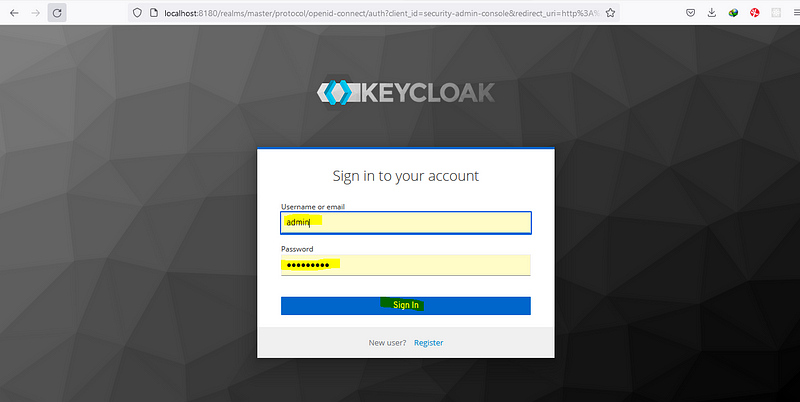
At the start login to the key cloak administration console.

Create Client on Keycloak
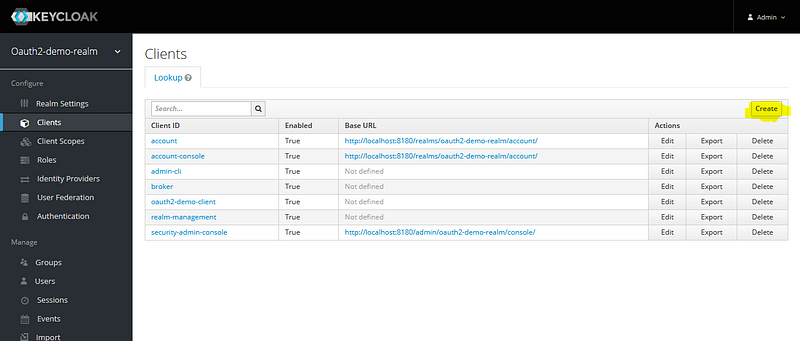
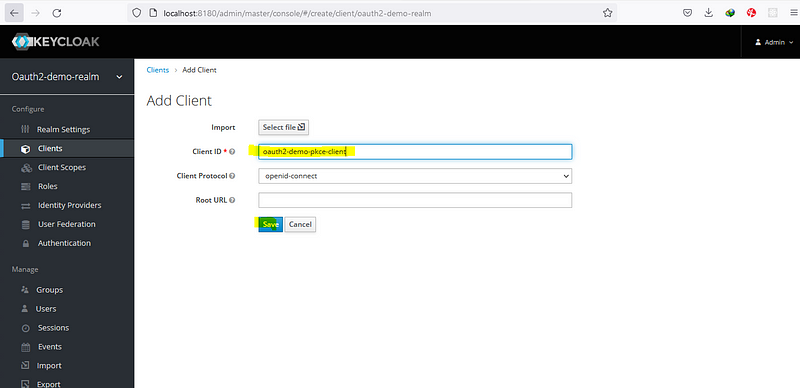
Configure Client on Keycloak
Here we have to make some changes, enable access type as public, standard flow enabled, provide value for valid redirect URI (http://localhost:4200 — angular app address), provide web origin (allow CORS which can access the authorization server, as for now I am going to provide * here, for permit all origins).
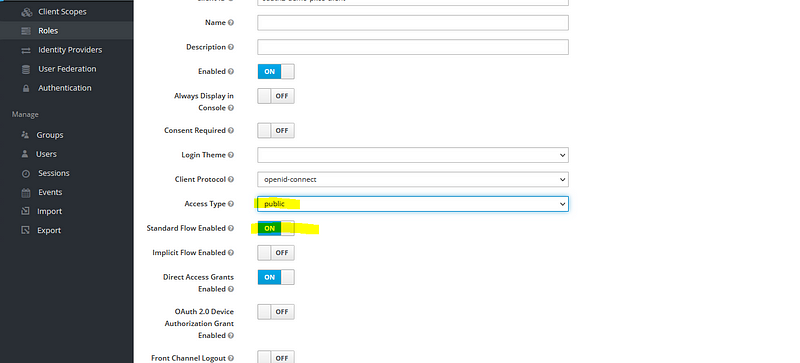
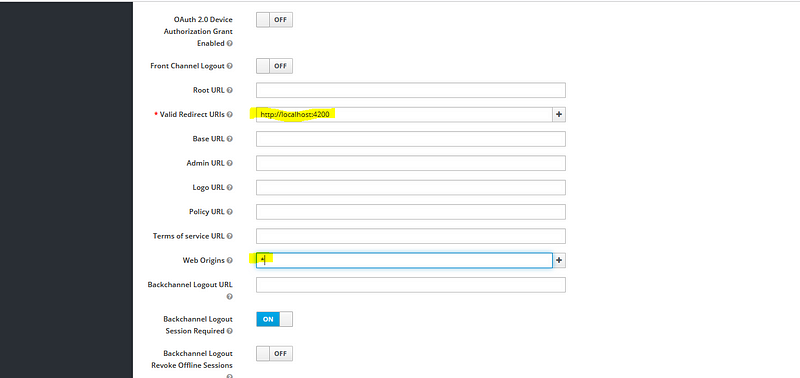
Note: When we are using a production application, please don’t provide the * value here, only provide the valid origin of the redirect URI, that means if your front-end application is running on a server provide the host details of the server instead of allowing all origins.
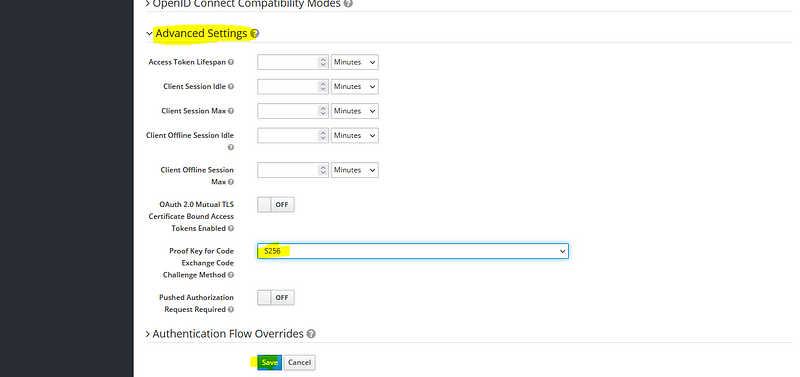
The next value that needs to configure is the PKCE enhanced code_challenge _method, you can find this value under the advanced settings.
That’s it for the client configuration, let’s dive into the code.
Angular Configuration
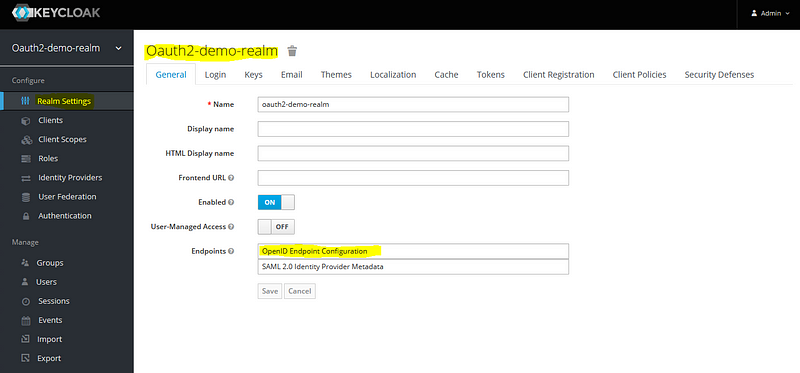
Open our angular project & first need to install the npm package called angular-oauth2-oidc.
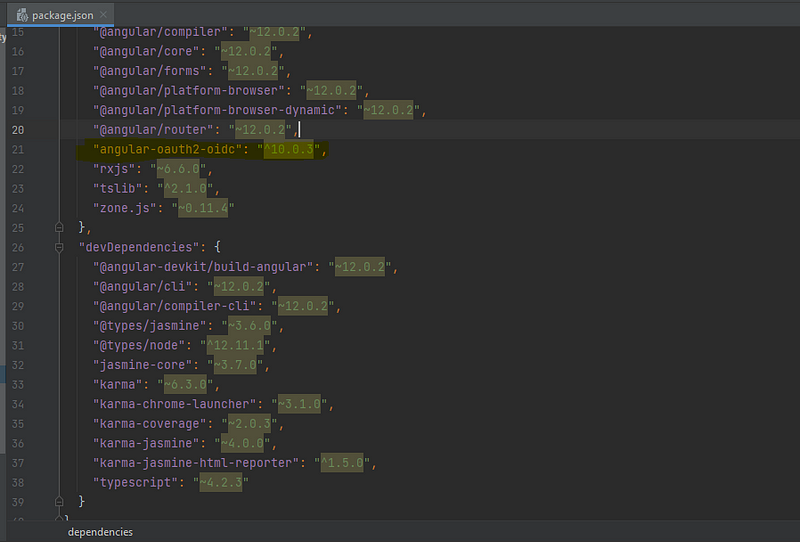
After adding this package, run the ‘npm install’ command to ad this package.
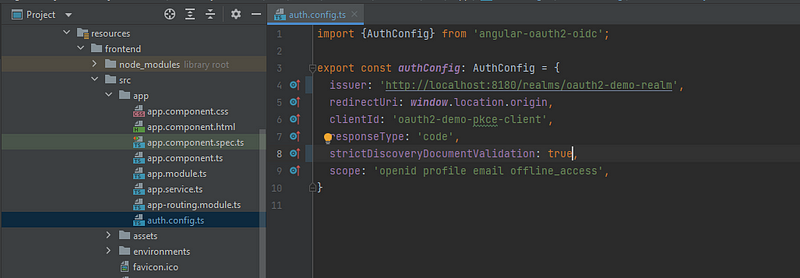
After the package is installed, I am creating a new file called “auth.config.ts”. Inside the file, I am providing six fields.
1. issuer: Issuer URI contains all the list of configuration endpoint which is exposed by the authorization server. ‘http://localhost:8180/realms/oauth2-demo-realm’
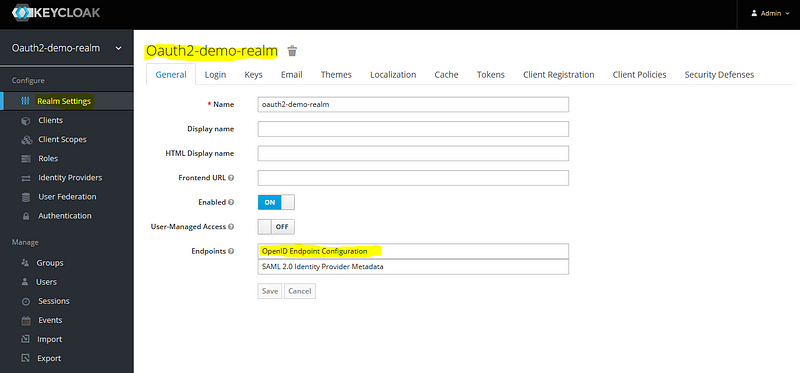
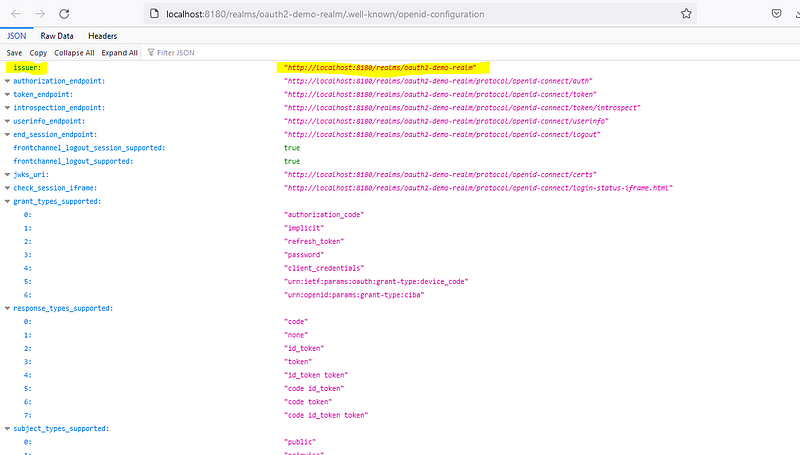
2. redirectUri: Same value when configuring the client in the keycloak section, instead of hard coding this value I am providing ‘window.location.origin’
3. clientId: It is from our keycloak, value is ‘oauth2-demo-pkce-client’
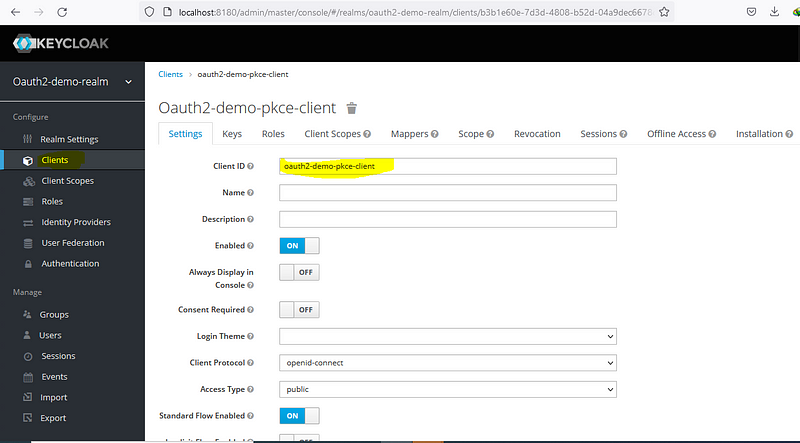
4. responseType: This is going to be a ‘code’ as we are following the authorization code flow mechanism.
5. strictDiscoveryDocumentValidation — This is something that is relevant to the angular oauth2 oidc library, this is used because the list of endpoints exposed by the issuer URI endpoint does not contain the same base URI as the issuer URI. In our case the issuer URI uses the same base URI (http://localhost:8180), so we can use it as true, if not provide false.
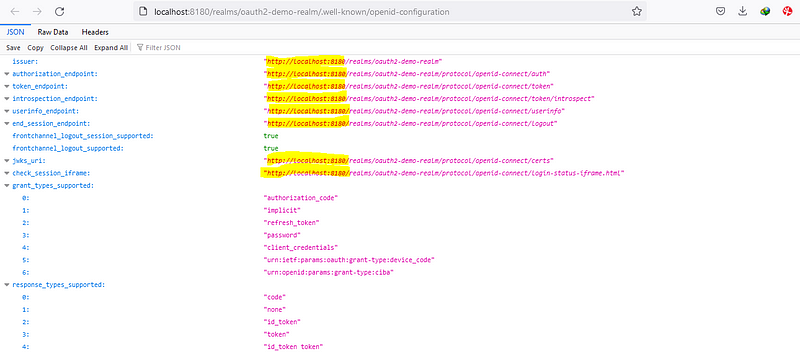
6. scope: Here I am providing some default scope.
import {AuthConfig} from 'angular-oauth2-oidc';
export const authConfig: AuthConfig = {
  issuer: 'http://localhost:8180/realms/oauth2-demo-realm',
  redirectUri: window.location.origin,
  clientId: 'oauth2-demo-pkce-client',
  responseType: 'code',
  strictDiscoveryDocumentValidation: true,
  scope: 'openid profile email offline_access',
}
Then inject the oath2 service class, and provide the configs
import {Component} from '@angular/core';
import {OAuthService} from "angular-oauth2-oidc";
import {authConfig} from "./auth.config";
@Component({
  selector: 'app-root',
  templateUrl: './app.component.html',
  styleUrls: ['./app.component.css']
})
export class AppComponent {
  title = 'frontend';
  text = '';
  constructor(private oauthService: OAuthService) {
    this.configure();
  }
login() {
    this.oauthService.initCodeFlow();
  }
private configure() {
    this.oauthService.configure(authConfig);
    this.oauthService.loadDiscoveryDocumentAndTryLogin(); // This method is trigger issuer uri
  }
logout() {
    this.oauthService.logOut();
  }
}
Till now we configured the files, but not calling this from our Html file. Let’s do it.
Then configure app.component.html with the login and logout button

Login

Logout
Finally, we have to define our OAuth module to our app.module.ts
Note: The upcoming configuration should be done after the spring boot application configurations are finished.
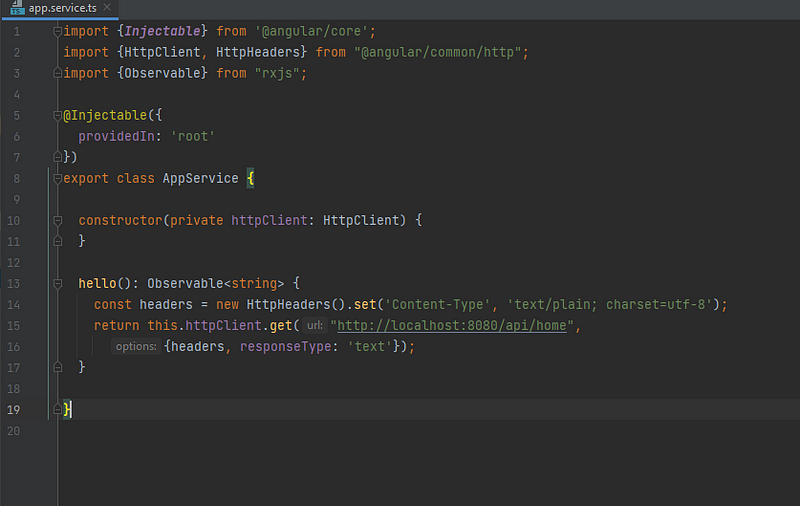
Create the component app.service.ts
Here make an HTTP get request throughout our resource server (Spring-boot application)
import {Injectable} from '@angular/core';
import {HttpClient, HttpHeaders} from "@angular/common/http";
import {Observable} from "rxjs";
@Injectable({
  providedIn: 'root'
})
export class AppService {
constructor(private httpClient: HttpClient) {
  }
hello(): Observable {
    const headers = new HttpHeaders().set('Content-Type', 'text/plain; charset=utf-8');
    return this.httpClient.get("http://localhost:8080/api/home",
      {headers, responseType: 'text'});
  }
}
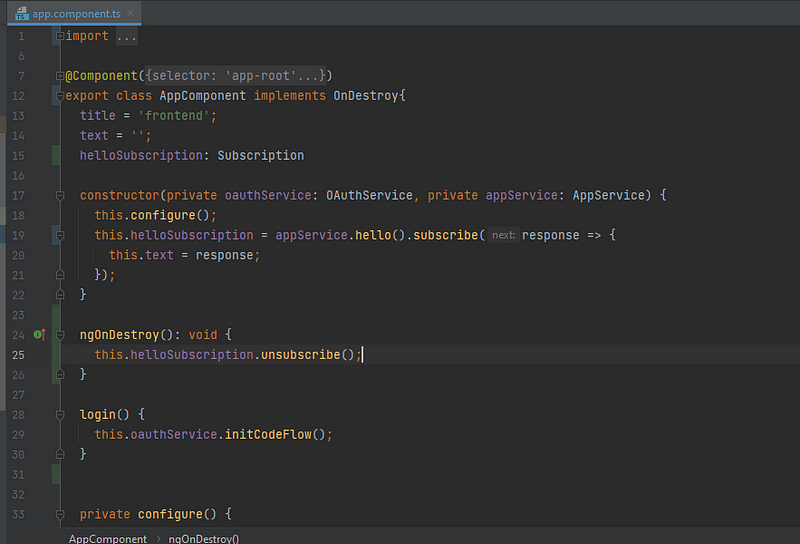
Now Let’s call it from our app.component.ts
import {Component, OnDestroy} from '@angular/core';
import {OAuthService} from "angular-oauth2-oidc";
import {authConfig} from "./auth.config";
import {AppService} from "./app.service";
import {Subscription} from "rxjs";
@Component({
  selector: 'app-root',
  templateUrl: './app.component.html',
  styleUrls: ['./app.component.css']
})
export class AppComponent implements OnDestroy{
  title = 'frontend';
  text = '';
  helloSubscription: Subscription
constructor(private oauthService: OAuthService, private appService: AppService) {
    this.configure();
    this.helloSubscription = appService.hello().subscribe(response => {
      this.text = response;
    });
  }
ngOnDestroy(): void {
    this.helloSubscription.unsubscribe();
  }
login() {
    this.oauthService.initCodeFlow();
  }
private configure() {
    this.oauthService.configure(authConfig);
    this.oauthService.loadDiscoveryDocumentAndTryLogin(); // This method is trigger issuer uri
  }
logout() {
    this.oauthService.logOut();
  }
}
Last we need to bind with our html page
Login
Refresh the browser after login to view the text
{{text}}
After finishing all the configs let’s start our application. ‘npm start’
Spring-boot (Resource server configuration)
First I am adding 3 dependencies in the pom.xml
1.spring-boot-starter-oauth2-resource-server – which will enable the resource server capabilities inside our spring-boot application.
2. spring-security-oauth2-jose – Enables the Java-script object signing and Encryption Framework. Which is used to securely transfer claims between 2 parties. This means transferring the JWT (JSON Web Token), JWS (JSON Web Signatures), JWE (JSON Web Encryption), JWK (JSON Web Key).
3. spring-boot-starter-security – Enable spring security.
    org.springframework.boot
    spring-boot-starter-oauth2-resource-server


    org.springframework.security
    spring-security-oauth2-jose


    org.springframework.boot
    spring-boot-starter-security
Now configure the resource server properties
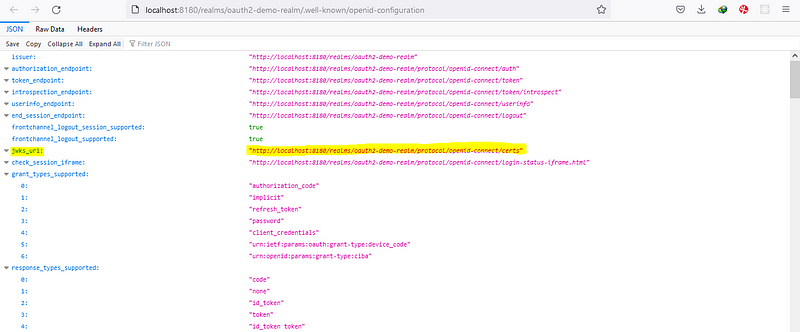

spring.security.oauth2.resourceserver.jwt.jwk-set-uri=http://localhost:8180/realms/oauth2-demo-realm/protocol/openid-connect/certs
OK, we configured the resource server.
Let’s create an endpoint.
I am creating the Controller “HomeRestController”, enabling the Rest api & cross-origin
package com.amitech.pkce.controller;
import org.springframework.http.HttpStatus;
import org.springframework.web.bind.annotation.*;
@RestController
@RequestMapping("/api/home")
@CrossOrigin(origins = "*")
public class HomeRestController {
@GetMapping
    @ResponseStatus(HttpStatus.OK)
    public String home() {
        return "Hello";
    }
}
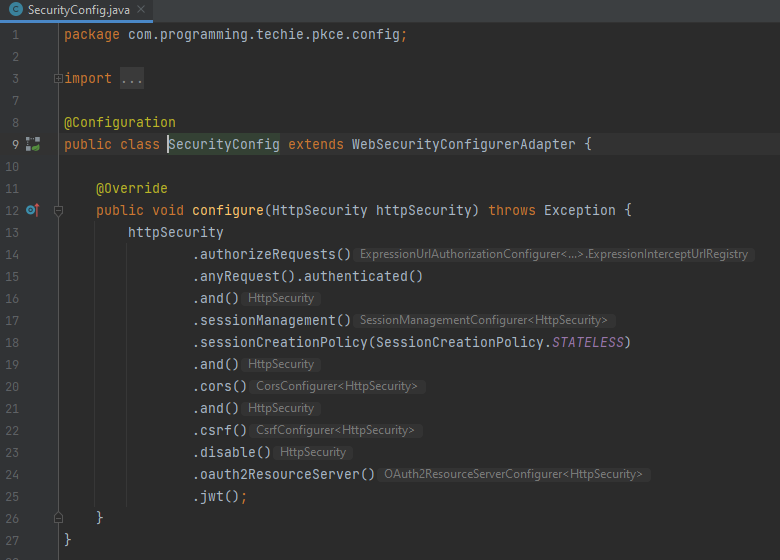
Last thing is to configure the spring security
For that, i am creating the config package and creating a class as SecurityConfig.
package com.amitech.pkce.config;
import org.springframework.context.annotation.Configuration;
import org.springframework.security.config.annotation.web.builders.HttpSecurity;
import org.springframework.security.config.annotation.web.configuration.WebSecurityConfigurerAdapter;
import org.springframework.security.config.http.SessionCreationPolicy;
@Configuration
public class SecurityConfig extends WebSecurityConfigurerAdapter {
@Override
    public void configure(HttpSecurity httpSecurity) throws Exception {
        httpSecurity
                .authorizeRequests()
                .anyRequest().authenticated()
                .and()
                .sessionManagement()
                .sessionCreationPolicy(SessionCreationPolicy.STATELESS)
                .and()
                .cors()
                .and()
                .csrf()
                .disable()
                .oauth2ResourceServer()
                .jwt();
    }
}
This class should extend the web security configure the adapter, in this way it will overwrite the spring-boot default security config. Inside this method, we can customize how spring security can behave.
First of all, I am going to make sure that all requests to our resource server should be authorized first. So i can do that by adding the authorizeRequest().anyRequest().authenticated()

Finally, we completed our front-end and back-end implementation. Let’s dive into the demo testing.
Demo
Navigate to the endpoint localhost:4200 (angular endpoint host)
click on login , you will redirect to the keycloak login page
If you check the request parameters you can see the code_challenge & code challenge method
Once you entered the credentials
If you check the request parameters again you will see the code, angular use this code to make the post request to the token endpoint.
Code verifier — this value is used to verify the code challenge method.
The response contains an access token, refresh token and ID token
Conclusion to Keycloak
I hope you understood my article with a full flow explanation. Now we could see that we don’t need to share our credentials through the network calls. Also, you learned about PKCE authorization code flow, configuring with the front-end client (In our case angular application), configuring with the resource server (In our case Spring-boot application), and configuring with the authorization server (In our case keycloak server). Please continue reading my article to learn more about keycloak and the latest technology trends.
What we have learned so far:
- Understand the basics of PKCE grant flow.
- Configuring PKCE in the Keycloak admin console.
- Configuring PKCE in angular application.
- Configuring PKCE in the Spring-boot application.
The media shown in this article is not owned by Analytics Vidhya and is used at the Author’s discretion.


Dear Paul please correct the PKCE stands for -- "PKCE stands for Proof key code enhanced" to "Proof Key Code Exchange (PKCE)"