This article was published as a part of the Data Science Blogathon.
Introduction
Mathematics is a core subject that helps us to solve Engineering, Scientific and Economic problems. It is used in a variety of fields and disciplines. So we can say that without mathematics, we can not do anything. and mathematics is becoming a more important subject to learn. But Many students think that maths is a difficult subject to understand without any creativity. So Animation provides an enjoyable viewing experience, and students will fall in love with mathematics if animation is used to present the subject.
Visualizations can be improved by using animations to make them more attractive and user-friendly. Python enables us to develop animation visualization by using some libraries, such as Matplotlib, Plotly, and others.
In this article, we will discuss about Manim, an open-source Python library for creating explanatory mathematical videos or animations. It aids in the understanding of various mathematical concepts through the use of animation.
What is Manim?
Manim is a Python library that is used for creating animation. It can be downloaded and installed using the pip command. However, to run it properly, some additional system dependencies must be installed
Installing Required Libraries
Please visit the following link and follow the appropriate instructions according to your operating system for the local installation of Manim and required dependencies. Manim requires Python 3.7 or a higher version.
Necessary libraries are FFmpeg, OpenGL, and LaTeX (optional, if you want to use LaTeX). MikTex is recommended. I have used Visual Studio Code for Implementation. You can use any python platform for Implementation.
Let’s get started…
Creating your First Manim Animation of Shape
Manim includes three concepts you can combine to create mathematical animations: the mathematical object or Mobject, the animation, and the scene. In Python, we can call it classes.
Mobjects is an object that represents a screen-displayable object. Simple shapes like circles, arrows, and rectangles are all Mobjects. Axes, function graphs, and bar charts are examples of more complex mobjects.
Change Shape
It’s not much fun just making one shape like a circle only. Let’s make a square out of this circle and any other shapes. So basically, we are creating one circle which will grow from the center. Then It will turn into a square, and then the square will turn into a triangle. Let’s see this beautiful animation.
from manim import *
class ChangeShape(Scene):
    def construct(self):
        circle = Circle()
        circle.set_fill(BLUE, opacity=0.5) # set the color and transparency
        circle.flip(RIGHT)
        self.play(GrowFromCenter(circle))
         self.wait(2)
        square = Square()
        square.set_fill(YELLOW, opacity=0.5)
        square.flip(RIGHT)
        self.play(Transform(circle, square)) # turn the circle into a square
        self.wait(2)
        triangle = Triangle()
        triangle.set_fill(GREEN, opacity=0.5)
        triangle.flip(RIGHT)
        self.play(Transform(circle, triangle)) # turn the square into a triangle
        self.wait(2)
        ellipse= Ellipse()
        ellipse.set_fill(RED, opacity=0.5)
        ellipse.flip(RIGHT)
        self.play(Transform(circle, ellipse)) # turn triangle into Ellipse
        self.wait(2)
Save the above code as c4.py. Now run the following command in VS Code to generate a video for the script.
manim -pql p1.py ChangeShape

Some Other commands which we can use like:
-p: Play video after it is generated
-ql: It will Generate a low-quality video
To generate a video with high quality, we can use -qh.
If you want to create a GIF instead of a video, add -i after -pql to the command.
In your local directory, a video called ChangeShapes.mp4 will be saved. You should see something similar to this!

Inference: First, we need to import many libraries to access functions of manim. Then our animation is painted on a canvas called to scene. ChangeShape class overrides the scene class allowing us to make our class more versatile.
To create our objects, display them on screen, and animate them, construct() method is used. Then you can set the shape’s color by using set_fill() function. So here, we have transformed different shapes from one object.
Move Objects Together
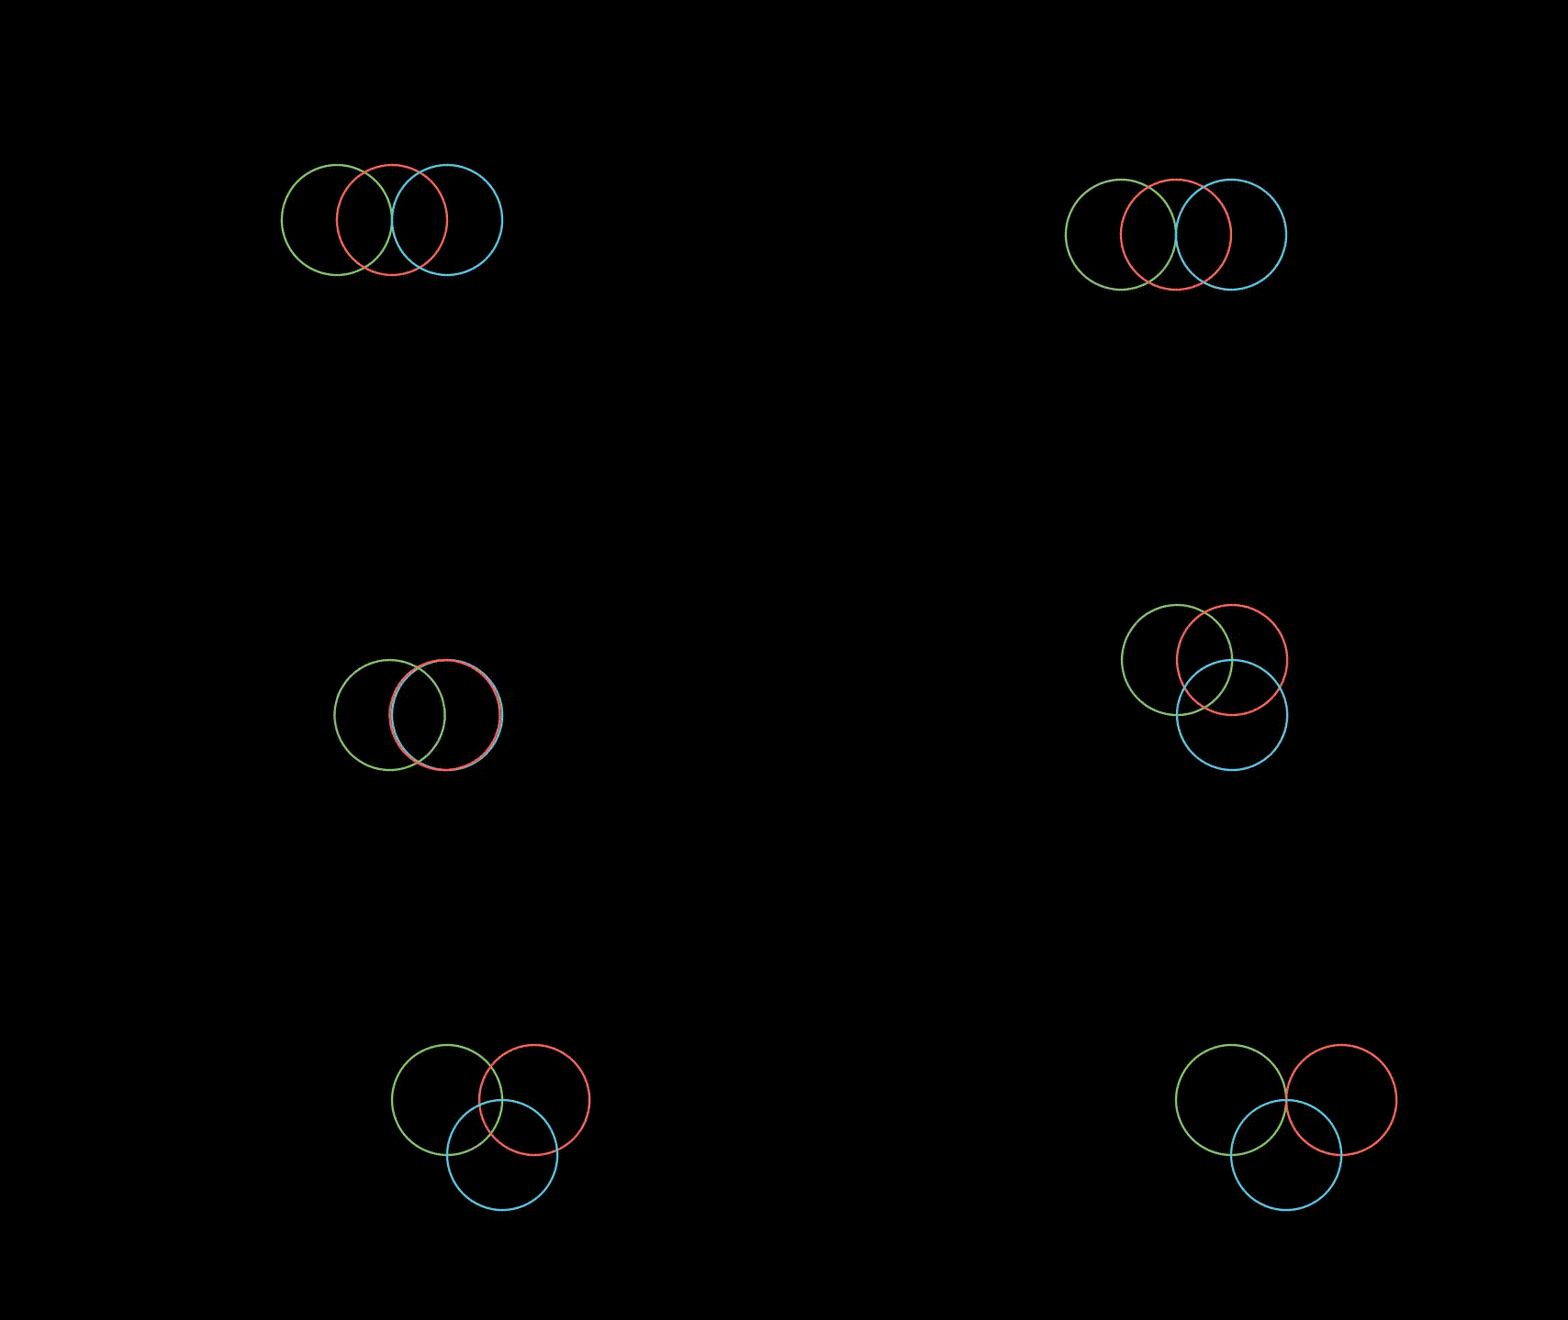
In the above example, we have seen how to create shapes using manim. Now, we will see how to move created objects together in different directions. Here I have created 3 circles of different colors, and then I have applied animation to all circles and moved them together.
from manim import *
class GroupCircles(Scene):
    def construct (self):
        # Create circles
        green_circle = Circle(color=GREEN)
        blue_circle = Circle(color=BLUE)
        red_circle = Circle(color=RED)
        # Set starting positions of circle
        green_circle.shift(LEFT)
        blue_circle.shift(RIGHT)
        # Create 2 different groups
        group1 = VGroup(green_circle, red_circle)
        group2 = VGroup(blue_circle)
        self.add(group1, group2) # add two groups to the scene
        self.wait()
        self.play((group1 + group2).animate.shift(DOWN)) # shift 2 groups down
        self.play(group1.animate.shift(RIGHT)) # move only 1 group
        self.play(group1.animate.shift(UP))
        self.play((group1 + group2).animate.shift(RIGHT)) # shift 2 groups to the right
        self.play(red_circle.animate.shift(RIGHT))
        self.wait()

GIF BY AUTHOR
Inference: We can use VGroup to move different Manim’s objects together. shift() function is used to shift objects in different directions ( Left, Right, Up, Down).
Create a Trace of the Moving Object
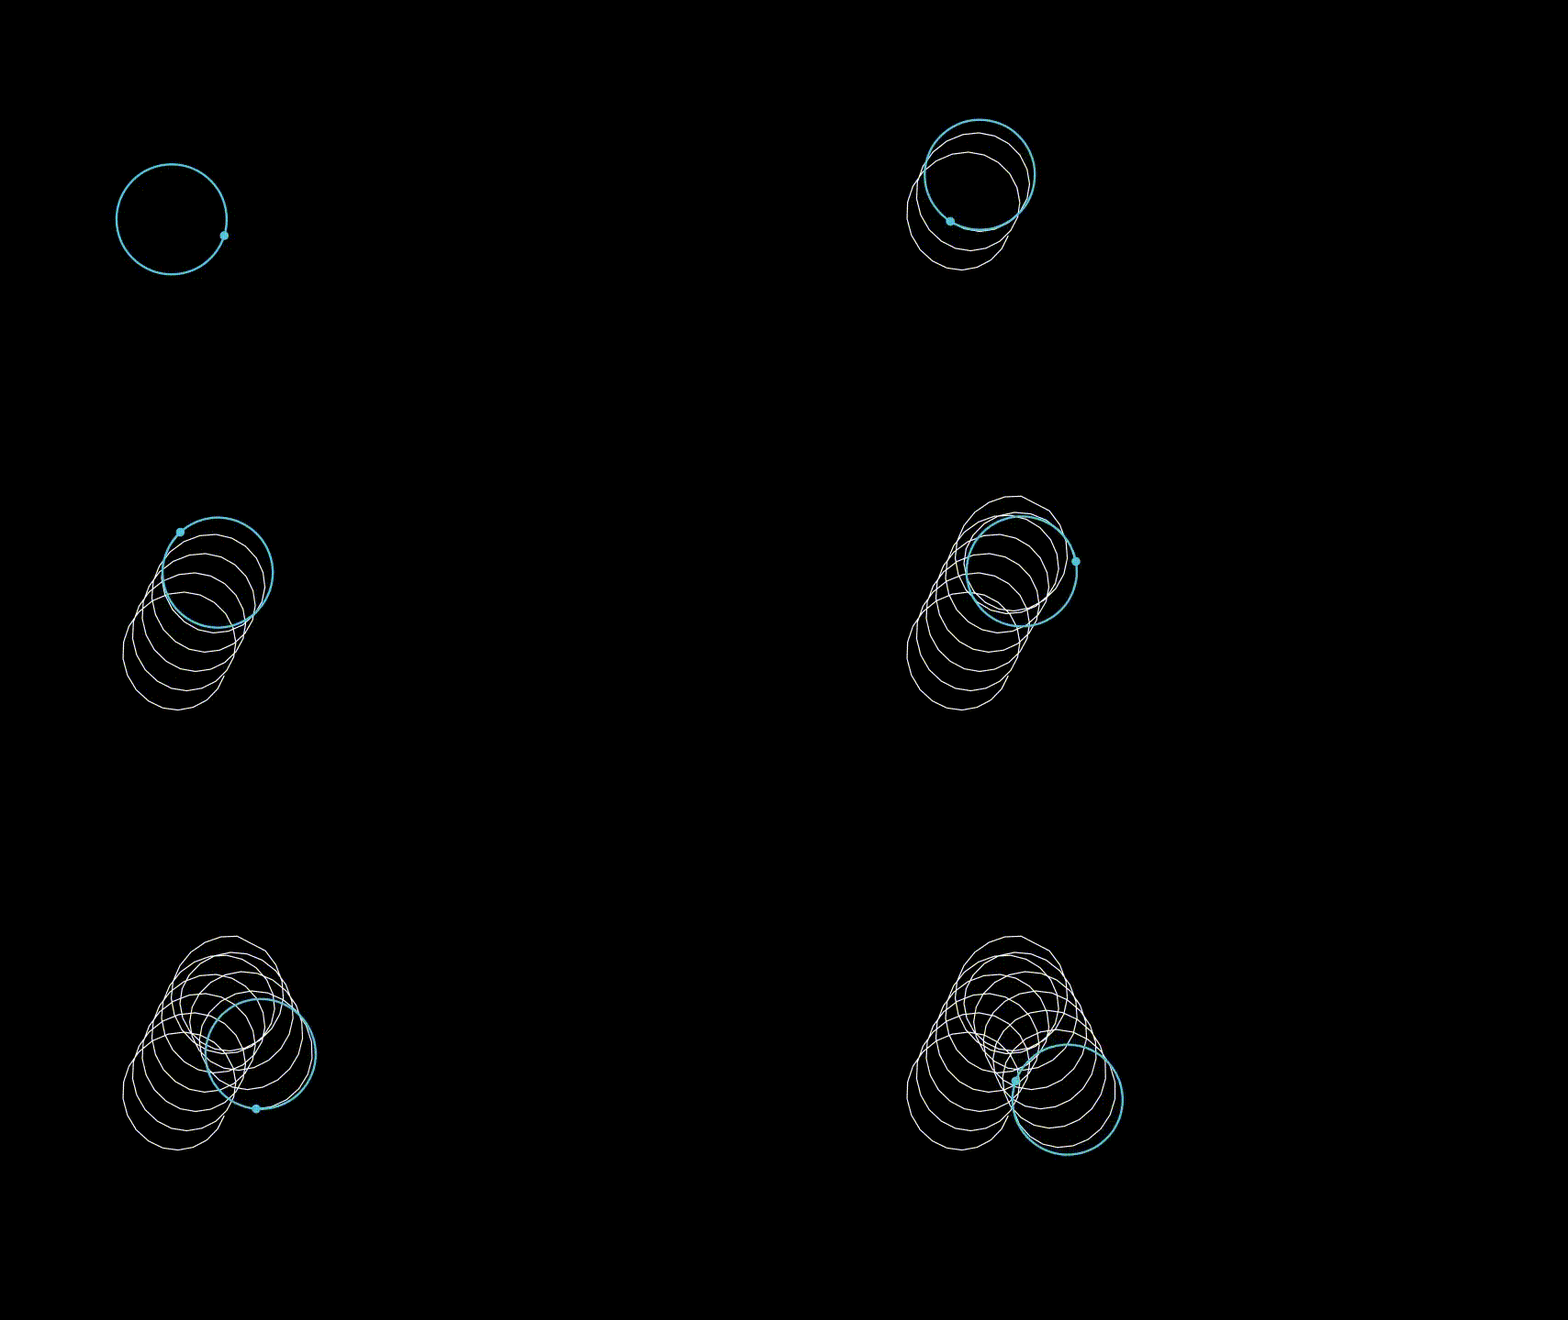
Initially, I have created one dot, and then the dot will create a trace of the circle, which will move in a particular direction. The rolling circle will shift to UP-Right and Down-Right Direction, and you can see amazing animation created in this way.
from manim import *
class TracedPath(Scene):
    def construct (self):
        # Create circle and dot
        circ = Circle(color=BLUE).shift(4*LEFT)
        dot = Dot(color=BLUE).move_to(circ.get_start())
        # Group dot and circle
        rolling_circle = VGroup(circ, dot)
        trace = TracedPath(circ.get_start)
        rolling_circle.add_updater(lambda m: m.rotate(-0.3))  # Rotate the circle
        self.add(trace, rolling_circle) # add trace and rolling circle to the scene
        # Shift the circle to UP-Right & Down-Right Direction
        self.play(rolling_circle.animate.shift(2*UP+RIGHT), run_time=8,angle=2*PI, rate_func=linear)
        self.play(rolling_circle.animate.shift(2*DOWN+RIGHT), run_time=8,angle=2*PI, rate_func=linear)

GIF BY AUTHOR
Inference: TracePath is used to create a trace of a moving object. In the above example, Tracing is started with a dot object, and it creates a trace of a circle and moves in a particular direction.
Creating Second Manim Animation of Mathematical Equation
Math equations can be created through Manim using LaTeX, a popular typesetting system in academia. One of LaTeX’s major advantages is its intuitive system for creating visually appealing math equations.
I will go over LaTeX in this article. For equations, you must use a MathTex object rather than a Text object.
Matching Equation Transformation
In mathematics, Step by step Explanation is crucial to understanding any example. At some point, It is required to replace some text with another text while solving any example. By applying this kind of animation, students can easily learn and solve the example. let’s see below.
from manim import *

class MatchingEquation(Scene):

    def construct (self):

        variables = VGroup(MathTex("a"), MathTex("b"), MathTex("c")).arrange_submobjects().shift(UP)

        eq1 = MathTex("{{x}}^2", "+", "{{y}}^2", "=", "{{z}}^2")

        eq2 = MathTex("{{a}}^2", "+", "{{b}}^2", "=", "{{c}}^2")

        eq3 = MathTex("{{a}}^2", "=", "{{c}}^2", "-", "{{b}}^2")

        self.add(eq1)

        self.wait(0.5)

        self.play(TransformMatchingTex(Group(eq1, variables), eq2))

        self.wait(0.5)

        self.play(TransformMatchingTex(eq2, eq3))

        self.wait(0.5)
GIF BY AUTHOR
Inference: Here, we can see that we can transform rendered LaTeX String by using TransformMatchingTex() function. If Tex String Matches, It will replace by mentioned Tex.
Solving Mathematical Equation
A Quadratic Equation is an algebraic Equation that needs to be transformed into the standard form of the quadratic equation before performing further operations. If the transformation of the Equation procedure is shown animatedly, Then it will become easier. So Below example shows step by step transformation of the quadratic Equation.
from manim import *
class MovingFrame(Scene):
     def construct(self):
        # Write equations
        equation = MathTex("2x^2", "-5x", "+2")
        eq_sign = MathTex("=")
        equation1 = MathTex("2x^2", "-4x-x", "+2")
        eq_sign1 = MathTex("=")
        equation2 = MathTex("2x","(x-2)","-1","(x-2)")
        eq_sign2 = MathTex("=")
        equation3 = MathTex("(x-2)","(2x-1)")
        eq_sign3 = MathTex("=")
        equation.next_to(eq_sign, LEFT)
        equation1.next_to(eq_sign, RIGHT)
        self.play(Write(equation))
        self.play(Write(eq_sign))
        self.play(Write(equation1))
        self.wait()
        eq_sign1.shift(DOWN)
        equation2.shift(DOWN)
        # Add moving frames
        framebox1 = SurroundingRectangle(equation[1], buff=.1)
        framebox2 = SurroundingRectangle(equation1[1], buff=.1)
        self.play(Create(framebox1))  # creating the frame
        self.play(ReplacementTransform(framebox1, framebox2))
        # Create animations
        self.play(FadeOut(framebox1))
        self.play(FadeOut(framebox2))
        # Line up bottom equations with the top equations
        eq_sign2.align_to(eq_sign1, LEFT)
        equation2.align_to(equation1, LEFT)
        eq_sign3.next_to(equation2, DOWN*2+LEFT*2)
        equation3.next_to(eq_sign3, RIGHT)
        eq_sign3.align_to(eq_sign1, LEFT)
        equation3.align_to(equation2, LEFT)
        # Group equations and sign
        eq_group = VGroup( eq_sign1, equation2, eq_sign2, eq_sign3, equation3)
        # Create animation
        self.play(Write(eq_group))
        self.wait()

GIF BY AUTHOR
Inference: By default, everything passed to MathTex is in math mode. When mathematical typesetting is required, LaTeX is used. We used MathText, which is a string generated by LaTeX in math mode. So You can also create an animation that writes mathematical equations with a moving frame.
Conclusion
In this article, we have started by Introducing Manim’s basic libraries required for the creation of animation. Then, we seen some python based examples in which we have created beautiful animations with just a few lines of code. People, especially non-technical people who are afraid of math, respond well to visual explanations. Use Manim to help you bridge this gap! Even if you’re not presenting technical information, an amazing Manim animation in your presentation will engage your audience
Key takeaways from this article are:
- Manim is a powerful Python-Based Mathematical animation Engine.
- Mobject animations such as Write, Create, GrowFromCenter, ReplacementTransform, and so on.
- Circles, squares, Triangle, Ellipse, and many other objects on the screen by Mobject.
- You can use LaTex (Tex Mobject) while working with Mathematical equations.
The media shown in this article is not owned by Analytics Vidhya and is used at the Author’s discretion.


