Introduction
Unlock the Power of Data with Machine Learning! With Kubeflow, creating and deploying ML pipelines is no longer complex and time-consuming. Say goodbye to the hassle of managing ML workflows and hello to the simplicity of Kubeflow.
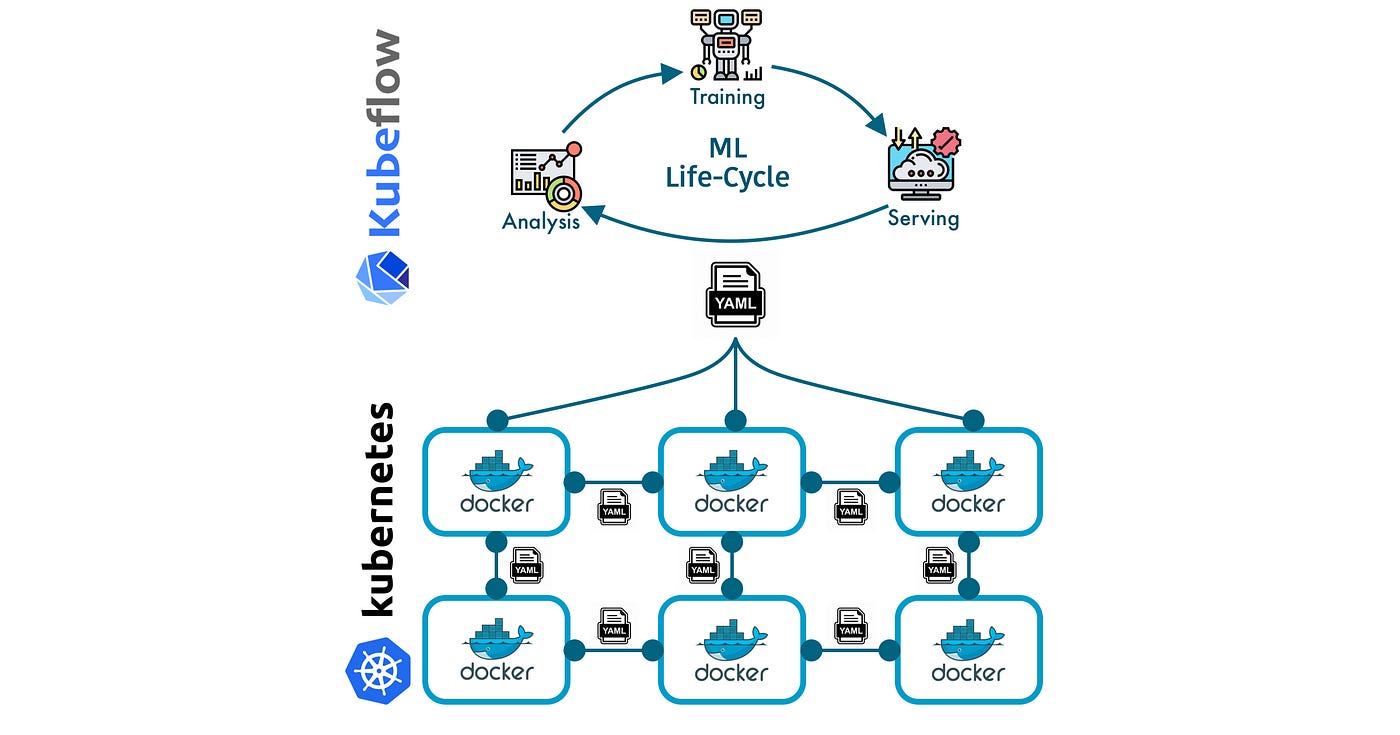
Kubeflow is an open-source platform that makes it easy to turn your data into valuable insights. Built on top of the popular container orchestration platform Kubernetes, Kubeflow provides a one-stop shop for all your ML needs.

Embark on a thrilling adventure with me as I lead you through the steps of creating and deploying a powerful ML pipeline with Kubeflow. Unleash the potential of your data and achieve new levels of data-driven insights and results. Get ready to take your ML capabilities to the next level!
Learning Objectives
- To understand the basic concepts and benefits of using Kubeflow for creating and deploying ML pipelines
- To learn the step-by-step process for creating and deploying an ML pipeline with Kubeflow
- To gain hands-on experience in using Kubeflow to manage ML workflows and deployments
- To understand the importance of retraining and evaluation in the ML pipeline process and how to handle it with Kubeflow
- To appreciate the benefits of using Kubeflow over traditional ML pipeline development and deployment processes.
This article was published as a part of the Data Science Blogathon.
Table of Contents
- Introduction
- An In-Depth Look at the Machine Learning Pipeline
2.1 Preprocessin
2.2 Training and Hyperparameter tuning on CMLE
2.3 Training locally on Kubernetes
2.4 Deploying to Cloud ML Engine
2.5 Compiling the Kubeflow ML Pipeline with DSL Compiler - Upload Kubeflow ML Pipeline to the User Interface
- Experimenting, developing, retraining, and evaluation
4.1 Retraining Model
4.2 Evaluating and Monitoring model performance with Notebooks - Conclusion
1. Creating a Kubernetes Cluster with Permanent Kubeflow Pipeline Installation
To run KFP, a Kubernetes cluster is required. The following command can be used to create a Google Kubernetes Engine (GKE) cluster and enable KFP to manage it (create_cluster.sh in the repository):
#!/bin/bash

CLUSTERNAME=mykfp
ZONE=us-central1-bgcloud config set compute/zone $ZONE
gcloud beta container clusters create $CLUSTERNAME
  --cluster-version 1.11.2-gke.18 --enable-autoupgrade
  --zone $ZONE
  --scopes cloud-platform
  --enable-cloud-logging
  --enable-cloud-monitoring
  --machine-type n1-standard-2
  --num-nodes 4kubectl create clusterrolebinding ml-pipeline-admin-binding --clusterrole=cluster-admin --user=$(gcloud config get-value account)
Creating a GKE cluster can take up to 3 minutes. Therefore, navigating to the GKE section of the GCP console is recommended to ensure that the cluster is started and ready.
Once the cluster is up, you can proceed to install the ML pipelines on the GKE cluster using the following command.
#!/bin/bash
PIPELINE_VERSION=0.1.3
kubectl create -f https://storage.googleapis.com/ml-pipeline/release/$PIPELINE_VERSION/bootstrapper.yaml
While the software installation is in progress, you can continue reading to learn more about the upcoming steps in the process
2. An In-Depth Look at the Machine Learning Pipeline
There are various methods for creating pipelines, including using Python3 and Docker (a “dev-ops” approach) or Jupyter notebooks (a more data-scientist-friendly approach). In this post, we will explore the Python3-Docker mechanism, which can provide a deeper understanding of the underlying processes using the Jupyter notebook method.
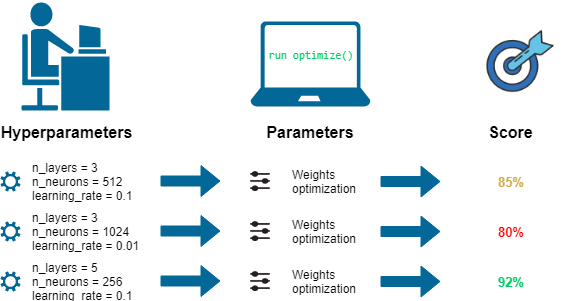
As an example, we will demonstrate the pipeline using a machine-learning model to predict the weight of a baby. The pipeline includes the following steps: (a) extracting data from BigQuery, transforming it, and storing the transformed data in Cloud Storage. (b) Training a TensorFlow Estimator API model and performing hyperparameter tuning. (c) Once the optimal learning rate, batch size, etc., are determined, the model is trained for a longer duration and with more data using those parameters. (d) Deploying the trained model to Cloud ML Engine.
preprocess = dsl.ContainerOp(
  name='preprocess',
  image='gcr.io/cloud-training-demos/babyweight-pipeline-bqtocsv:latest',
  arguments=[
    '--project', project,
    '--mode', 'cloud',
    '--bucket', bucket
  ],
  file_outputs={'bucket': '/output.txt'}
)hparam_train = dsl.ContainerOp(
  name='hypertrain',
  image='gcr.io/cloud-training-demos/babyweight-pipeline-hypertrain:latest',
  arguments=[
    preprocess.outputs['bucket']
  ],
  file_outputs={'jobname': '/output.txt'}
)train_tuned = dsl.ContainerOp(
  name='traintuned',
  image='gcr.io/cloud-training-demos/babyweight-pipeline-traintuned-trainer:latest',
  arguments=[
    hparam_train.outputs['jobname'],
    bucket
  ],
  file_outputs={'train': '/output.txt'}
)
train_tuned.set_memory_request('2G')
train_tuned.set_cpu_request('1')deploy_cmle = dsl.ContainerOp(
  name='deploycmle',
  image='gcr.io/cloud-training-demos/babyweight-pipeline-deploycmle:latest',
  arguments=[
    train_tuned.outputs['train'],  # modeldir
    'babyweight',
    'mlp'
  ],
  file_outputs={
    'model': '/model.txt',
    'version': '/version.txt'
  }
)
Steps in this process are represented as Docker containers, forming a directed acyclic graph where the output of one container serves as the input for the next. This appears as a connected pipeline when viewed in the pipeline UI

Additionally, a fifth step of deploying a web application with a user-friendly interface to interact with the model must also be implemented to complete the full end-to-end solution.
Examine the preprocessing stage:
preprocess = dsl.ContainerOp(
  name='preprocess',
image='gcr.io/cloud-training-demos/babyweight-pipeline-bqtocsv:latest',
  arguments=[
'--project', project,
'--mode', 'cloud',
'--bucket', bucket
  ],
  file_outputs={'bucket': '/output.txt'}
)
It’s important to observe that the preprocessing step utilizes two input parameters, the project, and bucket, and outputs the preprocessed data into /output.txt.
Subsequently, the second step retrieves the bucket name from the preprocessing step’s output, represented by preprocessing. outputs[‘bucket’]. The output of this step, which is the jobname of the most effective hyperparameter tuning trial, is then utilized by the third step as hparam_train.outputs[‘jobname’].
This process is relatively straightforward.
However, it raises two questions: where does the first step obtain the required project and bucket, and how are the individual steps implemented?
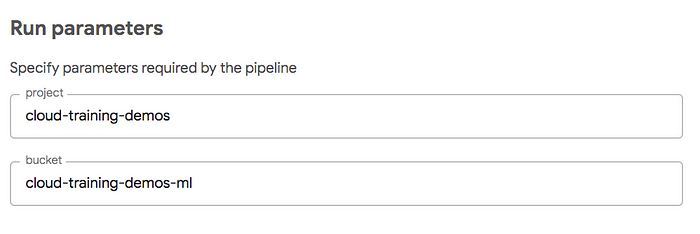
The answer to these questions lies in the pipeline parameters, which provide the project and bucket inputs for the first step
def train_and_deploy(
    project='cloud-training-demos',
    bucket='cloud-training-demos-ml'
):
In essence, the project and bucket parameters will be supplied by the end-user at the time of running the pipeline. The user interface will be pre-configured with default values, which have been previously specified:

The following section will delve into the implementation of each step. As previously mentioned, this explanation will focus on the Python3-Docker method of implementation. For those who prefer a Jupyter-based approach, a separate article will be published to address this in the future. If you are confident that the Docker route is not the right fit for you, feel free to skim this section or proceed directly to Section 3 briefly.
2.1 Preprocessing
In each step of the pipeline, it is necessary to create a Docker container. This container contains a standalone program (such as a bash script, Python code, C++, or any other language) along with its necessary dependencies, allowing it to be executed by KFP on the cluster.
For this example, the preprocessing code is a standalone Python program that utilizes Apache Beam and is intended to run on Cloud Dataflow. The entire code is contained in a single command-line program named transform.py.

The Dockerfile must specify all required dependencies for the program. Fortunately, KFP provides a range of sample containers, one of which includes all the necessary dependencies for this example. To minimize effort, the Dockerfile inherits from this existing container, resulting in a concise 4-line file.
FROM gcr.io/ml-pipeline/ml-pipeline-dataflow-tft:latest
RUN mkdir /babyweight
COPY transform.py /babyweight
ENTRYPOINT ["python", "/babyweight/transform.py"]
The Dockerfile copies the transform.py file into the container and sets it as the entry point, meaning that the file will be executed when the container is run.
Once the Dockerfile is complete, the Docker container can be built and published to the gcr.io registry within the project using the build.sh script.
CONTAINER_NAME=babyweight-pipeline-bqtocsv
docker build -t ${CONTAINER_NAME} .
docker tag ${CONTAINER_NAME}
gcr.io/${PROJECT_ID}/${CONTAINER_NAME}:${TAG_NAME}
docker push gcr.io/${PROJECT_ID}/${CONTAINER_NAME}:${TAG_NAME}
This refers to the specific image name specified for the preprocessing step.
2.2 Training and Hyperparameter Tuning on CMLE

The training and hyperparameter tuning will be performed on Cloud ML Engine
gcloud ml-engine jobs submit training $JOBNAME
  --region=$REGION
  --module-name=trainer.task
  --package-path=${CODEDIR}/babyweight/trainer
  --job-dir=$OUTDIR
  --staging-bucket=gs://$BUCKET
  --scale-tier=STANDARD_1
  --config=hyperparam.yaml
  --runtime-version=$TFVERSION
  --stream-logs
  --
  --bucket=${BUCKET}
  --output_dir=${OUTDIR}
  --eval_steps=10
  --train_examples=20000# write output file for next step in pipeline
echo $JOBNAME > /output.txt
It is important to note the use of the –stream-logs option in the gcloud command. This ensures that the command waits for completion. Additionally, the command output includes the jobname, which is essential for communication between this step and the subsequent step in the pipeline.
For this step, the Dockerfile inherits from a container with gcloud installed. The trainer code is obtained by cloning the relevant repository using the git clone command.
FROM google/cloud-sdk:latestRUN mkdir -p /babyweight/src &&
    cd /babyweight/src &&
    git clone https://github.com/GoogleCloudPlatform/training-data-analyst
COPY train.sh hyperparam.yaml ./
ENTRYPOINT ["bash", "./train.sh"]
2.3 Training locally on Kubernetes
The previous steps of preprocessing and hyperparameter tuning utilized managed services, with KFP only responsible for submitting jobs and allowing the managed services to handle the process.
However, the next training step can be done locally on the KFP running GKE cluster by executing a Docker container that directly runs a Python program. This adds variety and demonstrates the flexibility of KFP.
NEMBEDS=$(gcloud ml-engine jobs describe $HYPERJOB --format 'value(trainingOutput.trials.hyperparameters.nembeds.slice(0))')
TRIALID=$(gcloud ml-engine jobs describe $HYPERJOB --format 'value(trainingOutput.trials.trialId.slice(0))')...OUTDIR=gs://${BUCKET}/babyweight/hyperparam/$TRIALID
python3 -m trainer.task
  --job-dir=$OUTDIR
  --bucket=${BUCKET}
  --output_dir=${OUTDIR}
  --eval_steps=10
  --nnsize=$NNSIZE
  --batch_size=$BATCHSIZE
  --nembeds=$NEMBEDS
  --train_examples=200000
When executing a job on the KFP cluster, it’s important to consider the current resource utilization. The train-turned-container operation reserves the necessary amount of memory and CPU resources to ensure that the cluster has sufficient resources for the task. KFP will schedule the job only when the required resources are available, ensuring efficient use of the cluster’s resources.
train_tuned.set_memory_request('2G')
train_tuned.set_cpu_request('1')
2.4 Deploying to Cloud ML Engine
The deployment to Cloud ML Engine utilizes gcloud, making the deployment process similar to the previous steps, as seen in the deploy.sh and build.sh scripts within that directory.
gcloud ml-engine versions create ${MODEL_VERSION}
       --model ${MODEL_NAME} --origin ${MODEL_LOCATION}
       --runtime-version $TFVERSIONecho $MODEL_NAME > /model.txt
echo $MODEL_VERSION > /version.txt
and
FROM google/cloud-sdk:latest
RUN mkdir -p /babyweight/src &&
    cd /babyweight/src &&
    git clone https://github.com/GoogleCloudPlatform/training-data-analyst
COPY deploy.sh ./
ENTRYPOINT ["bash", "./deploy.sh"]
Similarly, deployment can also be performed on the Kubernetes cluster itself, as demonstrated by this component example
2.5 Compiling the Kubeflow ML Pipeline with DSL Compiler
To complete the pipeline setup, the pipeline code needs to be compiled into a domain-specific language (DSL) format. This is done using the DSL-compile tool that comes with the KFP Python3 SDK. Before compiling the pipeline, it is necessary to install the SDK by executing the script 3_install_sdk.sh
pip3 install python-dateutil
https://storage.googleapis.com/ml-pipeline/release/0.1.2/kfp.tar.gz --upgrade
Now, compile the Domain-Specific-Language (DSL) using the following command.
python3 mlp_babyweight.py mlp_babyweight.tar.gz
Alternatively, you can add the directory that contains dsl-compile to your PATH through the following steps:”
export PATH=”$PATH:`python -m site --user-base`/bin
And invoke the compiler by running the following command:
dsl-compile --py
mlp_babyweight.py --output mlp_babyweight.tar.gz
The result of compiling the pipeline’s Python3 file is a tar archive file, which you will then upload to the ML Pipelines user interface in the next step (Section 3).
3. Upload Kubeflow ML Pipeline to the User Interface
Establishing a connection between the GKE cluster and your local machine can be achieved through port forwarding. This will allow you to access the user interface server, which is running on port 80 on the GKE cluster, from your laptop on port 8085.
The process of setting up this connection can be accomplished using the script 4_start_ui.sh.
export NAMESPACE=kubeflow
kubectl port-forward -n ${NAMESPACE} $(kubectl get pods -n ${NAMESPACE} --selector=service=ambassador -o jsonpath='{.items[0].metadata.name}') 8085:80
To create an experiment and run a pipeline, access the KFP user interface at http://localhost:8085/pipeline and switch to the Pipelines tab. Upload the tar.gz file compiled in Section 2e. To start an experiment, create a new experiment and give it a name, such as “blog.”
Then, within the experiment, create a new run and give it a name, such as “try1”. Finally, set the pipeline to the one that was uploaded earlier.

4. Experimenting, Developing, Retraining, and Evaluation
The full source code for this pipeline implementation includes various aspects that were not fully explained in the previous steps. It is common for the code to require multiple iterations and modifications before it runs seamlessly.
To streamline the debugging and testing process, the pipeline was designed to allow starting at any step while ensuring that each step depends on the output of the previous one. A solution was devised to address this requirement.
if start_step <= 2:
    hparam_train = dsl.ContainerOp(
      name='hypertrain',
      # image needs to be a compile-time string
      image='gcr.io/cloud-training-demos/babyweight-pipeline-hypertrain:latest',
      arguments=[
        preprocess.outputs['bucket']
      ],
      file_outputs={'jobname': '/output.txt'}
    )
  else:
    hparam_train = ObjectDict({
      'outputs': {
        'jobname': 'babyweight_181008_210829'
      }
    })
Essentially, the container operation is only executed if the start_step is less than or equal to 2. If it is greater than 2, a dictionary with a predefined output from the previous step is created instead. This allows for more efficient development, as you can set the start_step to be 4 and start at the fourth step while still having the necessary inputs from the previous steps.
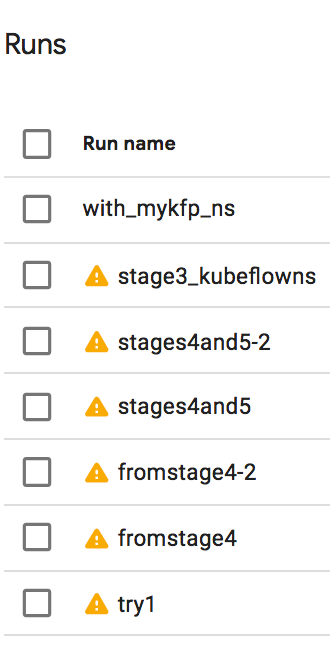
My experiment consisted of several runs:

My experiment consisted of several iterations, each with different configurations and parameters. For instance, run ‘try1’ failed after successfully executing three steps, and I had to start from step 4. It took me two attempts to complete step 4 correctly. Afterward, I added step 5, which involved deploying an AppEngine application to host the web service. I then revisited step 3 and experimented with different variations.
4.1 Retraining Model

Of course, a model’s training doesn’t stop after a single run. As more data becomes available, the model needs to be retrained. For example, in our baby weight model, retraining may occur once we have an additional year of data. I have included a starter as an input parameter to accommodate this in the pipeline.
def train_and_deploy(
    project=dsl.PipelineParam(name='project', value='cloud-training-demos'),
    bucket=dsl.PipelineParam(name='bucket', value='cloud-training-demos-ml'),
    startYear=dsl.PipelineParam(name='startYear', value='2000')
):
The preprocessing code in the “bqtocsv” step filters out all rows that occur before the specified start year. This allows for retraining the model on updated data by simply adjusting the start year input parameter.
WHERE year >= start_year
And names the output files in such a way that they don’t overwrite previous outputs.
os.path.join(OUTPUT_DIR, 'train_{}.csv', start_year)
Handling retraining is an important aspect of Machine Learning pipelines. In our case, the preprocessing code in the bqtocsv step filters only the data from the specified start year, ensuring that the training happens on a larger and more recent dataset. The output files are also named to prevent them from overwriting previous outputs.
4.2 Evaluating and Monitoring Model Performance with Notebooks
Before deploying a trained model to production, it is crucial to conduct a proper evaluation and potentially perform A/B testing. The evaluation process helps ensure the model’s reliability and effectiveness before full implementation. In the case of the baby weight model, the code was easily Dockerized as it was mostly written in Python. However, many machine learning models are developed using Jupyter notebooks.
The process of evaluating models developed in Jupyter notebooks and converting them into pipelines is a topic that deserves a separate discussion. Stay tuned for future updates on this subject.
Conclusion
In conclusion, Kubeflow is an open-source platform that provides a set of tools and frameworks for building, deploying, and managing ML pipelines. The platform is built on top of Kubernetes, making it easy to manage and scale the pipelines. With the help of this guide, you should now have a clear understanding of the steps involved in creating and deploying an ML pipeline with Kubeflow.
Key takeaways:
- Kubeflow is an open-source platform for managing ML pipelines.
- The platform is built on top of Kubernetes, making it scalable and easy to manage.
- The guide covers the steps involved in creating and deploying an ML pipeline with Kubeflow.
- The process includes training, evaluation, deployment, and retraining of the model.
- Kubeflow Pipelines (KFP) is an important tool for operationalizing machine learning models.
Feel free to connect with me on Linkedin.
The media shown in this article is not owned by Analytics Vidhya and is used at the Author’s discretion.


