Introduction
In this fast-changing landscape of AI, efficiency and scalability become paramount. Developers are actively reaching out to those models that provide high performance at a reduced cost with lower latency and better scalability. Enter Gemini Flash 1.5 a new release that retains all the great features of Gemini 1.1 and offers even better performance for many image-related tasks. Specifically, As a part of the Gemini 1.5 release, which also includes the Gemini 1.5 Pro variant, Flash 1.5 stands out as a model to make fast, efficient, and high-volume tasks possible. Now, let’s consider the importance of Gemini Flash 1.5 in this blog and make a Food Vision WebApp with Flask.
Learning Outcomes
- Understand the key features and performance improvements of Gemini Flash 1.5.
- Learn how to integrate and use the Gemini Flash 1.5 model in a Flask web application.
- Gain insights into the importance of lightweight AI models for high-volume tasks.
- Discover the process of creating a Food Vision WebApp using Flask and Gemini Flash 1.5.
- Explore the steps for configuring and using Google AI Studio’s Gemini Flash 1.5.
- Identify the benefits of using JSON schema mode for structured AI model outputs.
This article was published as a part of the Data Science Blogathon.
Table of contents
Need for Lightweight AI Models
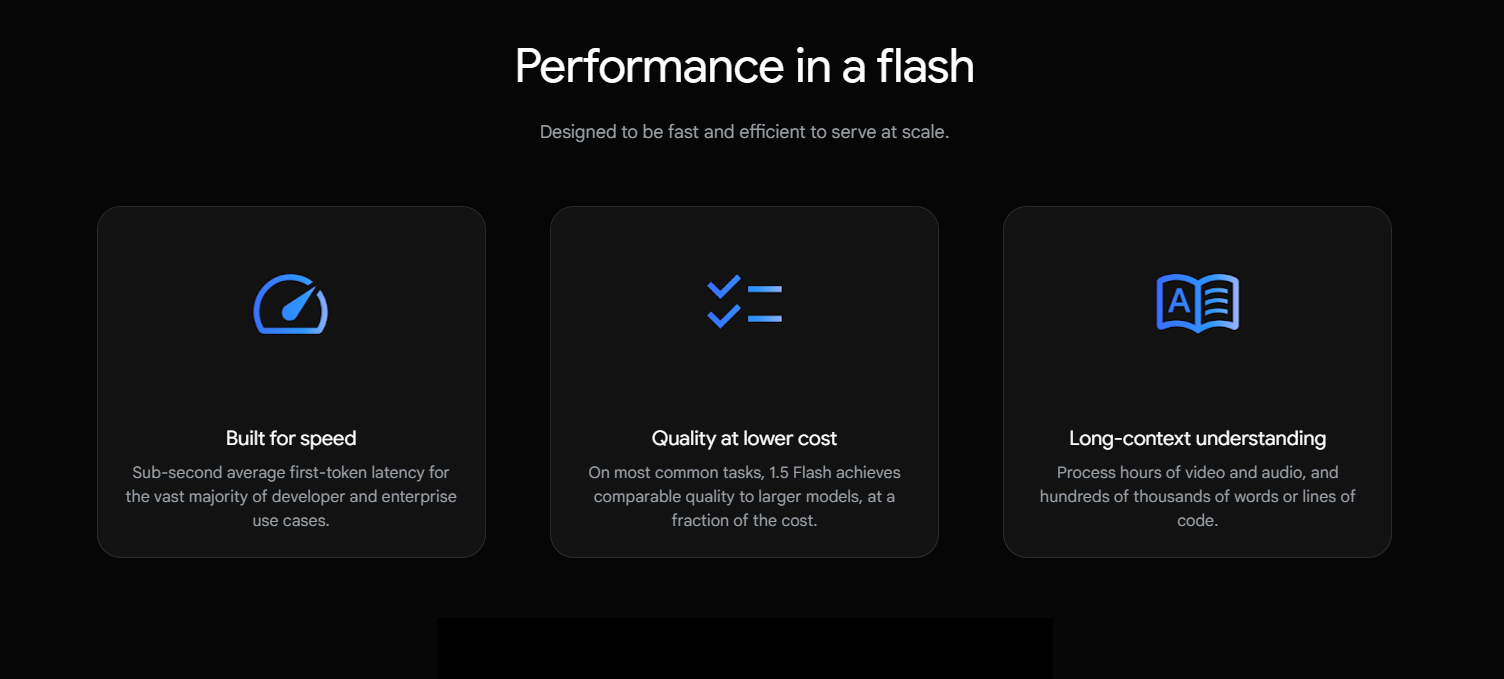
With the integration of AI into different industries, fast and efficient models to process high amounts of data are therefore needed. Traditional AI models are very resource-intensive, usually high in latency, and low in scaling. This creates a huge challenge, especially to developers working on applications that require real-time responses or which are field-deployed on resource-constrained environments such as mobile devices or edge computing platforms.
Recognizing these challenges, Google introduced the Gemini Flash 1.5 model—a lightweight AI solution tailored to meet the needs of modern developers. Gemini Flash 1.5 is designed to be cost-efficient, fast, and scalable, making it an ideal choice for high-volume tasks where performance and cost are critical considerations.
Key Features of Gemini Flash 1.5
- Enhanced Performance and Scalability: One of the most significant updates in Gemini Flash 1.5 is its focus on performance and scalability. Google has increased the rate limit for Gemini Flash 1.5 to 1000 requests per minute (RPM), a substantial improvement that allows developers to handle more significant workloads without compromising on speed. Additionally, the removal of the daily request limit further enhances its usability, enabling continuous processing without interruptions.
- Tuning Support: Customization and adaptability are key components of successful AI implementations. To support this, Google is rolling out tuning support for Gemini Flash 1.5, allowing developers to fine-tune the model to meet specific performance thresholds. Tuning is supported both in Google AI Studio and directly via the Gemini API. This feature is particularly valuable for developers looking to optimize the model for niche applications or specific data sets. Importantly, tuning jobs are free of charge, and using a tuned model does not incur additional per-token costs, making it an attractive option for cost-conscious developers.
- JSON Schema Mode: Another notable feature in Gemini Flash 1.5 is the introduction of JSON schema mode. This mode gives developers more control over the model’s output by allowing them to specify the desired JSON schema. This flexibility is crucial for applications that require structured output, such as data extraction, API responses, or integration with other systems. By conforming to a specified schema, Gemini Flash 1.5 can be seamlessly integrated into existing workflows, enhancing its versatility.
Getting Started with Flask
Flask is a lightweight micro web framework that allows developers to build web applications using Python. It’s called a “micro” framework because it doesn’t require a lot of setup or configuration, unlike other frameworks like Django. Flask is perfect for building small to medium-sized web applications, prototyping, and even large-scale applications with the right architecture.
Key Features of Flask
- Lightweight: Flask has a small codebase and doesn’t require a lot of dependencies, making it easy to learn and use.
- Flexible: Flask can be used for building a wide range of web applications, from simple web pages to complex web services.
- Modular: Flask has a modular design, making it easy to extend and customize.
- Unit Testing: Flask has built-in support for unit testing, making it easy to write and run tests.
Getting Started with Flask
Flask is a lightweight micro web framework that allows developers to build web applications using Python. It’s perfect for building small to medium-sized web applications, prototyping, and even large-scale applications with the right architecture.
Key Features of Flask
- Lightweight: Small codebase with minimal dependencies, easy to learn and use.
- Flexible: Suitable for a wide range of web applications.
- Modular: Easy to extend and customize.
- Unit Testing: Built-in support for unit testing.
Flask App Example
from flask import Flask

app = Flask(__name__)

@app.route("/")
def hello_world():
    return "<p>Hello, World!</p>"

if __name__ == "__main__":
    app.run(debug=True)
Output:
Read the Flask Documentation for more details
Food Vision WebApp: Overview of Project Organization
The Food Vision WebApp is organized into several key components: a virtual environment folder (myenv/), static files for frontend assets (static/), HTML templates (templates/), and a main application file (app.py). The .env file stores sensitive configuration details. This structure ensures a clean separation of concerns, making the project easier to manage and scale.
Folder Structure
This section outlines the folder structure of the Food Vision WebApp, detailing where various components are located. Understanding this organization is crucial for maintaining and expanding the application efficiently.
myenv/             # folder for virtual environment
│
static/            # Folder for static files
│   ├── scripts.js
│   └── styles.css
│
templates/         # Folder for HTML templates
│   └── index.html
│
.env               # Environment variables file
app.py             # Main application file
Create a Virtual Environment
Creating a virtual environment ensures that your project dependencies are isolated from the global Python environment. Follow these steps to set up and activate a virtual environment for the Food Vision WebApp.
python -m venv myenvActivate in Windows (Command Prompt)
.\myenv\Scripts\activateActivating in Windows (PowerShell)
.\myenv\Scripts\Activate.ps1Activate in macOS/Linux (Bash/Zsh)
source myenv/bin/activateInstall these Dependencies
Install the required Python packages to run the Food Vision WebApp effectively. These dependencies include libraries for web development, image processing, and environment management.
pip install google-generativeai
pip install flask
pip install pillow
pip install python-dotenv
HTML Template: Designing the User Interface
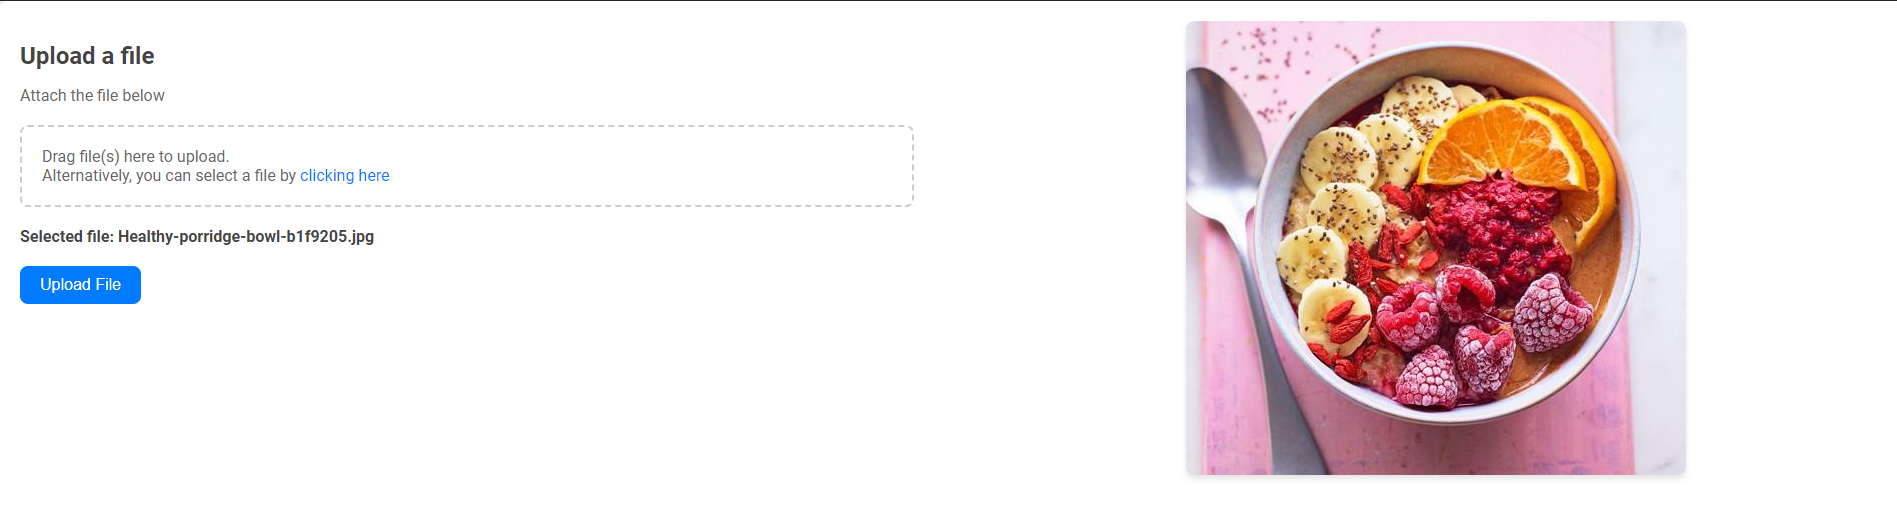
The HTML template provides the structure for the Food Vision WebApp’s front-end. This section covers the layout, file upload form, and placeholders for displaying the uploaded image and results.
<!-- templates/index.html -->
<!DOCTYPE html>
<html lang="en">
<head>
    <meta charset="UTF-8">
    <meta name="viewport" content="width=device-width, initial-scale=1.0">
    <title>Nutrify</title>
    <link rel="stylesheet" href="{{ url_for('static', filename='styles.css') }}">
    <script src="{{ url_for('static', filename='scripts.js') }}" defer></script>
</head>
<!-- templates/index.html -->
    <body>
        <div class="container">
            <div class="upload-section">
                <div class="upload-form">
                    <h2>Upload a file</h2>
                    <p>Attach the file below</p>
                    <form id="uploadForm" method="post" enctype="multipart/form-data">
                        <div class="upload-area" id="uploadArea">
                            <input type="file" id="uploadInput" name="uploadInput" accept=".jpg, .jpeg, .png" required>
                            <label for="uploadInput">Drag file(s) here to upload.<br>Alternatively, you can select a file by <a href="#" onclick="document.getElementById('uploadInput').click(); return false;">clicking here</a></label>
                        </div>
                        <div id="fileName" class="file-name"></div>
                        <button type="submit" id="submitBtn">Upload File</button>
                    </form>
                    <div id="loadingIndicator" style="display: none;">
                        <div class="spinner"></div>
                        <p>Loading...</p>
                    </div>
                </div>
                <div id="imageDisplay" class="image-display"></div>
            </div>
            <div id="responseOutput" class="response-output"></div>
        </div>


</body>
</html>
CSS: Styling the WebApp
The CSS file enhances the visual presentation of the Food Vision WebApp. It includes styles for layout, buttons, loading indicators, and responsive design to ensure a seamless user experience.
body {
    font-family: 'Roboto', sans-serif;
    background-color: #f4f4f4;
    margin: 0;
    padding: 0;
    color: #333;
    overflow-y: auto; /* Allows scrolling as needed */
    min-height: 100vh; /* Ensures at least full viewport height */
    display: flex;
    flex-direction: column; /* Adjusts direction for content flow */
}
.center-container {
    display: flex;
    align-items: center;
    justify-content: center;
    flex-grow: 1; /* Allows the container to expand */
}

.container {
    display: flex;
    flex-direction: column;
    justify-content: center;
    align-items: center;
    width: 100%;
    max-width: 100%;
    padding: 20px;
    background-color: #fff;
    box-shadow: 0 5px 15px rgba(0, 0, 0, 0.1);
    border-radius: 8px;
    flex-grow: 1;
    box-sizing: border-box; /* Add this line */
}

.upload-section {
    display: flex;
    width: 100%;
    justify-content: space-between;
    align-items: flex-start;
    margin-bottom: 20px;
}

.upload-form {
    width: 48%;
}

.image-display {
    width: 48%;
    text-align: center;
}

h2 {
    color: #444;
    margin-bottom: 10px;
}

p {
    margin-bottom: 20px;
    color: #666;
}

/* Upload area styles */
.upload-area {
    border: 2px dashed #ccc;
    border-radius: 8px;
    padding: 20px;
    margin-bottom: 20px;
    cursor: pointer;
}

.upload-area input[type="file"] {
    display: none;
}

.upload-area label {
    display: block;
    color: #666;
    cursor: pointer;
}

.upload-area a {
    color: #007bff;
    text-decoration: none;
}

.upload-area a:hover {
    text-decoration: underline;
}

.file-name {
    margin-bottom: 20px;
    font-weight: bold;
    color: #444;
}

/* Button styles */
button {
    padding: 10px 20px;
    border: none;
    border-radius: 8px;
    cursor: pointer;
    font-size: 1em;
    transition: background-color 0.3s ease, transform 0.2s ease;
    background-color: #007bff;
    color: #fff;
}

button:hover {
    background-color: #0056b3;
    transform: translateY(-2px);
}

/* Loading indicator styles */
#loadingIndicator {
    display: none;
    text-align: center;
    margin-top: 20px;
}

.spinner {
    border: 4px solid rgba(0, 0, 0, 0.1);
    border-top: 4px solid #007bff;
    border-radius: 50%;
    width: 40px;
    height: 40px;
    animation: spin 1s linear infinite;
    margin: 0 auto;
}

@keyframes spin {
    0% { transform: rotate(0deg); }
    100% { transform: rotate(360deg); }
}

/* Image display styles */
#imageDisplay img {
    max-width: 100%;
    height: auto;
    border-radius: 8px;
    box-shadow: 0 4px 6px rgba(0, 0, 0, 0.1);
}

/* Response output styles */
.response-output {
    width: 100%;
}

#responseOutput {
    text-align: left;
    margin-top: 20px;
}

#responseOutput h2 {
    color: #333;
    margin-bottom: 10px;
    font-size: 1.5em;
}

#responseOutput pre {
    white-space: pre-wrap;
    padding: 10px;
    background-color: #f9f9f9;
    border: 1px solid #ddd;
    border-radius: 8px;
    font-size: 1em;
}
Flask Application (app.py)
The app.py file powers the Food Vision WebApp by managing routes and handling image uploads. It integrates with the Gemini Flash 1.5 model to provide nutritional analysis and responses.
Step1: Setting Up Essential Libraries
This section imports the necessary libraries and modules for the Flask application. These include Flask for web development, google.generativeai for interacting with the Gemini API, and PIL for image processing.
from flask import Flask,render_template,request, redirect, url_for,jsonify
import google.generativeai as genai
from PIL import Image
import base64
import io
import os
Step2: Gemini API Configuration
Here, you configure the Gemini AI library using your API key. This setup ensures that the application can communicate with the Gemini API to process image data and generate nutritional information.
my_api_key_gemini = os.getenv('GOOGLE_API_KEY')
genai.configure(api_key=my_api_key_gemini)
Step3: Getting the API Key
Obtain your API key from the Google AI Studio. This key is crucial for authenticating requests to the Gemini API.
Go to Google AI Studio here and get your API key.

Step4: Store Your API key in .env file
Save your API key in a .env file to keep it secure and easily accessible. The application retrieves the key from this file to configure the Gemini API.
GOOGLE_API_KEY="Your_API_KEY"- my_api_key_gemini = os.getenv(‘GOOGLE_API_KEY’): This retrieves your Google API key from an environment variable named GOOGLE_API_KEY.
- genai.configure(api_key=my_api_key_gemini): This configures the Gemini AI library to use your API key for making requests.
Step5: Creating routes
In this step, you create the routes for the Flask application. These routes handle requests and responses, including rendering the homepage and processing file uploads.
app = Flask(__name__)

@app.route('/')
def index():
    return render_template('index.html')
Step6: Creating Flask Route
Creating a well-structured Flask route for handling an image upload, processing it, and sending it to the Gemini Flash 1.5.
@app.route('/upload', methods=['POST'])
def upload():
    uploaded_file = request.files['uploadInput']

    if uploaded_file:
        image = Image.open(uploaded_file)

        # Ensure correct mime type based on file extension
        if uploaded_file.filename.endswith('.jpg') or uploaded_file.filename.endswith('.jpeg'):
            mime_type = 'image/jpeg'
        elif uploaded_file.filename.endswith('.png'):
            mime_type = 'image/png'
        else:
            return jsonify(error='Unsupported file format'), 400

        # Encode image to base64 for sending to API
        buffered = io.BytesIO()
        image.save(buffered, format=image.format)
        encoded_image = base64.b64encode(buffered.getvalue()).decode('utf-8')

        image_parts = [{
            "mime_type": mime_type,
            "data": encoded_image
        }]

        input_prompt = """
            You are an expert in nutritionist where you need to see the food items from the image
            and calculate the total calories, also provide the details of every food items with calories intake
            is below format

            1. Item 1 - no of calories, protein
            2. Item 2 - no of calories, protein
            ----
            ----
            Also mention disease risk from these items
            Finally you can also mention whether the food items are healthy or not and Suggest Some Healthy Alternative
            is below format
            1. Item 1 - no of calories, protein
            2. Item 2 - no of calories, protein
            ----
            ----
        """

        # Simulate API response
        model1 = genai.GenerativeModel('gemini-1.5-flash')
        response = model1.generate_content([input_prompt, image_parts[0]])
        result = response.text

        return jsonify(result=result, image=encoded_image)

    return jsonify(error='No file uploaded'), 400
Step7: Running the Application
Execute the Flask app with app.run(debug=True) to start the server. This provides a local development environment where you can test and debug the application.
from flask import Flask,render_template,request, redirect, url_for,jsonify
import google.generativeai as genai
from PIL import Image
import base64
import io
import os
my_api_key_gemini = os.getenv('GOOGLE_API_KEY')
genai.configure(api_key=my_api_key_gemini)
app = Flask(__name__)

@app.route('/')
def index():
    return render_template('index.html')

@app.route('/upload', methods=['POST'])
def upload():
    uploaded_file = request.files['uploadInput']

    if uploaded_file:
        image = Image.open(uploaded_file)

        # Ensure correct mime type based on file extension
        if uploaded_file.filename.endswith('.jpg') or uploaded_file.filename.endswith('.jpeg'):
            mime_type = 'image/jpeg'
        elif uploaded_file.filename.endswith('.png'):
            mime_type = 'image/png'
        else:
            return jsonify(error='Unsupported file format'), 400

        # Encode image to base64 for sending to API
        buffered = io.BytesIO()
        image.save(buffered, format=image.format)
        encoded_image = base64.b64encode(buffered.getvalue()).decode('utf-8')

        image_parts = [{
            "mime_type": mime_type,
            "data": encoded_image
        }]

        input_prompt = """
            You are an expert in nutritionist where you need to see the food items from the image
            and calculate the total calories, also provide the details of every food items with calories intake
            is below format

            1. Item 1 - no of calories, protein
            2. Item 2 - no of calories, protein
            ----
            ----
            Also mention disease risk from these items
            Finally you can also mention whether the food items are healthy or not and Suggest Some Healthy Alternative
            is below format
            1. Item 1 - no of calories, protein
            2. Item 2 - no of calories, protein
            ----
            ----
        """

        # Simulate API response (replace with actual API call)
        model1 = genai.GenerativeModel('gemini-1.5-flash')
        response = model1.generate_content([input_prompt, image_parts[0]])
        result = response.text

        return jsonify(result=result, image=encoded_image)

    return jsonify(error='No file uploaded'), 400

if __name__ == "__main__":
    app.run(debug=True)
Output:
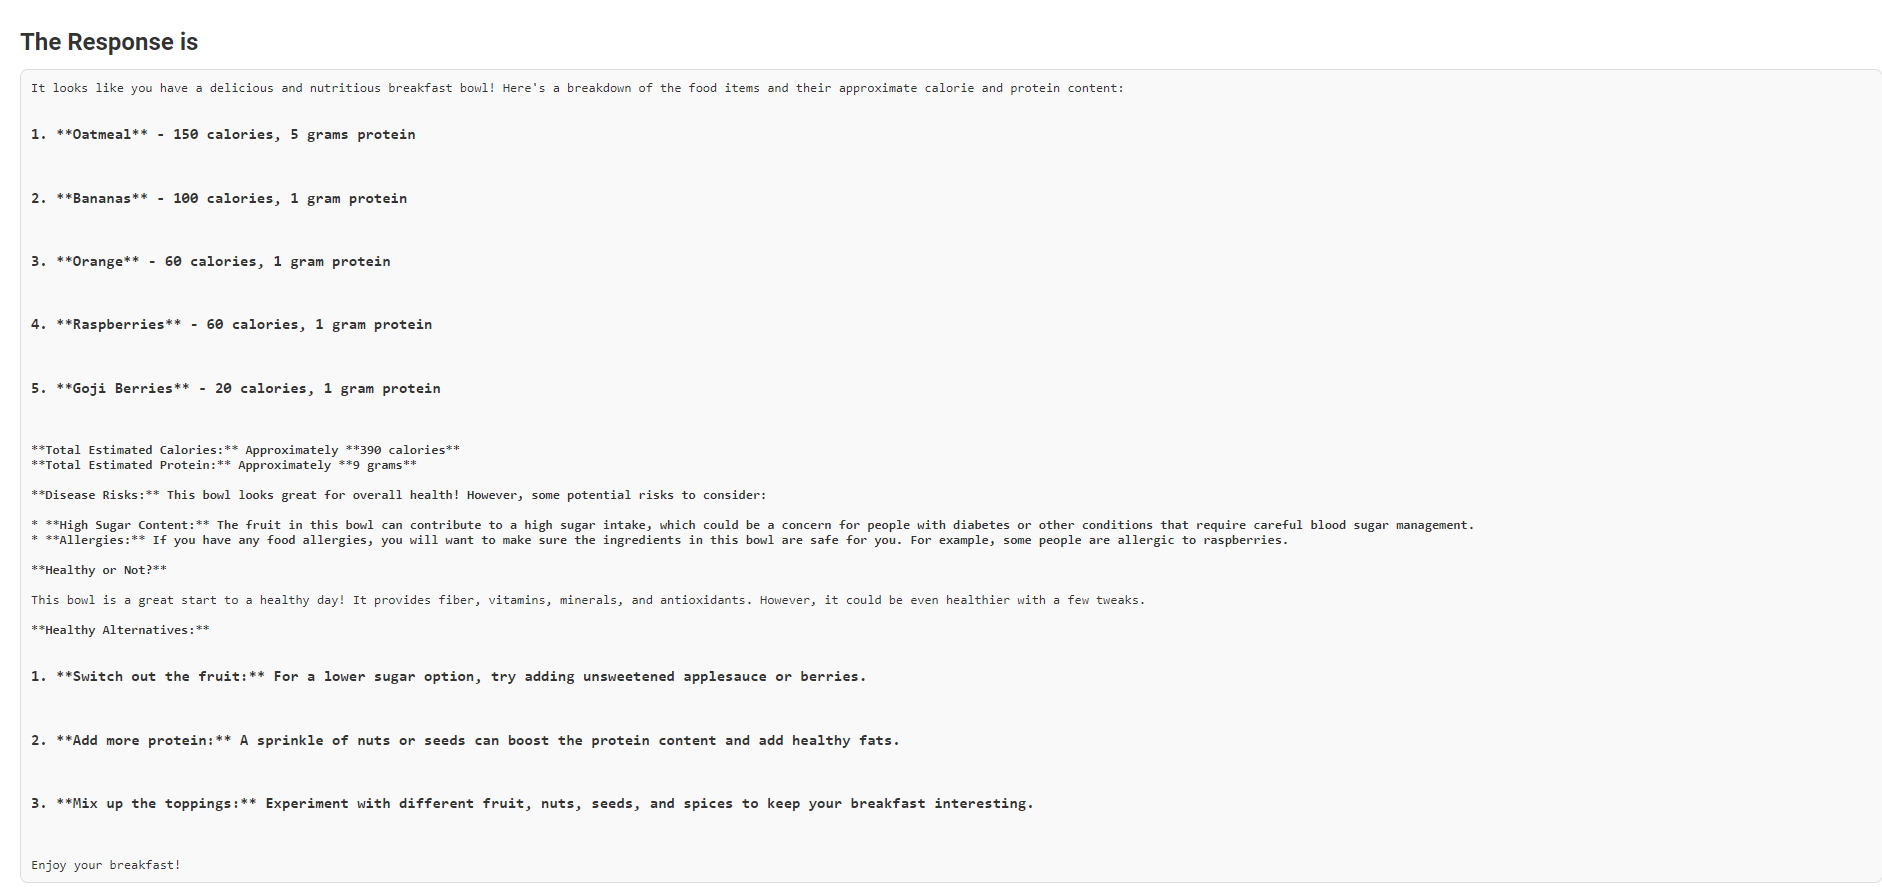
The output will be a JSON response containing the nutritional analysis and health recommendations based on the uploaded food image. The analysis includes details like calories, protein content, potential health risks, and suggestions for healthier alternatives.
Get the code from my GitHub Repo: here.
Conclusion
Gemini Flash 1.5 advances the state of AI models by addressing core requirements with enhanced speed, efficiency, and scalability. It aims to meet the demands of today’s fast-moving digital world. Armed with quite a few powerful performance features, flexible tuning support, and broadened scope in text, image, and structured data tasks, Gemini Flash 1.5 empowers developers to build highly creative AI solutions with power and cost-effectiveness. It is lightweight, high in volume for processing; hence, it serves as a very good choice for real-time mobile apps and large enterprise systems.
Key Takeaways
- Gemini Flash 1.5 optimizes high-volume tasks. It features fast processing, with as many as 1000 requests per minute, making it quite ideal for applications that require real-time responses.
- It provides tuning support so that developers can further tune the model to meet specific requirements without incurring extra cost, hence making it adaptable for use cases.
- It now supports text, JSON, and images, so Gemini Flash 1.5 can do everything from image classification to structured data output.
- Google AI Studio provides an accessible platform for integrating and managing Gemini Flash 1.5, with features like JSON schema mode and mobile support enhancing the overall developer experience.
- The removal of the daily request limit and the ability to handle a large number of requests per minute make Gemini Flash 1.5 suitable for scalable applications, from mobile apps to large-scale enterprise solutions.
Frequently Asked Questions
Q1. What is Gemini Flash 1.5?
A. Gemini Flash 1.5 is a lightweight, cost-efficient AI model developed by Google, optimized for high-volume tasks with low latency. It is part of the Gemini 1.5 release, alongside the Gemini 1.5 Pro variant.
Q2. How does Gemini Flash 1.5 differ from Gemini 1.5 Pro?
A. Gemini Flash 1.5 is designed for faster and more cost-effective processing, making it ideal for high-volume tasks. While both models share similarities, Flash 1.5 optimizes speed and scalability for scenarios where these factors are critical.
Q3. What are the key features of Gemini Flash 1.5?
A. Key features include enhanced performance with 1000 requests per minute, tuning support for customization, JSON schema mode for structured outputs, and mobile support with light mode in Google AI Studio.
Q4. Can I fine-tune the Gemini Flash 1.5 model?
A. Yes, tuning support is available for Gemini Flash 1.5, allowing you to customize the model according to your specific needs. Tuning is currently free of charge, with no additional per-token costs.
Q5. Does Gemini Flash 1.5 support image processing?
A. Yes, Gemini Flash 1.5 supports image processing, making it suitable for tasks such as image classification and object detection, in addition to text and JSON handling.
The media shown in this article is not owned by Analytics Vidhya and is used at the Author’s discretion.
Hi I'm Gourav, a Data Science Enthusiast with a medium foundation in statistical analysis, machine learning, and data visualization. My journey into the world of data began with a curiosity to unravel insights from datasets.