Introduction
Have you ever spent hours perfecting a spreadsheet, only to worry that someone else might unintentionally (or intentionally!) mess with your carefully crafted data? I’ve been there, and it’s not a fun place to be. Excel is an incredibly powerful tool that many of us rely on for everything from simple lists to complex data analysis. But with that power comes the need to protect your work. That’s where locking cells in Excel comes into play—a simple yet effective way to keep your data safe from unwanted changes.
Overview
- Discover how locking cells in Excel can protect your carefully crafted data from unintended changes.
- Learn how to secure specific cells in Excel to safeguard critical information while collaborating with others.
- Understand the steps to fully protect your worksheet fully, ensuring that locked cells remain secure.
- Find out how to selectively lock essential cells and formulas to prevent accidental edits.
- Explore the importance of locking Excel cells to maintain data integrity and peace of mind in shared work environments.
Table of contents
The Basics of Locking Cells in Excel
Locking cells in Excel is like putting your work in a digital vault. It ensures that specific cells or even an entire sheet can’t be altered without your permission. Imagine you’re sharing a budget spreadsheet with a team and want them to update only the spending categories, not the formulas or totals. By locking certain cells, you’re safeguarding those critical calculations while still allowing for collaboration.
Here’s how you can lock cells in Excel:
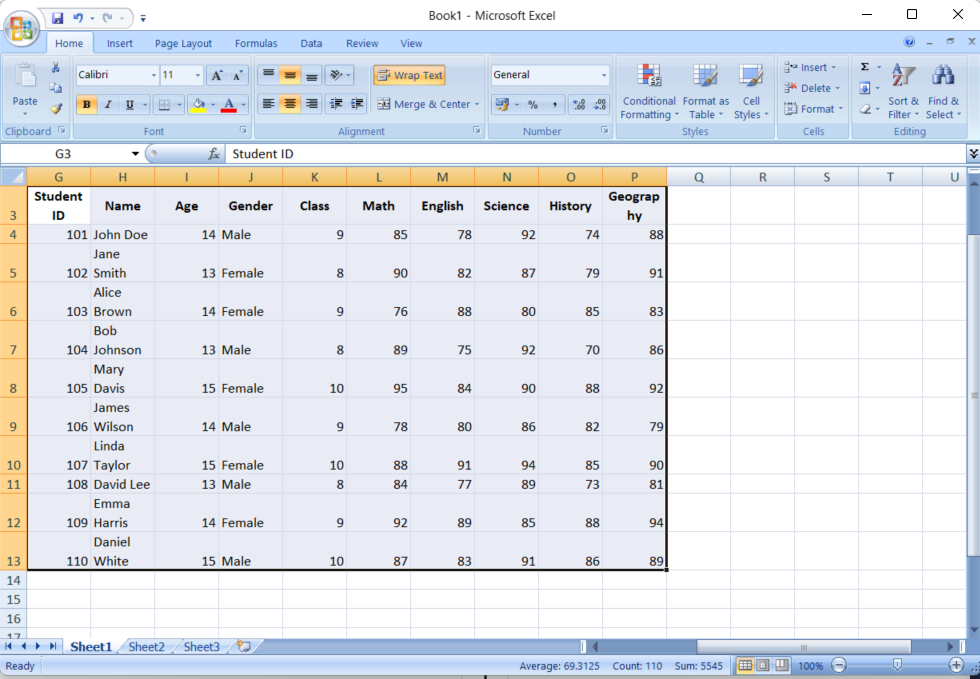
- Select the Cells You Want to Lock: Name the cells you wish to protect. If you’re locking all cells, you can skip this step.
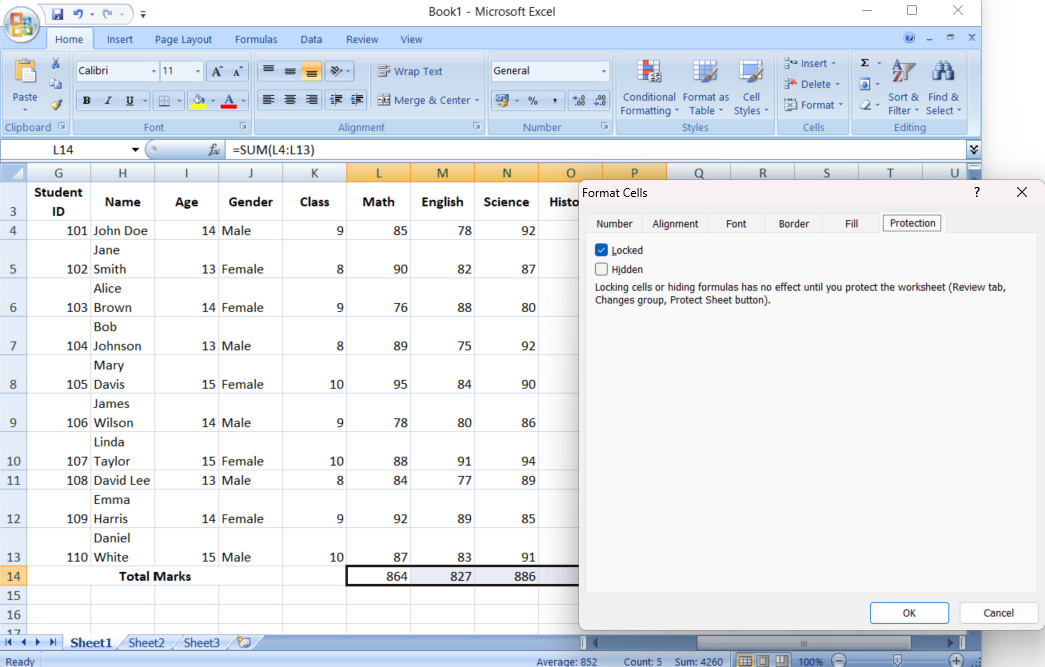
- Open the Format Cells Dialog: Right-click on the selected cells and choose “Format Cells,” or navigate to the “Home” tab and click on “Format” in the ribbon, then select “Format Cells.”
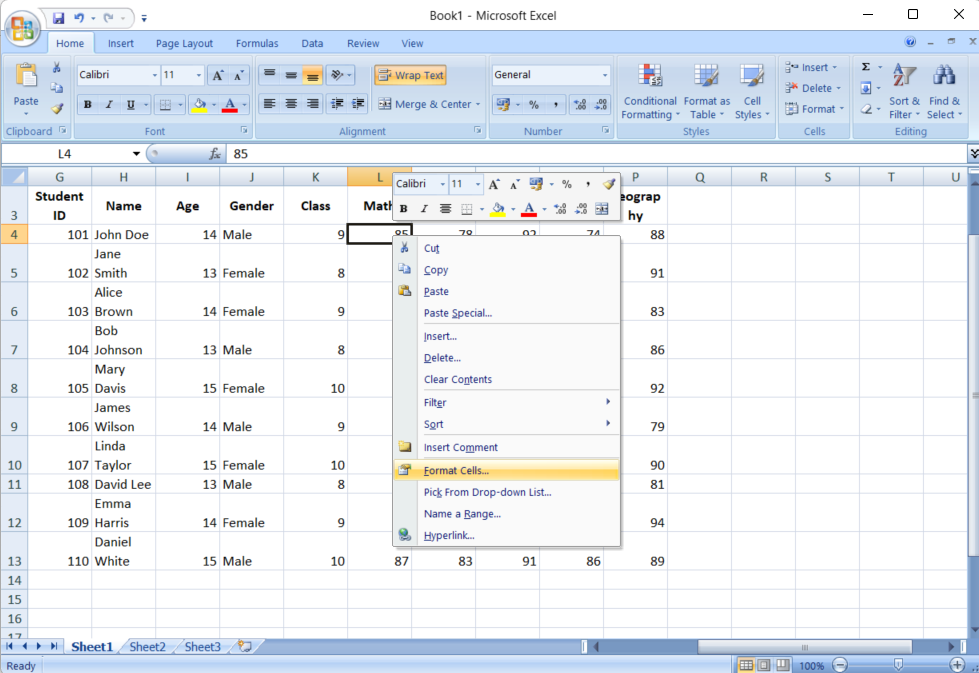
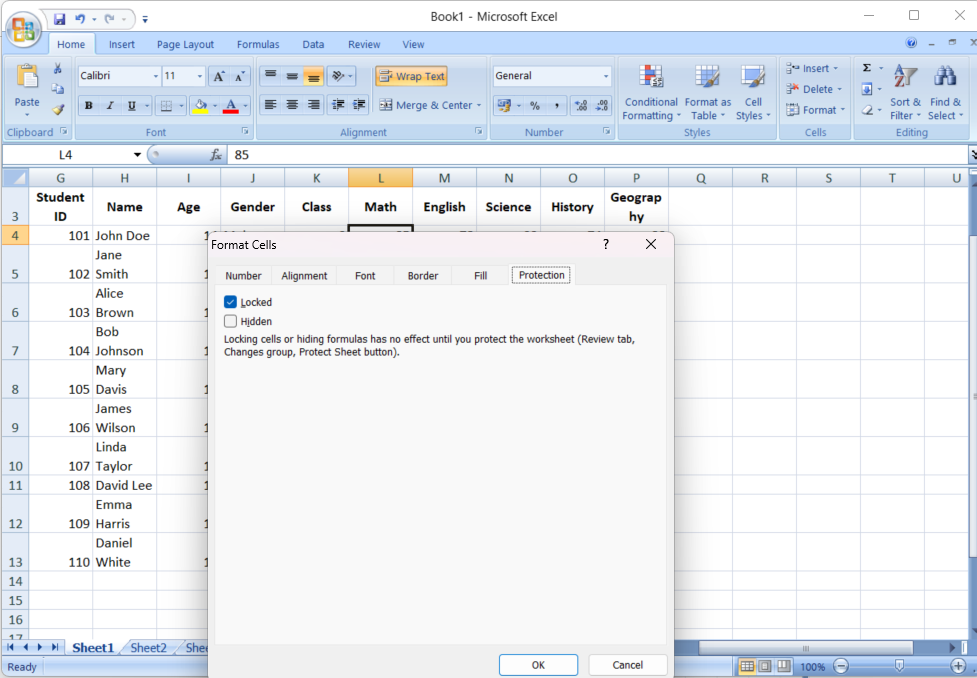
- Lock the Cells: Go to the “Protection” tab in the Format Cells dialog and check the box next to “Locked.” This action only marks the cells for locking; you’ll still need to protect the sheet to enforce it.
Also read: Microsoft Excel for Data Analysis
Protecting the Worksheet
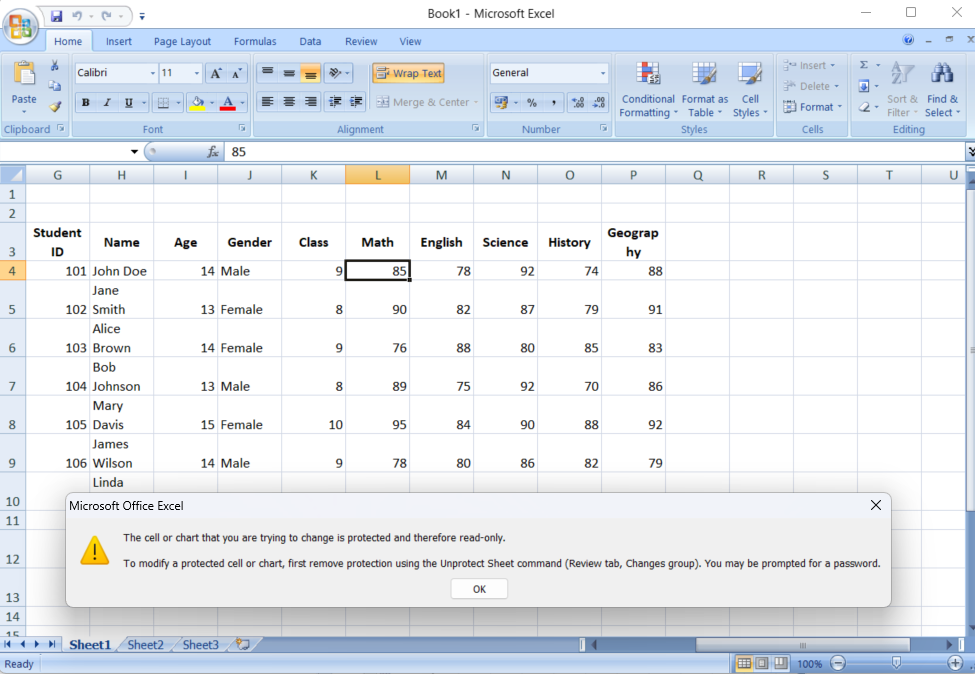
Once you’ve marked cells as locked, the next step is to protect the worksheet. This is where the magic happens—the locked cells won’t be protected without this step.
To protect your worksheet:
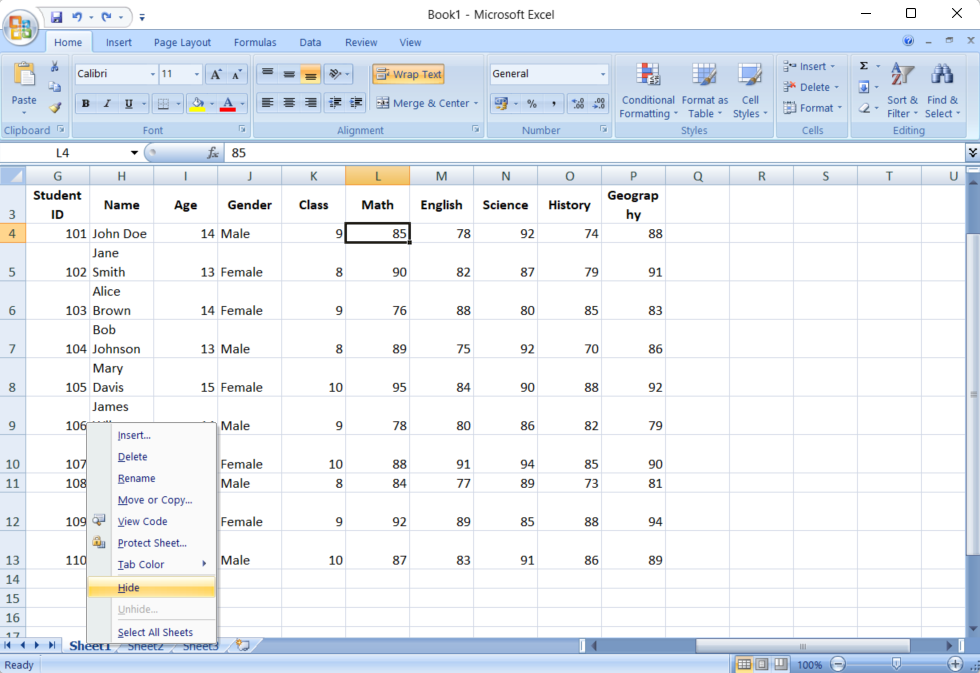
- Right-click the Sheet Tab: Right-click the tab of the sheet you want to protect and select “Protect Sheet” from the context menu.
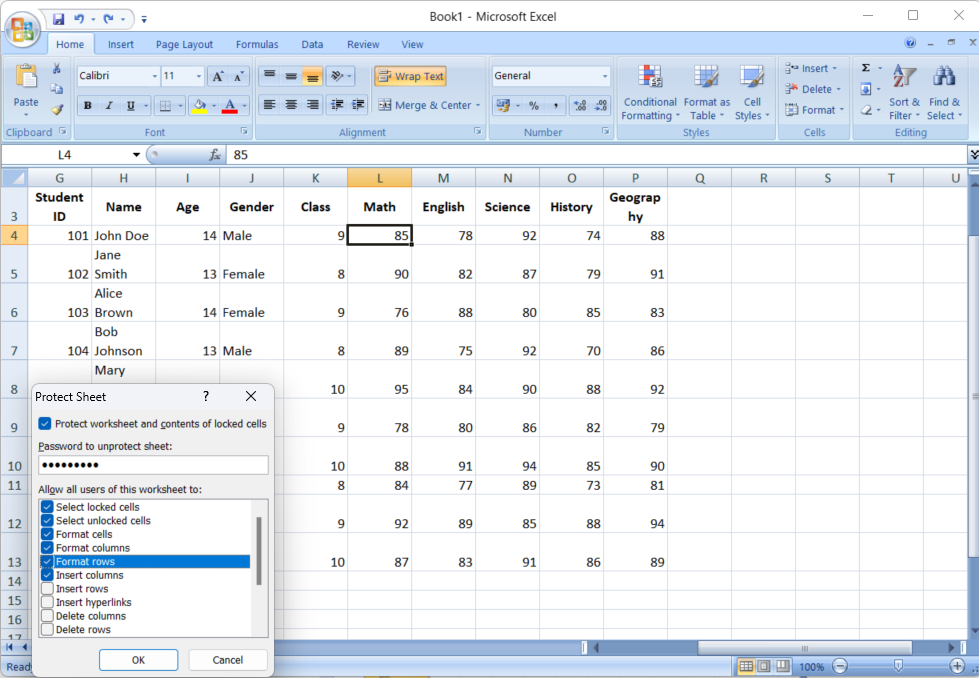
- Set a Password: Enter a password (make sure it’s something you’ll remember!), and select the actions you want to allow users to perform on your sheet. Users can select locked cells by default, but you can change this if needed.
- Finalize the Protection: Click “OK” to apply the protection. Now, the cells you marked as locked cannot be altered unless the user knows the password.
Special Cases: Locking Formula Cells
For those of us who live and breathe formulas, protecting them from accidental changes is crucial. Locking formula cells follows a similar process but with an extra step to ensure only the cells containing formulas are locked.
- Unlock All Cells: Start by unlocking all cells as described earlier.
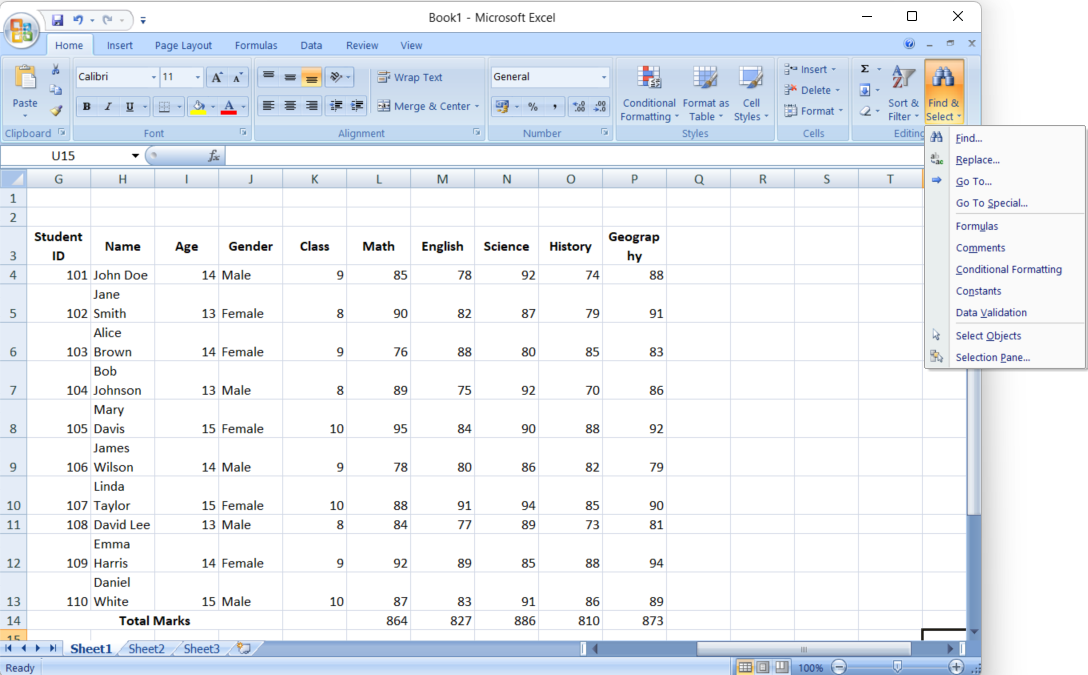
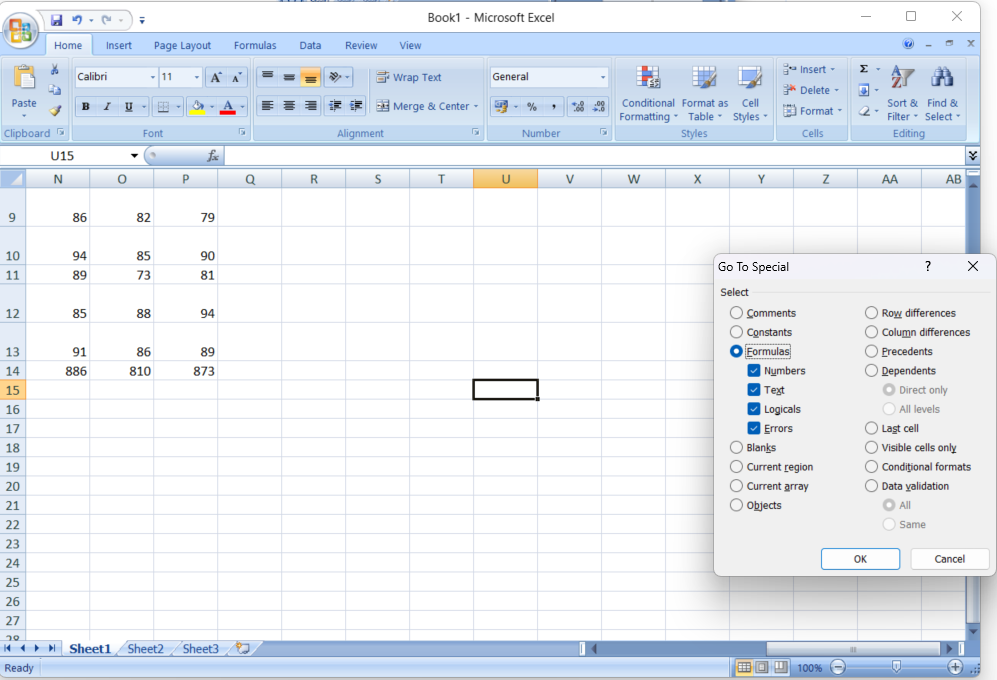
- Find and Select Formulas: Go to the “Home” tab, click “Find & Select,” then choose “Go To Special.” In the dialog box, select “Formulas” and click “OK.” Excel will automatically select all cells containing formulas.
- Lock the Selected Formula Cells: Right-click the selected cells, go to Format Cells > Protection, and check the “Locked” box.
- Protect the Worksheet: Protect the sheet to activate the locks, and your formulas are now safe!
Also, read about 50 Excel shortcuts to boost your workflow
Conclusion
Locking cells in Excel is one of those small actions that can have a big impact, especially when you’re sharing your work with others. Knowing that your data and formulas are protected gives you peace of mind, allowing you to focus on what really matters—analyzing and presenting your data, not worrying about accidental changes.
So, next time you’re working on an important Excel project, take a moment to lock those cells. You’ll thank yourself later when your spreadsheet remains intact, no matter how many hands it passes through. If you’re curious to explore more advanced Excel features or have any questions about this guide, drop a comment below—I’m here to help!
Here’s your Pathway to Mastering Microsoft Excel Formulas and Functions: Click Here
Frequently Asked Questions
Q1. What are the benefits of locking cells in Excel?
Ans. Locking cells in Excel helps protect critical data from accidental or unauthorized changes. It ensures that only specific users can modify important data, thereby maintaining the integrity and accuracy of the information in your spreadsheet.
Q2. How do I lock cells in Excel without locking the entire sheet?
Ans. To lock specific cells without locking the entire sheet, first, select the cells you want to lock and go to “Format Cells” > “Protection” and check the “Locked” option. Then, protect the sheet via the “Review” tab. Only the selected cells will be locked, allowing you to edit the rest of the sheet.
Q3. Can I restrict editing to only certain users in Excel?
Ans. You can restrict editing to certain users by using Excel’s “Allow Users to Edit Ranges” feature. This allows you to set specific permissions for different users, enabling them to edit certain cells or ranges while protecting the rest of the sheet.
Q4. How can I track changes made to a protected Excel sheet?
Ans. Excel provides a “Track Changes” feature that allows you to monitor any modifications made to a protected sheet. This feature logs all changes, including who made them and when, so you can review and approve or reject the modifications.
Q5. What precautions should I take before locking cells in Excel?
Ans. Before locking cells, complete all necessary data entry and formatting. Double-check that you’ve only locked the cells you intend to protect, and create a backup of your file. Also, consider sharing the password with trusted colleagues if access is needed in your absence.
Hi, I am Pankaj Singh Negi - Senior Content Editor | Passionate about storytelling and crafting compelling narratives that transform ideas into impactful content. I love reading about technology revolutionizing our lifestyle.


