Introduction
Accurate and clean data is the backbone of effective decision-making. Whether you’re managing a sales record, contact list, or any other dataset, duplicate entries can quickly turn into a source of confusion and errors. Imagine making a critical business decision based on faulty data—it’s a risk you can’t afford. That’s why mastering the skill of removing duplicates in Excel is essential. This simple yet powerful technique ensures your data remains reliable and easy to manage, setting the stage for more confident and accurate analysis. Here’s how you can easily remove duplicates in Excel.

Overview
- Removing duplicates ensures your data remains reliable for accurate analysis and decision-making.
- Learn how to quickly select and clean up your data range to remove duplicates in Excel.
- Utilize Excel’s “Remove Duplicates” tool to eliminate redundant entries from your dataset efficiently.
- Choose specific columns for checking duplicates to tailor the process to your data needs.
- After removal, verify your data to ensure accuracy and use backup strategies for safety.
Table of contents
Why You Should Remove Duplicates in Excel?
Removing duplicates in Excel is essential for maintaining data accuracy and integrity. Duplicate entries can skew analysis, lead to incorrect conclusions, and create report inconsistencies. Eliminating duplicates ensures that each data point is unique, enhancing your results’ reliability. It also helps optimize storage, reduce file size, and improve Excel operations’ performance. Whether managing a large dataset or preparing a report, removing duplicates streamlines your data, making it cleaner and more manageable for analysis and decision-making.
Step 1: Select the Data Range
First, select the cell range you want to clean up to remove duplicates. Here’s how:
- Open your Excel file and go to the worksheet with the data.
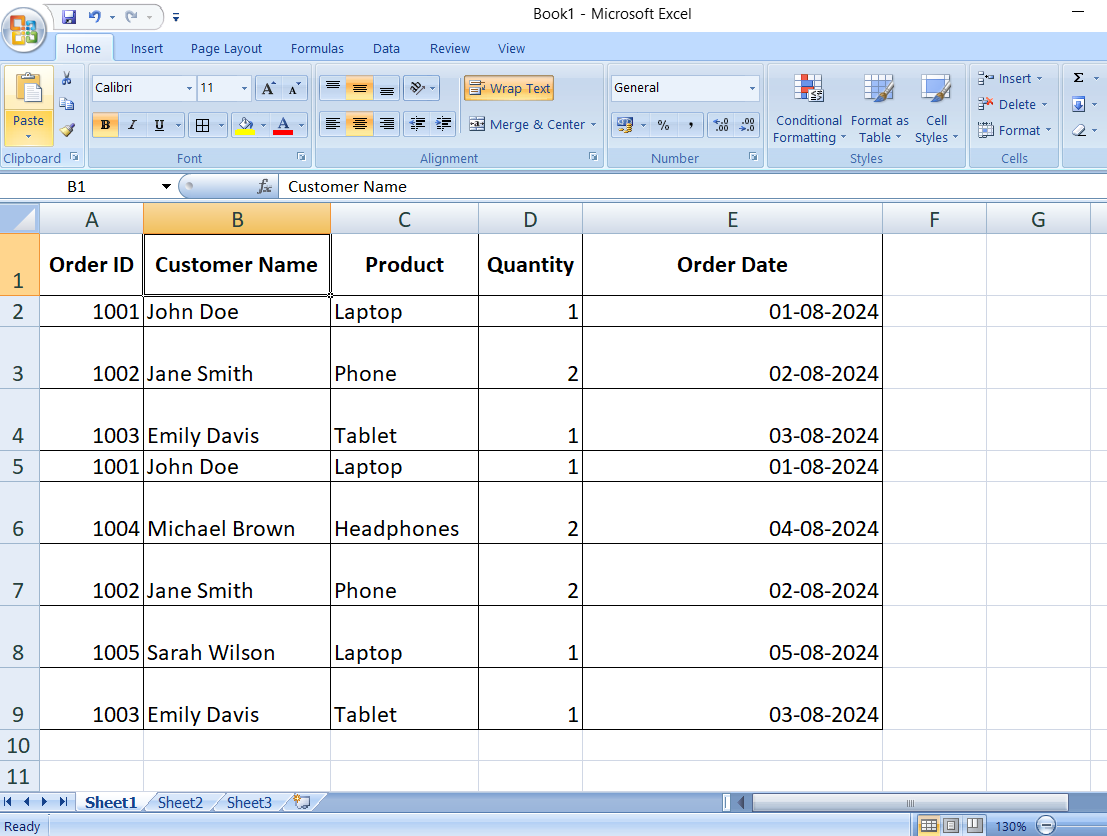
- Highlight the cells you want to check for duplicates. You can use the keyboard shortcut Ctrl + Shift + Arrow keys or drag your mouse across the cells.
- To select the entire worksheet, press Ctrl + A or click the triangle icon at the top-left corner of the grid.
Also read: Microsoft Excel for Data Analysis
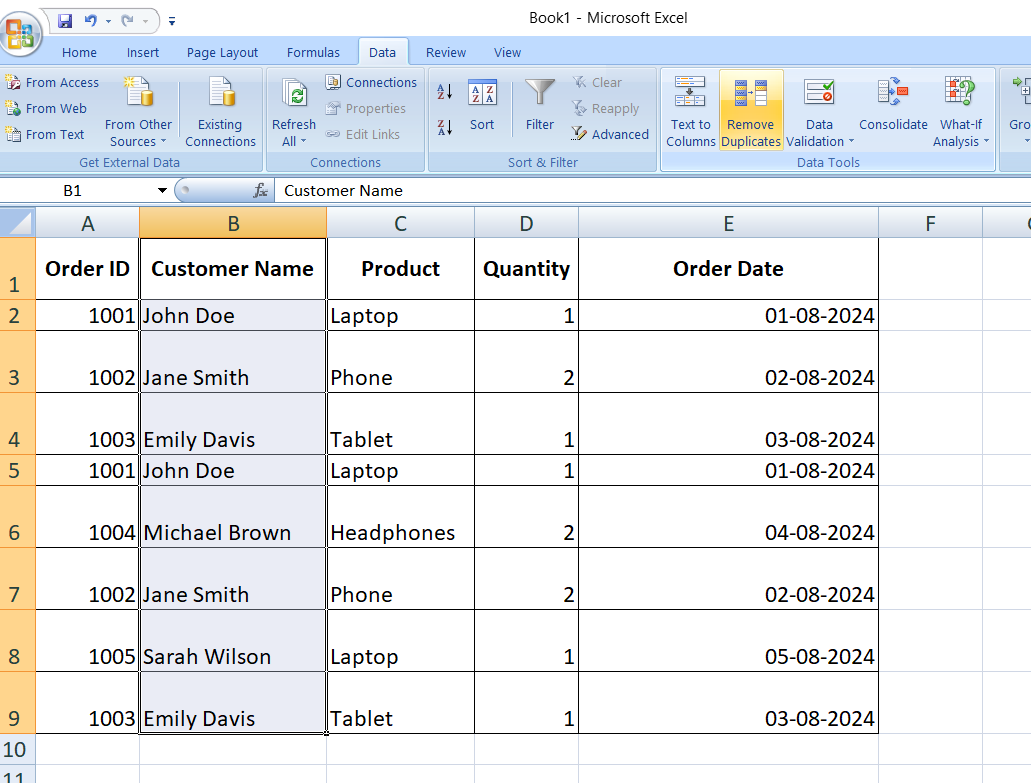
Step 2: Access the Remove Duplicates Tool
A built-in feature in Excel is designed to help eliminate duplicate values:
- Open the Excel ribbon at the top of the screen and select the “Data” tab.
- The “Remove Duplicates” option is in the “Data Tools” group. To get the Remove Duplicates dialog box, click on it.
Read about classic Excel shortcuts for efficient data analysis
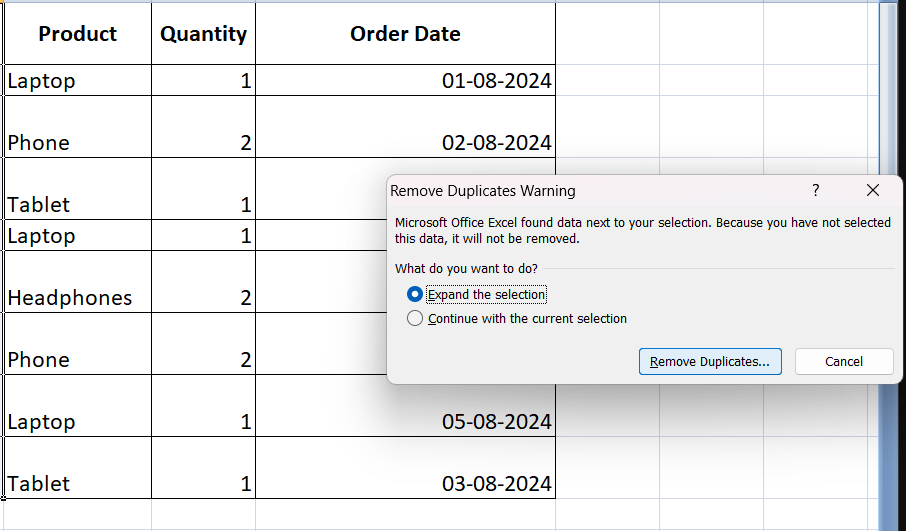
Step 3: Choose the Columns for Duplicate Check
You can choose which columns to check for duplicates in the Remove Duplicates dialog box:
- By default, all columns in the selected range are checked.
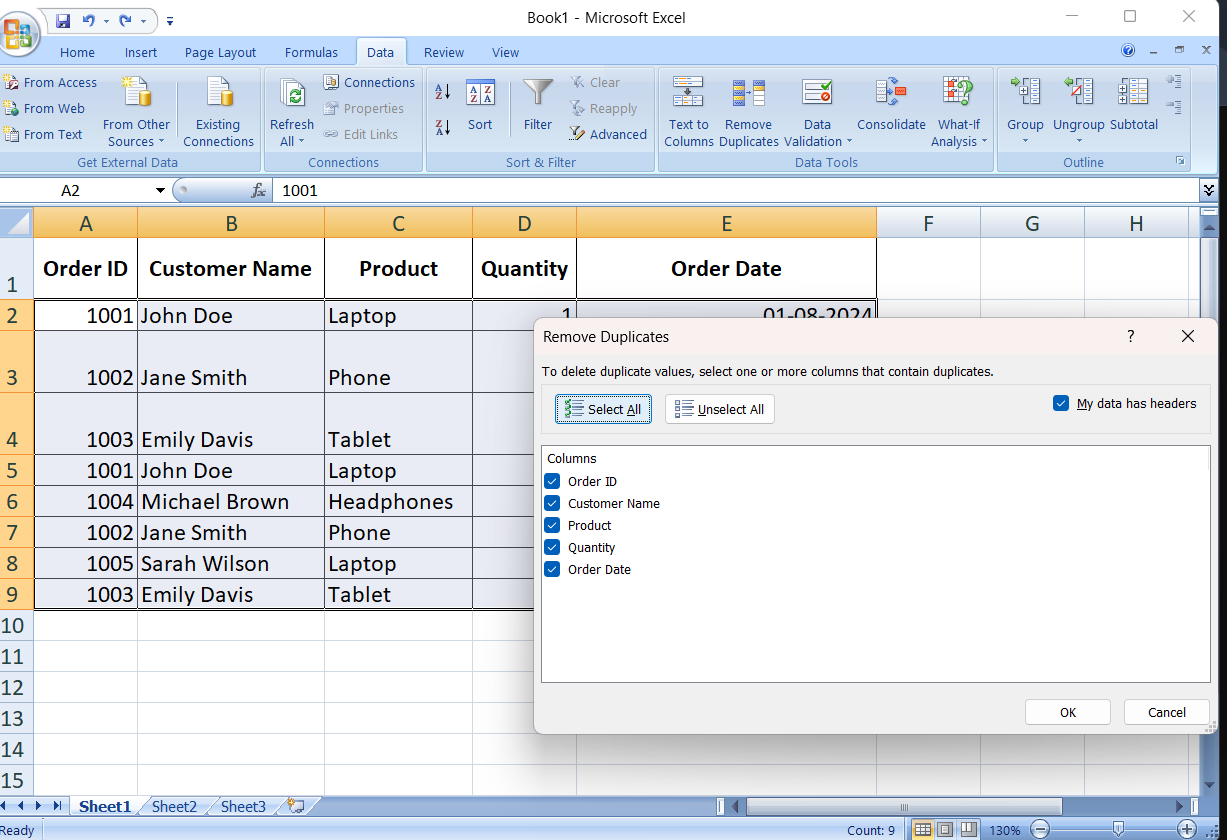
- Rows with the same values in the checked columns are considered duplicates.
- If you only want to check specific columns, uncheck the others.
- For example, if you’re managing a customer list and want to remove duplicates based on email addresses, uncheck all columns except the one with the email addresses.
- After choosing the columns, press “OK.”
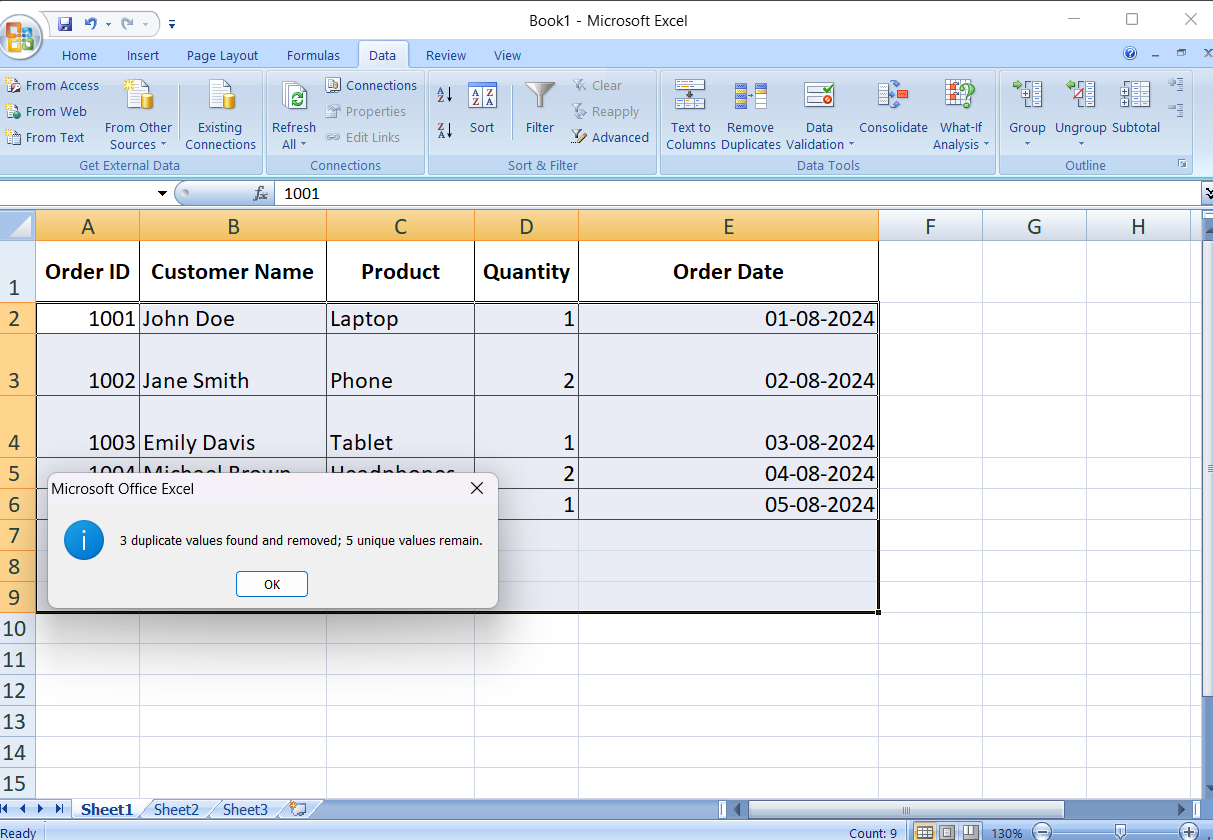
Step 4: Review the Results
Excel will process the data once you click “OK,” and it will display a summary:
- You’ll be able to see how many unique values are left in the message box and the number of duplicate values identified and eliminated.
- Click “OK” to close the message box.
Step 5: Verify Your Data
It’s wise to confirm that your data is what you expected and that duplicates have been appropriately eliminated:
- By scrolling through it, ensure no more duplicates are in your dataset.
- If something doesn’t appear right, you can use the “Undo” option (Ctrl + Z) to undo the modifications.
Additional Tips
- Maintain a Backup: Preserving a backup copy of your original data is a good idea before eliminating duplicates. You can accomplish this by making a copy of the worksheet or renaming the file.
- Advanced Filtering: If you want even more control, you can use Excel’s “Advanced Filter” option (located in the “Data” tab) to filter and show only unique entries without truly eliminating duplicates.
Also, read about 10+ Simple Yet Powerful Excel Tricks for Data Analysis
Conclusion
Excel’s easy-to-use yet effective duplicate removal feature helps preserve the accuracy of your data. Following these steps, you can quickly tidy up your spreadsheets and ensure your data is correct and dependable. The features in Excel make it simple to handle duplicates effectively, regardless of the size of the dataset you’re working with.
Frequently Asked Questions
Q1. How do I remove duplicates in Excel?
Ans. Select your data, go to the “Data” tab, and click on “Remove Duplicates.”
Q2. Can I remove duplicates from specific columns only?
Ans. Yes, in the “Remove Duplicates” dialog box, uncheck the columns you don’t want to include.
Q3. What happens to the first occurrence of a duplicate?
Ans. Excel keeps the first occurrence and removes the subsequent duplicates.
Q4. Can I undo the removal of duplicates?
Ans. Yes, you can undo it immediately by pressing Ctrl + Z.
Q5. How can I remove duplicates without losing any data?
Ans. Use the “Advanced Filter” option to filter and view unique values without deleting data.
Hi, I am Janvi, a passionate data science enthusiast currently working at Analytics Vidhya. My journey into the world of data began with a deep curiosity about how we can extract meaningful insights from complex datasets.


