Introduction
In a cozy corner of a tech enthusiast’s workshop, the quest began: could a tiny Raspberry Pi handle the power of advanced AI? This article follows that journey, showing how to transform this small device into a capable tool for smart document processing. We’ll guide you through setting up the Raspberry Pi, installing the needed software, and building a system to handle document ingestion and QnA tasks. By the end, you’ll see how even the smallest tech gadgets can achieve impressive results with a bit of creativity and effort.
Learning Objectives
- Learn how to configure a Raspberry Pi for headless operation.
- Understand the process of installing and managing dependencies like Ollama.
- Discover how to develop a system for loading and processing PDF documents.
- Gain skills in creating a Retrieval-Augmented Generation (RAG) pipeline for answering queries.
- Learn methods for verifying the functionality of your application.
- Explore how to prepare your application for deployment with FastAPI and build a user interface with Reflex.
This article was published as a part of the Data Science Blogathon.
Table of contents
Setting Up Your Raspberry Pi
First we need to setup our Raspberry Pi for the application to be running. The first step is to have a proper OS setup in the device. If you already have this done, you can skip this. We will be using Ubuntu server image for this demo, but the default OS can also be used. All you need is a microSD of minimum 16GB to flash the OS image.
Steps to Flash SD card
Follow the steps below to flash the SD card with the OS image:
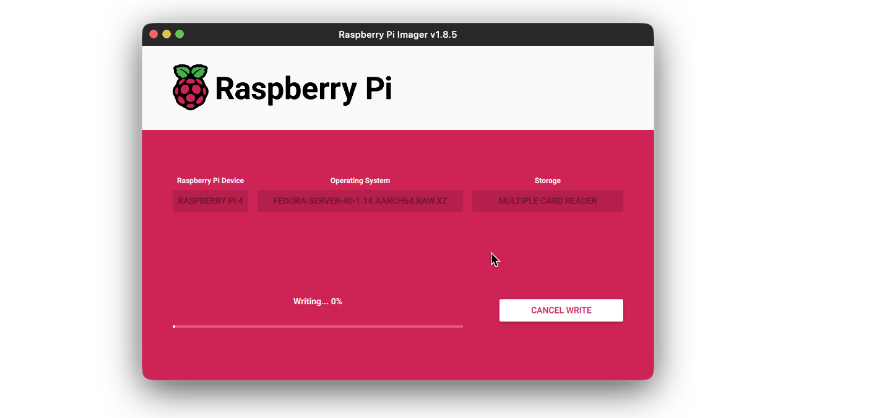
- Download Raspberry Pi Imager based on your system from this link, and install it. All default settings are recommended.
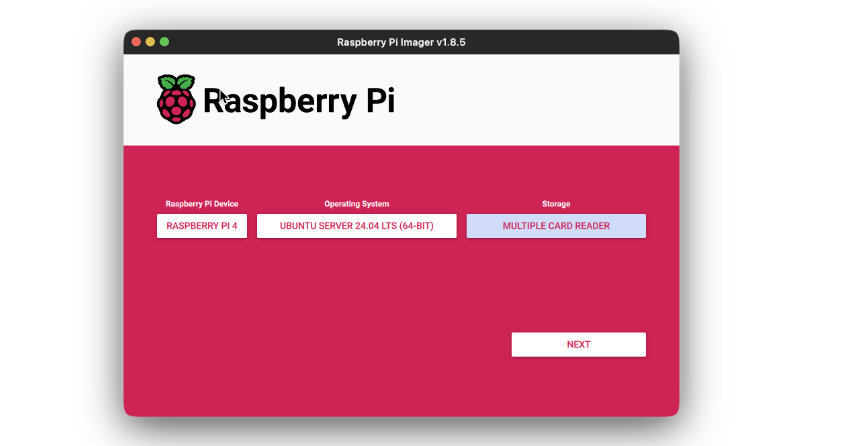
- Open the Imager application and first select the device.
- Then select the OS that you want to install. In this case, Ubuntu Server 24.04.
- Then chose the storage where the image will be flashed. This will be the SD card where image is to be flashed.
- Click on next. You’ll be prompted to edit the settings for new device. We will be setting the Raspberry Pi for headless development, via SSH.
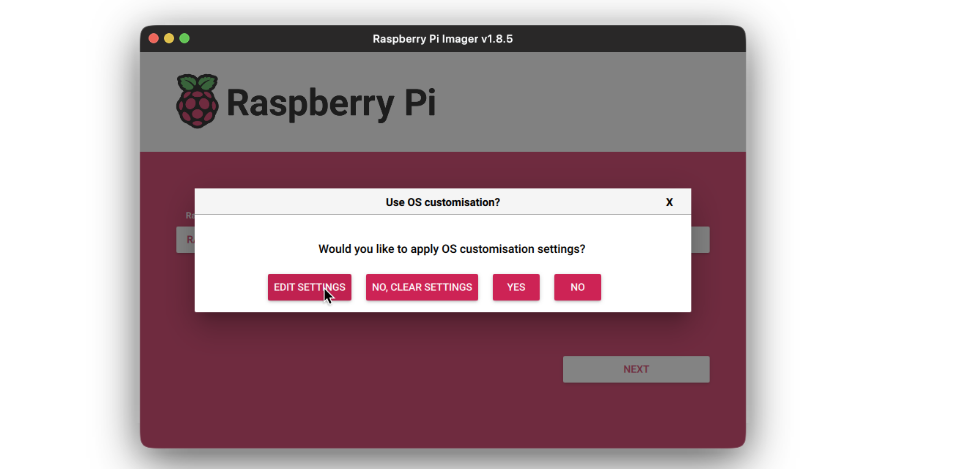
- Add the username and password for the user to login to. Then add an WiFi SSID and it’s password, for the device to automatically login to that WiFi network on boot up. This is important as the we will need the device to connect to the network automatically for us to be able to connect to it via SSH.

- On the Services tab, check the Enable SSH and select the Use username and password option. Click Save.

- Then press the Write button and wait for the flashing to complete.
Once the SD card is flashed with the OS, insert it into the device and start it. It should take few minutes on first boot up to complete initial setup. The device will automatically connect to WiFi after booting. Now from another device, preferably using a laptop or desktop, login to your Raspberry Pi using it’s IP. If you are not sure what it’s IP is, you can use Fing android/ios app to loo-up for the IP.
Once you have the IP, SSH into your device using the username and password you used during the setup. The command for me
would be:
ssh [email protected]Updating the Packages
Now, we need to update the packages for all things to be installed correctly. Update your system using the following commands:
sudo apt update
sudo apt upgrade
Next, need to install Ollama to use the Language model and the Embedding model in our device. Install Ollama using the following command:
curl -fsSL https://ollama.com/install.sh | shIf you see any error when running the above command, run the following command to install curl and try again:
sudo apt install curlOnce Ollama is installed, use the following commands to download Phi3 model and Embeddings model:
ollama pull phi3
ollama pull nomic-embed-text
After the two models are downloaded, create a project inside any directory of your choice and start building the Application.
Building the Application Backbone
Now that we have the device setup, we will move forward with building the RAG application.
Step1: Environment Setup
First we will have the environment setup. Create a virtual environment and install the following packages:
deeplake
boto3==1.34.144
botocore==1.34.144
fastapi==0.110.3
gunicorn==22.0.0
httpx==0.27.0
huggingface-hub==0.23.4
langchain==0.2.6
langchain-community==0.2.6
langchain-core==0.2.11
langchain-experimental==0.0.62
langchain-text-splitters==0.2.2
langsmith==0.1.83
marshmallow==3.21.3
numpy==1.26.4
pandas==2.2.2
pydantic==2.8.2
pydantic_core==2.20.1
PyMuPDF==1.24.7
PyMuPDFb==1.24.6
python-dotenv==1.0.1
pytz==2024.1
PyYAML==6.0.1
reflex==0.5.6
requests==2.32.3
Step2: Creating config.py File
Next, create a config.py file and add the following fields in it:
LANGUAGE_MODEL_NAME = "phi3"
EMBEDDINGS_MODEL_NAME = "nomic-embed-text"
OLLAMA_URL = "http://localhost:11434"
We have setup our project with necessary packages and configs for the Application.
Step3: Creating Ingestion Class
Now, let’s create the Ingestion class that will be used to ingest document into the vector store. Below is the code for entire Ingestion class:
import os
import config as cfg

from pinecone import Pinecone
from langchain.vectorstores.deeplake import DeepLake
from langchain.embeddings.ollama import OllamaEmbeddings
from .doc_loader import PDFLoader

class Ingestion:
    """Document Ingestion pipeline."""
    def __init__(self):
        try:
            self.embeddings = OllamaEmbeddings(
                model=cfg.EMBEDDINGS_MODEL_NAME,
                base_url=cfg.OLLAMA_URL,
                show_progress=True,
            )
            self.vector_store = DeepLake(
                dataset_path="data/text_vectorstore",
                embedding=self.embeddings,
                num_workers=4,
                verbose=False,
            )
        except Exception as e:
            raise RuntimeError(f"Failed to initialize Ingestion system. ERROR: {e}")

    async def create_and_add_embeddings(
        self,
        file: str,
    ):
        try:
            loader = PDFLoader(
                file_path=file,
            )

            chunks = await loader.load_document()
            size = await self.vector_store.aadd_documents(documents=chunks)
            return len(size)
        except (ValueError, RuntimeError, KeyError, TypeError) as e:
            raise Exception(f"ERROR: {e}")
In the above class, we define the init method where the embeddings model and the vector store instances are initialized. We also defined an asynchronous method create_and_add_embeddings that will take the file path, load it, chunk it and ingest it into the document. We have used a PDFLoader class to load the PDF file and chunk it. This class is defined to make a separate chunking logic based on requirements.
Step4: Code for PDFLoader
Below is the code for PDFLoader:
import os
from langchain.schema import Document
from langchain.document_loaders.pdf import PyMuPDFLoader
from langchain.text_splitter import CharacterTextSplitter


class PDFLoader():
    def __init__(self, file_path: str) -> None:
        self.file_path = file_path

    async def load_document(self):
        self.file_name = os.path.basename(self.file_path)
        loader = PyMuPDFLoader(file_path=self.file_path)

        text_splitter = CharacterTextSplitter(
            separator="\n",
            chunk_size=1000,
            chunk_overlap=200,
        )
        pages = await loader.aload()
        total_pages = len(pages)
        chunks = []
        for idx, page in enumerate(pages):
            chunks.append(
                Document(
                    page_content=page.page_content,
                    metadata=dict(
                        {
                            "file_name": self.file_name,
                            "page_no": str(idx + 1),
                            "total_pages": str(total_pages),
                        }
                    ),
                )
            )

        final_chunks = text_splitter.split_documents(chunks)
        return final_chunks
Explanation
Let’s breakdown the PDFLoader class. We first initialize the file_path parameter using an init method. We
have defined a load_document method that does the following things:
- Extracts the filename from the file_path.
- Loads the PDF file using PyMuPDFLoader from Langchain. Note that any other PDFLoader can also be used at this point.
- Initializes a CharacterTextSplitter to split the document into several smaller chunks of defined size.
- Then we asynchronously load the document using the PyMuPDFLoader object instance.
- We then iterate over the pages and create Document object using the page content. We also add custom metadata fields of choice. In this case will add file_name, page_no and the total_pages fields.
- Then we take all the chunks and split them using CharacterTextSplitter object instance and finally return the chunks.
Now that we have the Ingestion pipeline ready, we will start working with the QnA pipeline.
Step5: Code for QnA Pipeline
Below is the code for QnA pipeline:
import os
import config as cfg

from pinecone import Pinecone
from langchain.vectorstores.deeplake import DeepLake
from langchain.embeddings.ollama import OllamaEmbeddings
from langchain_community.llms.ollama import Ollama
from .doc_loader import PDFLoader

class QnA:
    """Document Ingestion pipeline."""
    def __init__(self):
        try:
            self.embeddings = OllamaEmbeddings(
                model=cfg.EMBEDDINGS_MODEL_NAME,
                base_url=cfg.OLLAMA_URL,
                show_progress=True,
            )
            self.model = Ollama(
                model=cfg.LANGUAGE_MODEL_NAME,
                base_url=cfg.OLLAMA_URL,
                verbose=True,
                temperature=0.2,
            )
            self.vector_store = DeepLake(
                dataset_path="data/text_vectorstore",
                embedding=self.embeddings,
                num_workers=4,
                verbose=False,
            )
            self.retriever = self.vector_store.as_retriever(
                search_type="similarity",
                search_kwargs={
                    "k": 10,
                },
            )
        except Exception as e:
            raise RuntimeError(f"Failed to initialize Ingestion system. ERROR: {e}")

    def create_rag_chain(self):
        try:
            system_prompt = """<Instructions>\n\nContext: {context}"
            """
            prompt = ChatPromptTemplate.from_messages(
                [
                    ("system", system_prompt),
                    ("human", "{input}"),
                ]
            )
            question_answer_chain = create_stuff_documents_chain(self.model, prompt)
            rag_chain = create_retrieval_chain(self.retriever, question_answer_chain)

            return rag_chain
        except Exception as e:
            raise RuntimeError(f"Failed to create retrieval chain. ERROR: {e}")
Let’s break down the QnA class. In the init method, we initialize the embeddings instance, the model instance and the vector store instance. Using the vector store instance, we define the retriever instance. This is where we can define metadata filters and k, the max number of chunks to be fetched. In the create_rag_chain method, we define the system_prompt, where all the instructions for the Language
model is defined. This system prompt can be defined based on your use-case. We then create the chat prompt using the system prompt.
Finally, using the model and prompt we create document chain, and using the retriever and document chain we create the retrieval chain and return it. This retrieval chain will be used to invoke the model
using user query.
Now let’s try out both the Ingestion and QnA pipelines to check everything works as intended. We will use Apple 2023 10K document for this experiment. First let’s implement the Ingestion pipeline to ingest the document into the vector store.
Code Implementation
from backend.src.ingestion import Ingestion

ingestion = Ingestion()
file = "data/Apple-10K-2023.pdf"

ids = await ingestion.create_and_add_embeddings(file=file)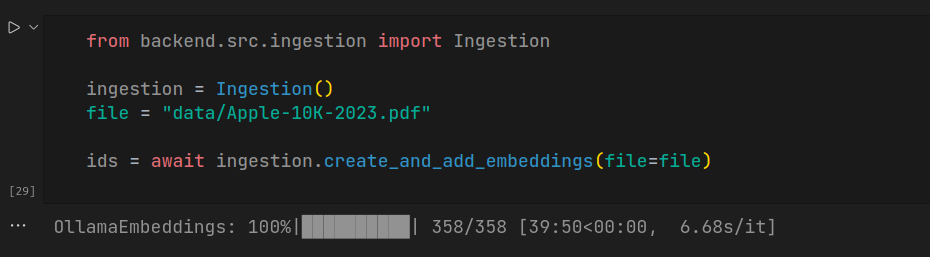
Note that the ingestion takes quiet long, which depends on the ingesting document size.
Step6: Using Rag Chain to Ask Queries
Next, let’s use the rag chain to ask queries on the ingested document.
from backend.src.qna import QnA

qna = QnA()
rag_chain = qna.create_rag_chain()
for chunk in rag_chain.pick("answer").stream({"input": "What is this document about?"}):
    print(chunk, end="")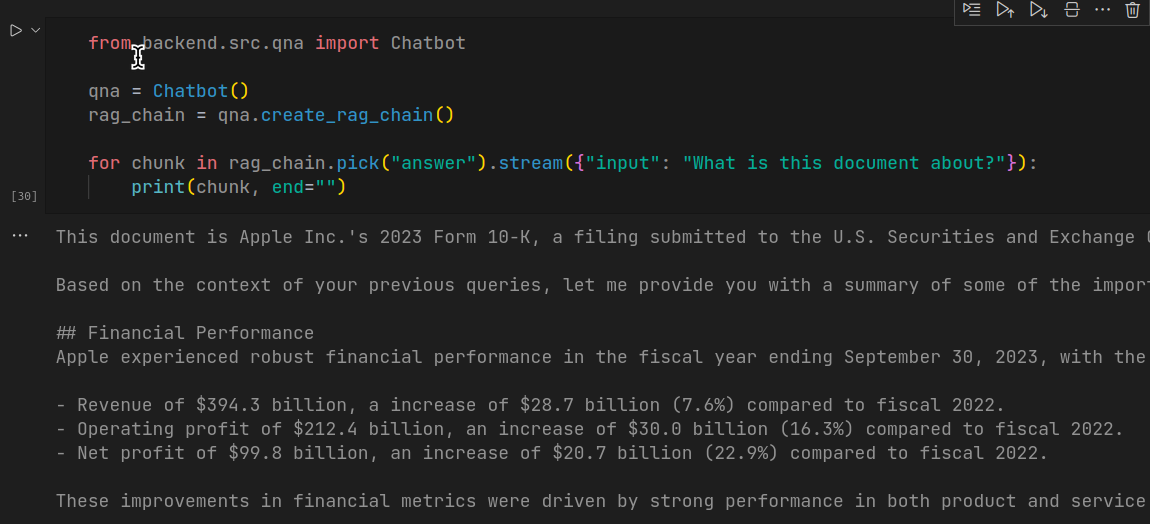
This code generates response for the query in a stream, just like how you see in ChatGPT interface. Although the response time is huge, the response generated by the model is accurate.
With this, we have completed implementation of our Raspberry Pi RAG application setup. In the next part of this article, we will wrap our app using FastAPI and build an UI using Reflex. Reflex is a Python only UI library to build web application for mobile and desktop.
Conclusion
We have now completed the setup of Raspberry Pi and successfully implemented the backbone of a RAG application. From installing the OS and preparing the environment to building the Ingestion and QnA
pipelines, each step has been essential in creating the document question answering system. By following the steps, you’ve equipped your Raspberry Pi to handle complex document ingestion and query tasks. In the next part of this article, we will focus on wrapping our application using FastAPI and creating an interactive user interface with Reflex, a Python-based UI library. This will enhance the usability and accessibility of the RAG application, making it ready for real-world applications. Stay tuned for the next
steps!
Key Takeaways
- We learned to set up how to prepare and configure a Raspberry Pi for running a RAG application.
- Installing and managing dependencies like Ollama and model downloads.
- Building a system to ingest and process PDF documents into a vector store.
- Implementing a Retrieval-Augmented Generation chain for answering queries.
- Verifying the application functionality and preparing for deployment with FastAPI and Reflex.
Frequently Asked Question
Q1. Why use Raspberry Pi when there are powerful and faster GPUs available?
A. Using Raspberry Pi to host RAG application is completely a subject of preference. For users (specifically hobbyists and students) not willing to spend monthly bills on GPUs, OpenAI API or cloud platforms, can use Raspberry Pi or any other edge devices to build and host their RAG application, either as a project or prototype for some final product.
Considering the longer response time, the RAG application can be utilized for use-cases where time is an inconsiderable factor. To name a few:
i. Personal emails summarizer app that would summarize all your emails or the day in 500 words, saving your time that would have rather gone reading them all.
ii. Podcast summarizer application, that would summarize your favourite podcasts while you are at work.
Q2. Can I use models Larger than Phi3 for this application?
A. Yes, a model larger than Phi3 can be used, but, that is not recommended for Raspberry Pi, not even 8GB model. Larger models like Llama 2, 3, Mistral are huge and will require more RAM to run on the device. Gemma 2B is an alternate model that can be used instead of Phi3.
Q3. Can I use Ollama to only run the Language model?
A. Absolutely! You can use any other embedding service instead of running it via Ollama. This will save resource and be faster to do document ingestion.
The media shown in this article is not owned by Analytics Vidhya and is used at the Author’s discretion.
A Machine Learning and Deep Learning practitioner with a background in Computer Science Engineering. My work interests include Machine Learning, Deep Learning, Computer Vision and NLP, with expertise in Generative AI and Retrieval Augmented Generation.