Introduction
Gender detection from facial images is one of the many fascinating applications of computer vision. In this project, we combine OpenCV for confront location and the Roboflow API for gender classification, making a device that identifies faces, checks them, and predicts their gender. We’ll utilize Python, particularly in Google Colab, to type in and run this code. This direct gives an easy-to-follow walkthrough of the code, clarifying each step so you can understand and apply it to your ventures.
Learning Objective
- Understand how to implement face detection using OpenCV’s Haar Cascade.
- Learn how to integrate Roboflow API for gender classification.
- Explore methods to process and manipulate images in Python.
- Visualize detection results using Matplotlib.
- Develop practical skills in combining AI and computer vision for real-world applications.
This article was published as a part of the Data Science Blogathon.
Table of contents
How to Detect Gender Using OpenCV and Roboflow in Python?
Let us learn how to implement OpenCV and Roboflow in Python for gender detection:
Step 1: Importing Libraries and Uploading Image
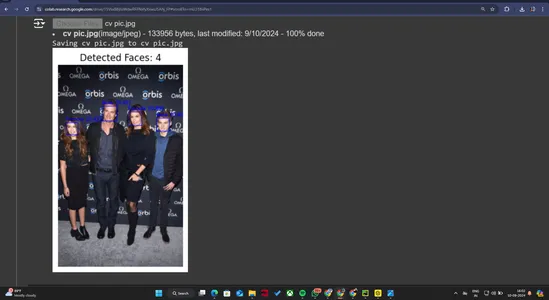
The primary step is to consequence the vital libraries. We’re utilizing OpenCV for picture preparation, NumPy for dealing with clusters, and Matplotlib to visualize the comes about. We also uploaded an image that contained faces we wanted to analyze.
from google.colab import files
import cv2
import numpy as np
from matplotlib import pyplot as plt
from inference_sdk import InferenceHTTPClient

# Upload image
uploaded = files.upload()

# Load the image
for filename in uploaded.keys():
    img_path = filename
In Google Colab, the files.upload() work empowers clients to transfer records, such as pictures, from their neighborhood machines into the Colab environment. Upon uploading, the picture is put away in a word reference named transferred, where the keys compare to the record names. A for loop is then used to extract the file path for further processing. To handle image processing tasks, OpenCV is employed to detect faces and draw bounding boxes around them. At the same time, Matplotlib is utilized to visualize the results, including displaying the image and cropped faces.
Step 2: Loading Haar Cascade Model for Face Detection
Next, we stack OpenCV’s Haar Cascade demonstration, which is pre-trained to identify faces. This model scans the image for patterns resembling human faces and returns their coordinates.
# Load the Haar Cascade model for face detection
face_cascade = cv2.CascadeClassifier(cv2.data.haarcascades + 'haarcascade_frontalface_default.xml')
It is usually a prevalent strategy for object detection. It identifies edges, textures, and patterns associated with the object (in this case, faces). OpenCV provides a pre-trained face detection model, which is loaded using `CascadeClassifier.`
Step 3: Detecting Faces in the Image
We stack the transferred picture and change it to grayscale, as this makes a difference in making strides in confronting location exactness. Afterward, we use the face detector to find faces in the image.
# Load the image and convert to grayscale
img = cv2.imread(img_path)
gray = cv2.cvtColor(img, cv2.COLOR_BGR2GRAY)

# Detect faces in the image
faces = face_cascade.detectMultiScale(gray, scaleFactor=1.1, minNeighbors=5, minSize=(30, 30))- Image Loading and Conversion:
- Utilize cv2.imread() to stack the transferred picture.
- Change the picture to grayscale with cv2.cvtColor() to diminish complexity and upgrade discovery.
- Detecting Faces:
- Use detectMultiScale() to find faces in the grayscale image.
- The function scales the image and checks different areas for face patterns.
- Parameters like scaleFactor and minNeighbors adjust detection sensitivity and accuracy.
Step 4: Setting Up the Gender Detection API
Now that we have detected the faces, we initialize the Roboflow API using InferenceHTTPClient to predict the gender of each detected face.
# Initialize InferenceHTTPClient for gender detection
CLIENT = InferenceHTTPClient(
    api_url="https://detect.roboflow.com",
    api_key="USE_YOUR_API"
)

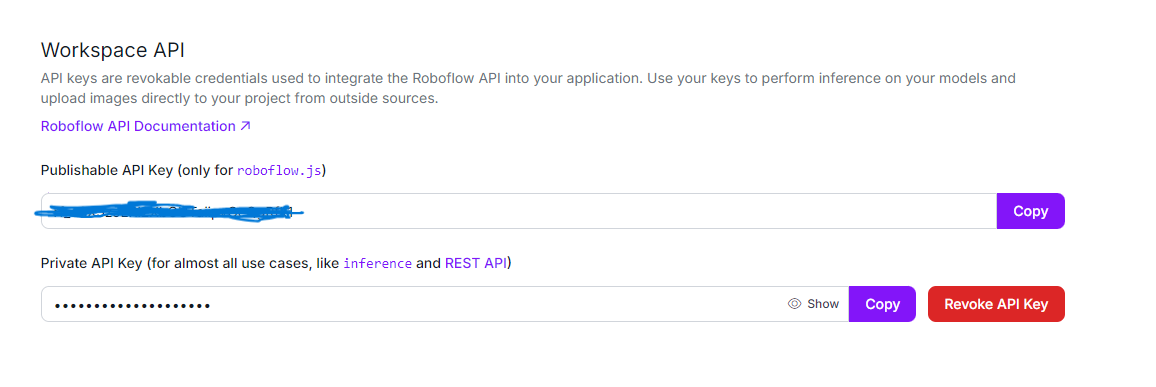
The InferenceHTTPClient simplifies interaction with Roboflow’s pre-trained models by configuring a client with the Roboflow API URL and API key. This setup enables requests to be sent to the gender detection model hosted on Roboflow. The API key serves as a unique identifier for authentication, allowing secure access to and utilization of the Roboflow API.
Step 5: Processing Each Detected Face
We loop through each detected face, draw a rectangle around it, and crop the face image for further processing. Each cropped face image is temporarily saved and sent to the Roboflow API, where the gender-detection-qiyyg/2 model is used to predict the gender.
The gender-detection-qiyyg/2 model is a pre-trained deep learning model optimized for classifying gender as male or female based on facial features. It provides predictions with a confidence score, indicating how certain the model is about the classification. The model is trained on a robust dataset, allowing it to make accurate predictions across a wide range of facial images. These predictions are returned by the API and used to label each face with the identified gender and confidence level.
# Initialize face count
face_count = 0

# List to store cropped face images with labels
cropped_faces = []

# Process each detected face
for (x, y, w, h) in faces:
    face_count += 1
    # Draw rectangles around the detected faces
    cv2.rectangle(img, (x, y), (x + w, y + h), (255, 0, 0), 2)

    # Extract the face region
    face_img = img[y:y+h, x:x+w]

    # Save the face image temporarily
    face_img_path = 'temp_face.jpg'
    cv2.imwrite(face_img_path, face_img)

    # Detect gender using the InferenceHTTPClient
    result = CLIENT.infer(face_img_path, model_id="gender-detection-qiyyg/2")

    if 'predictions' in result and result['predictions']:
        prediction = result['predictions'][0]
        gender = prediction['class']
        confidence = prediction['confidence']

        # Label the rectangle with the gender and confidence
        label = f'{gender} ({confidence:.2f})'
        cv2.putText(img, label, (x, y - 10), cv2.FONT_HERSHEY_SIMPLEX, 0.8, (255, 0, 0), 2)

        # Add the cropped face with label to the list
        cropped_faces.append((face_img, label))
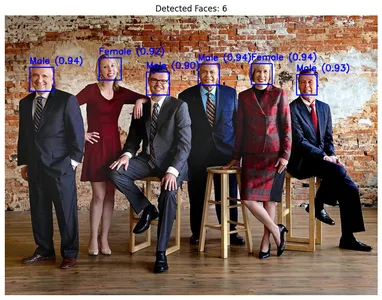
For each recognized face, the system draws a bounding box using cv2.rectangle() to visually highlight the face in the image. It then crops the face region using slicing (face_img = img[y:y+h, x:x+w]), isolating it for further processing. After temporarily saving the cropped face, the system sends it to the Roboflow model via CLIENT.infer(), which returns the gender prediction along with a confidence score. The system adds these results as text labels above each face using cv2.putText(), providing a clear and informative overlay.
Step 6: Displaying the Results
Finally, we visualize the output. We first convert the image from BGR to RGB (as OpenCV uses BGR by default), then display the detected faces and gender predictions. After that, we show the individual cropped faces with their respective labels.
# Convert image from BGR to RGB for display
img_rgb = cv2.cvtColor(img, cv2.COLOR_BGR2RGB)

# Display the image with detected faces and gender labels
plt.figure(figsize=(10, 10))
plt.imshow(img_rgb)
plt.axis('off')
plt.title(f"Detected Faces: {face_count}")
plt.show()

# Display each cropped face with its label horizontally
fig, axes = plt.subplots(1, face_count, figsize=(15, 5))
for i, (face_img, label) in enumerate(cropped_faces):
    face_rgb = cv2.cvtColor(face_img, cv2.COLOR_BGR2RGB)
    axes[i].imshow(face_rgb)
    axes[i].axis('off')
    axes[i].set_title(label)
plt.show()
- Image Conversion: Since OpenCV uses the BGR format by default, we convert the image to RGB using cv2.cvtColor() for correct color display in Matplotlib.
- Displaying Results:
- We use Matplotlib to display the image with the detected faces and the gender labels on top of them.
- We also show each cropped face image and the predicted gender label in a separate subplot.
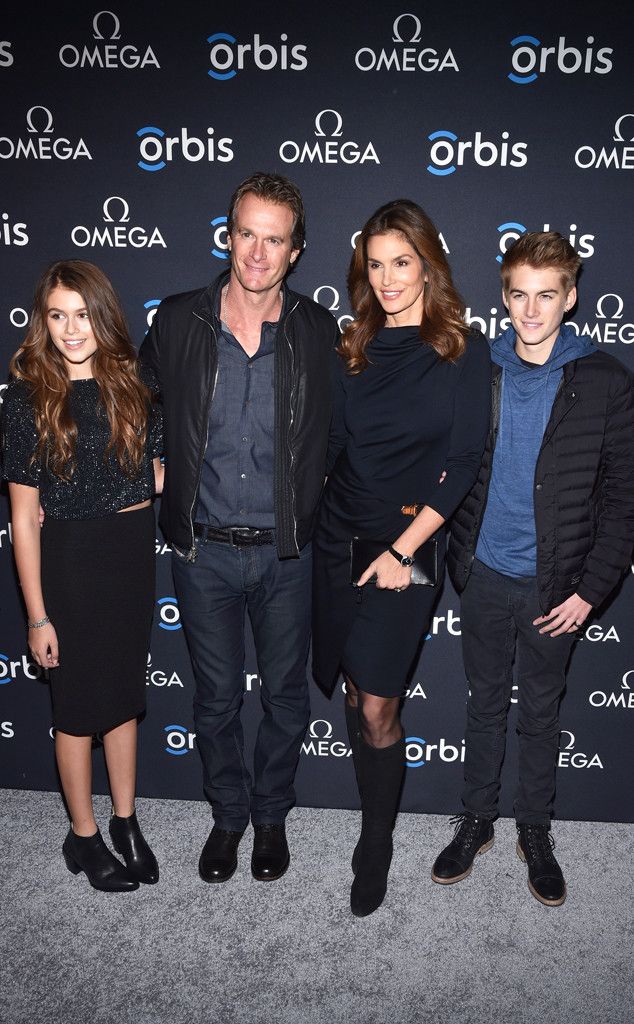
Original data

Output Result data


Conclusion
In this guide, we have successfully developed a powerful Gender Detection with OpenCV and Roboflow in Python. By implementing OpenCV for face detection and Roboflow for gender prediction, we created a system that can accurately identify and classify gender in images. The addition of Matplotlib for visualization further enhanced our project, providing clear and insightful displays of the results. This project highlights the effectiveness of combining these technologies and demonstrates their practical benefits in real-world applications, offering a robust solution for gender detection tasks.
Key Takeaways
- The project demonstrates an effective approach to detecting and classifying gender from images using a pre-trained AI model. The demonstration precisely distinguishes sexual orientation with tall certainty, displaying its unwavering quality.
- By combining devices such as Roboflow for AI deduction, OpenCV for picture preparation, and Matplotlib for visualization, the venture effectively combines different innovations to realize its objectives.
- The system’s capacity to distinguish and classify the gender of different people in a single picture highlights its vigor and flexibility, making it appropriate for various applications.
- Using a pre-trained demonstration guarantees tall exactness in forecasts, as proven by the certainty scores given within the coming about. This accuracy is crucial for applications requiring reliable gender classification.
- The project uses visualization techniques to annotate images with detected faces and predicted genders. This makes the results more interpretable and valuable for further analysis.
Also Read: Named Based Gender Identification using NLP and Python
Frequently Asked Questions
A. The project aims to detect and classify gender from images using AI. It leverages pre-trained models to identify and label individuals’ genders in photos.
A. The project utilized the Roboflow gender detection model for AI inference, OpenCV for image processing, and Matplotlib for visualization. It also used Python for scripting and data handling.
A. The model analyzes images to detect faces and then classifies each detected face as male or female based on the trained AI algorithms. It outputs confidence scores for the predictions.
A. The model demonstrates high accuracy with confidence scores indicating reliable predictions. For example, the confidence scores in the results were above 80%, showing strong performance.
The media shown in this article is not owned by Analytics Vidhya and is used at the Author’s discretion.


