Chatbots have transformed how we interact with technology, offering automated, intelligent conversations. However, building scalable and flexible systems can be challenging. AutoGen simplifies this process with its Programming and Low-code frameworks. Last week we learned how to build agentic chatbots using AutoGen’s Programming framework. Today we are going to use AutoGen Studio, a low-code tool, to build agentic chatbots. This guide will focuses on how to use AutoGen Studio to create custom chatbots for various tasks.
Table of Contents
What is AutoGen Studio?
AutoGen Studio is a simple interface that lets you quickly create AI agents, add skills, and connect them into workflows to accomplish tasks. It’s built on the AutoGen framework, which helps in creating chatbots that can handle complex conversations. With AutoGen Studio, you don’t need much coding to design and launch chatbots. This makes it easy and fast to build intelligent agents that are flexible and responsive.
Now let’s learn how to build agentic chatbots using AutoGen Studio.
Starting AutoGen Studio
To prevent potential conflicts between library dependencies, it is highly recommended to run AutoGen Studio in a separate virtual environment. This ensures that AutoGen Studio’s specific dependencies do not interfere with other installed libraries.
- Create a new environment: conda create -n autogenstudio python=3.11
- Activate the environment: conda activate autogenstudio
- Install AutoGen Studio: pip install autogenstudio
- Launch the Studio interface on port 8081: autogenstudio ui –port 8081
- Access AutoGen Studio in your browser at: http://localhost:8081/
Once the mentioned steps are done, we can start custom chatbot development with AutoGen Studio.
Exploring the Build Section
Speaking of the platform interface, AutoGen Studio has two separate sections – Build and Playground. The Build section is where we build our agents with various models and skills. The Playground section is where we can interact with the agents.
The build section has four tabs Skills, Models, Agents, and Workflows.
Each tab comes with some pre-built components. We can edit them or make new ones as needed.
Let’s start with Models.
Models
Some predefined models are present here, which can be edited. We can also integrate various other LLMs in the AutoGen Studio here.
You can add new models as shown here:
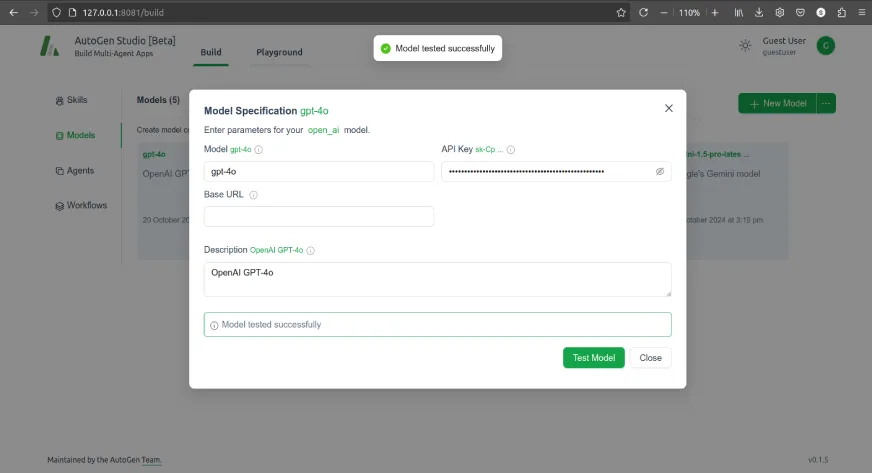
Add the model name in the Model field and the API key in API Key field. We can test the model to make sure the details we have entered are correct.
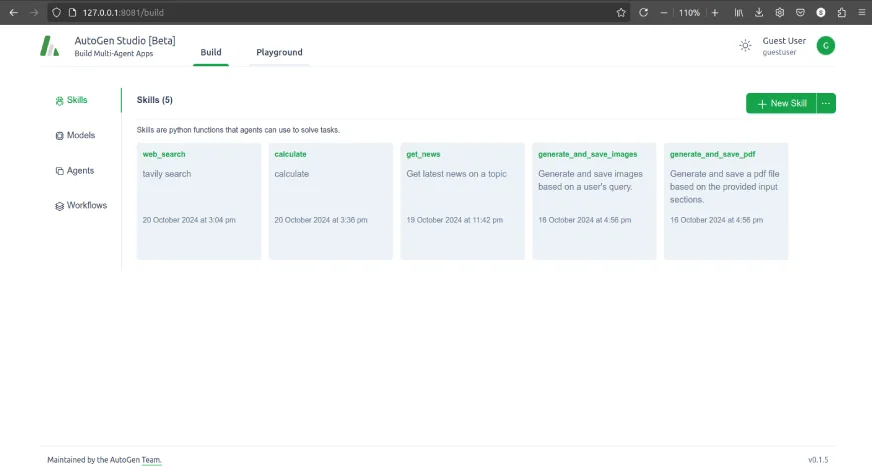
Skills
Skills are Python functions that return output based on the input provided. There are a few inbuilt functions provided which we can refer to.
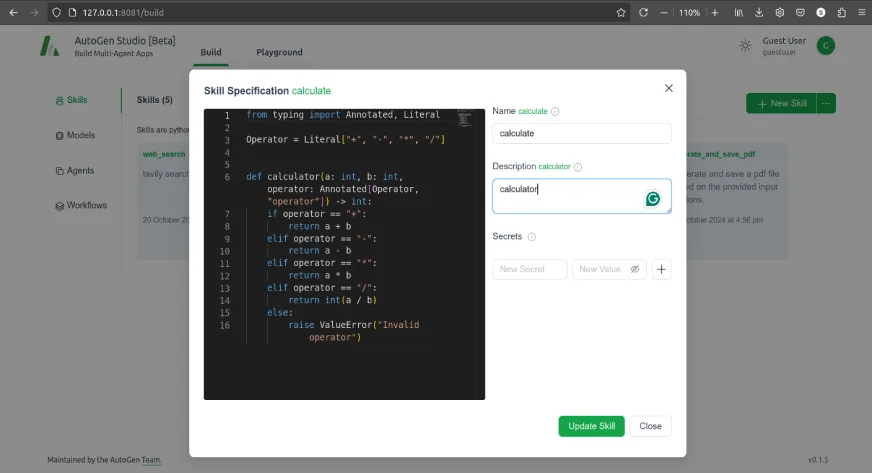
We can add a new skill as follows
Python Code
from typing import Annotated, Literal

Operator = Literal["+", "-", "*", "/"]

def calculator(a: int, b: int, operator: Annotated[Operator, "operator"]) -> int:
   if operator == "+":
       return a + b
   elif operator == "-":
       return a - b
   elif operator == "*":
       return a * b
   elif operator == "/":
       return int(a / b)
   else:
       raise ValueError("Invalid operator")
Add the Python function code to the Skill Specification window. Mention the Name and Description of the skill. If any skill needs an API key, we can add it to the Secrets field.
Agents
Once we have our Models and Skills, we can build agents using them.
We also have a few pre-build agents we can explore.
Among the pre-built agents, one of them is the user_proxy agent. This agent can be used to initiate conversations with other LLM agents and is a proxy for humans. Since this agent acts like a proxy for humans, it doesn’t need any LLM attached to it.
We can also create an AutoGen Studio group chat agent where multiple agents converse with each other to arrive at a decision.
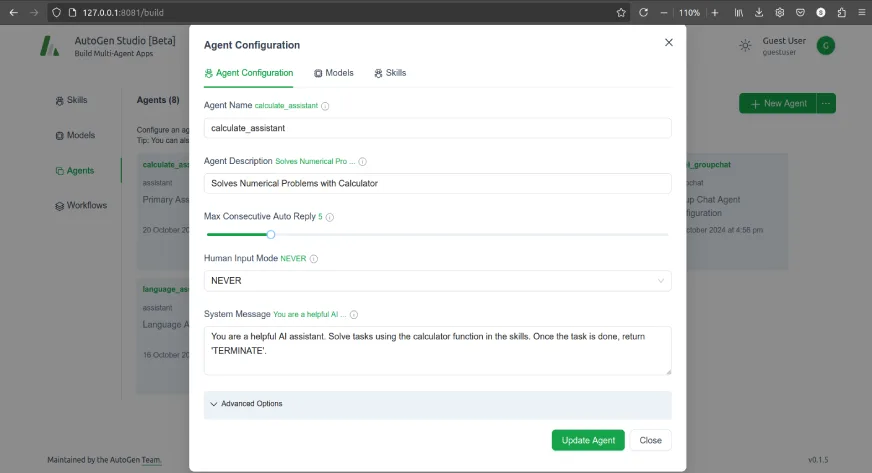
To create a new agent, click on +New Agent and select Assistant Agent.
As shown in the Agent Configuration image, fill in the suitable details for your agent. If you need guidance on any of the fields, you can use the tooltips provided for help. Once the agent is created, two new tabs Models and Skills will show up.
In the Models and Skills tabs, you can specify which models and skills the agent should have access to.
In this case, let’s select the GPT-4o model and calculate the skill of the agent.
Workflows
Workflows define how different agents collaborate to perform tasks. We can select one of the two interaction patterns, Autonomous (Chat) and Sequential.
To create a new workflow, click on +New Workflow and select Autonomous (Chat).
In the Workflow Configuration tab, fill in the Name, Description, and Summary Method as needed.
The llm summary method uses an LLM to summarize the conversation. The last summary method uses the last message of the conversation as a summary.
Once, the workflow is created, a new tab Agents will be created.
In the Agents tab, add user_proxy agent as the initiator and calculate_assistant as the receiver.
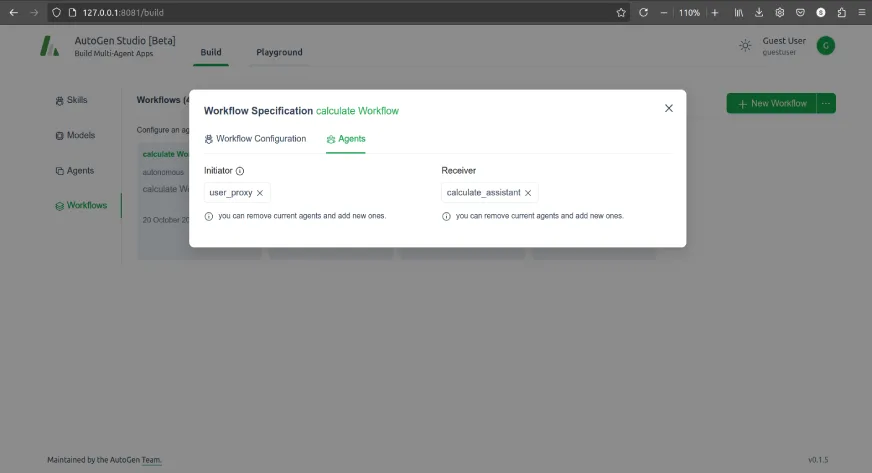
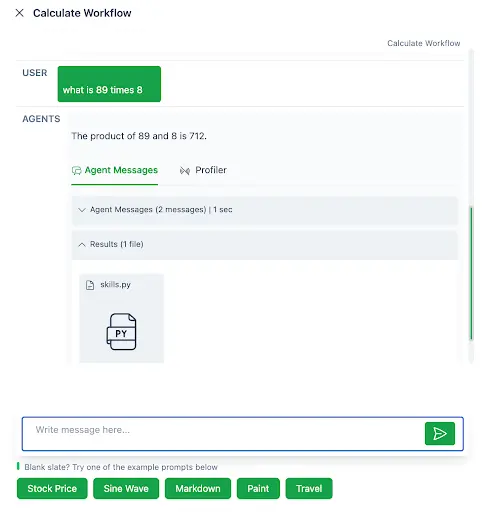
Once we have done all that, we can select and test the workflow.
Playing in the AutoGen Studio Playground
Now we can interact with the agent we have built in the playground.
Create a new session and select the workflow we want to run as follows

Once we create the session, we can use the workflow to solve any numerical problems.
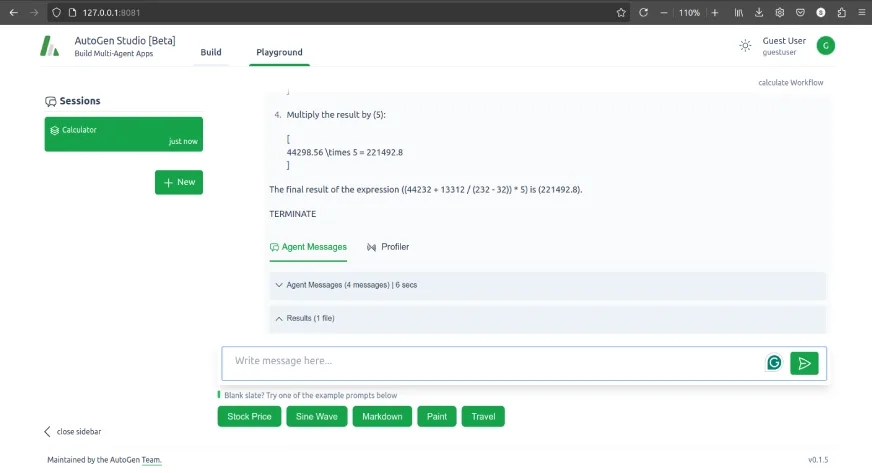
Here, you can also explore the pre-built workflows. Make sure you have selected the working model for the agents in the workflow.
Conclusion
AutoGen Studio provides a powerful yet simple platform for building agentic chatbots with minimal coding effort. By utilizing its intuitive interface and pre-built components like models, skills, agents, and workflows, users can create intelligent, task-oriented chatbots in no time. By following the steps outlined in this guide, you can begin harnessing the full potential of AutoGen Studio to create dynamic and responsive chatbots tailored to your specific needs.
Upgrade your skills and become a master of AI Agents with out exclusive program – Agentic AI Pioneer Porgram.
Frequently Asked Questions
Q1. What is AutoGen Studio?
A. AutoGen Studio is a low-code tool designed for building agentic chatbots. It allows users to create AI agents, integrate various skills, and develop workflows without extensive coding knowledge.
Q2. Do I need programming skills to use AutoGen Studio?
A. Some, AutoGen Studio is designed to be user-friendly and requires minimal coding. Its intuitive interface and pre-built components make it accessible to users with varying levels of technical expertise.
Q3. What are the main components of AutoGen Studio?
A. The main components of AutoGen Studio include Models, Skills, Agents, and Workflows. The AutoGen Studio LLM integration allows for the seamless use of large language models to enhance chatbot capabilities, while the other components define the chatbot’s behavior and functionality.
Q4. Can I customize the skills and models in AutoGen Studio?
A. Yes, AutoGen Studio allows you to customize skills by writing your own Python functions and to add new models by providing their names and API keys.
Q5. How can I test the chatbot I built using AutoGen Studio?
A. You can test your chatbot in the Workflow or in the Playground section by creating a new session and selecting the workflow you want to run. This allows you to interact with your chatbot and evaluate its performance.
I am working as an Associate Data Scientist at Analytics Vidhya, a platform dedicated to building the Data Science ecosystem. My interests lie in the fields of Natural Language Processing (NLP), Deep Learning, and AI Agents.