AI is changing how we build software. Tools like MCP(Model Context Protocol) and Cursor AI are leading this shift. Cursor AI lets you write code using natural language, whereas MCP adds smart processing and automation on top. Together, they make development faster and easier. With Cursor AI MCP servers, you can connect to external tools for tasks like reasoning or web search. The MCP with Cursor AI integration uses the Model Context Protocol to power this connection.
In this article, you’ll learn how to connect Cursor AI with MCP to unlock smarter, more automated development workflows. We’ll start by breaking down what Cursor AI and the Model Context Protocol actually are, why they matter, and how they work together. Then, we’ll guide you through the steps to install both tools and set up your environment.
Table of contents
What is Cursor AI?
Cursor AI is a modern AI-powered code editor that allows developers to focus more on logic and design rather than syntax. It accepts natural language instructions and generates high-quality, context-aware code. Cursor also includes features like Natural language-based, codingAI-assisted, debuggingIntelligent documentation lookup and Integration with version control.
How to Install Cursor AI?
Before diving into vibe coding, you’ll need to install Cursor AI. Here’s a step-by-step guide to get you started:
1. Download Cursor AI
Visit the official website cursor.com and click the Download button. The website should automatically detect your operating system and provide the correct installation file.
2. Run the Installer
For Windows and macOS:
Simply run the downloaded installer file and follow the on-screen instructions, just as you would with any other application.
For Linux (Ubuntu):
- Download the AppImage file provided for Linux.
- Open a terminal and move the AppImage to a permanent location (e.g., the /opt directory) by running:
sudo mv [name-of-file] /opt/cursor.appimage
- Make the AppImage executable with:
chmod +x /opt/cursor.appimage
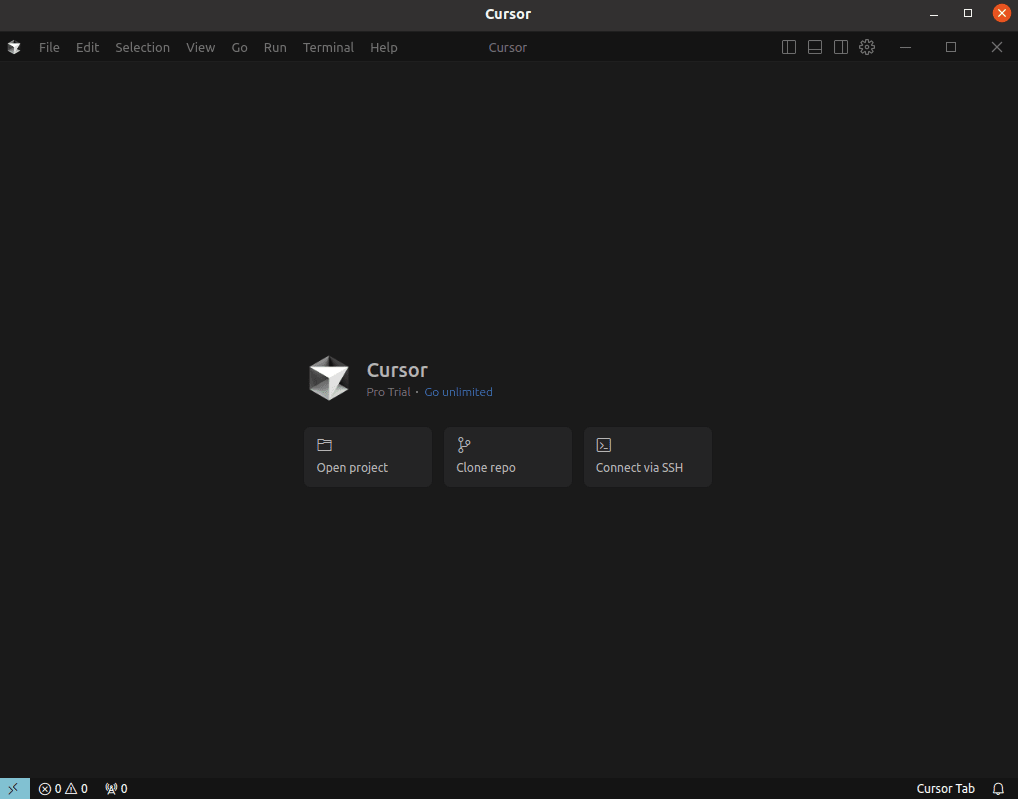
3. Launch Cursor AI
For Windows and macOS:
After installation, launch Cursor AI from the desktop shortcut or your applications menu.
For Linux (Ubuntu):
- Create a desktop entry by opening a terminal and executing:
sudo nano /usr/share/applications/cursor.desktop
- Insert the following content into the file:
[Desktop Entry]
Name=Cursor
Exec=/opt/cursor.appimage
Icon=/opt/cursor.png
Type=Application
Categories=Development;
- Save the file (press Ctrl+X, then Y, then Enter).
- (Optional) To set an application icon, Place a PNG image named cursor.png in the /opt directory. You might need to log out and log back in for the changes to take effect.
4. Initial Setup and Configuration
On the first launch, you’ll be prompted to configure essential settings such as keyboard shortcuts, the language for AI interactions, and whether to enable codebase-wide indexing.
You can also choose to install additional commands that let you launch Cursor AI directly from the terminal.
5. Import VS Code Settings (Optional)
If you use Visual Studio Code, you may be prompted to import your VS Code settings. This step imports your extensions, themes, user settings, and keyboard shortcuts to provide a familiar development environment.
6. Sign Up / Login
Create an account using your email, Google, or GitHub credentials. Upon registration, new users often receive a free trial of Cursor Pro.
You can refer to this blog for more information on Cursor AI.
What is MCP?
MCP is an open standard that creates secure, two-way connections between your data and AI-powered tools. Think of it like a USB-C port for AI applications—a single, common connector that lets different tools and data sources “talk” to each other.
When used alongside Cursor AI, MCP acts as a backend intelligence layer, enhancing the development experience.
For more information on MCP, refer to these articles:
Now that Cursor AI is in the previous step. We can start integrating MCP.
Setting-up MCP Servers in Cursor AI
Cursor AI allows you to extend its functionality using MCP (Model Context Protocol) servers. In this guide, we’ll walk through setting up two different MCP servers:
- Sequential Thinking MCP – for structured, reflective problem-solving
- DuckDuckGo Web Search MCP – for real-time web data and search capabilities.
Sequential Thinking MCP Server Setup
This server helps you break down complex tasks into a structured, step-by-step process, ideal for planning, strategy, or modular development workflows.
Step 1: Generate a Smithery API Key
To connect any MCP server hosted on Smithery AI, you need an API key:
- Go to Smithery AI and log in.
- Navigate to your Dashboard and find the API Key section.
- Click on Generate API Key.

This key will allow Cursor AI to authenticate and connect with the MCP server.
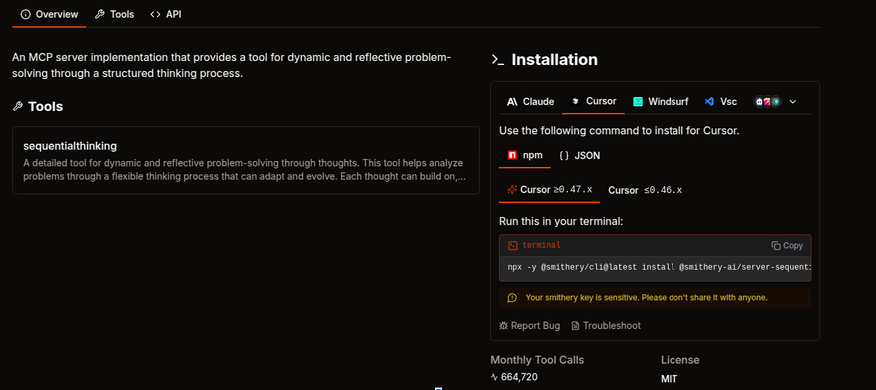
Step 2: Copy the Installation Command
Next, grab the command needed to connect Cursor AI to the server:
- Open the Sequential Thinking MCP Server page on Smithery.
- Navigate to the Overview section.
- Click on the Cursor tab.
- Copy the provided installation command; we’ll use this to add the server in Cursor.
Step 3: Connect the MCP Server in Cursor
Now let’s connect it within Cursor AI:
- Open Cursor IDE and go to Settings.
- Navigate to the MCP Servers section.
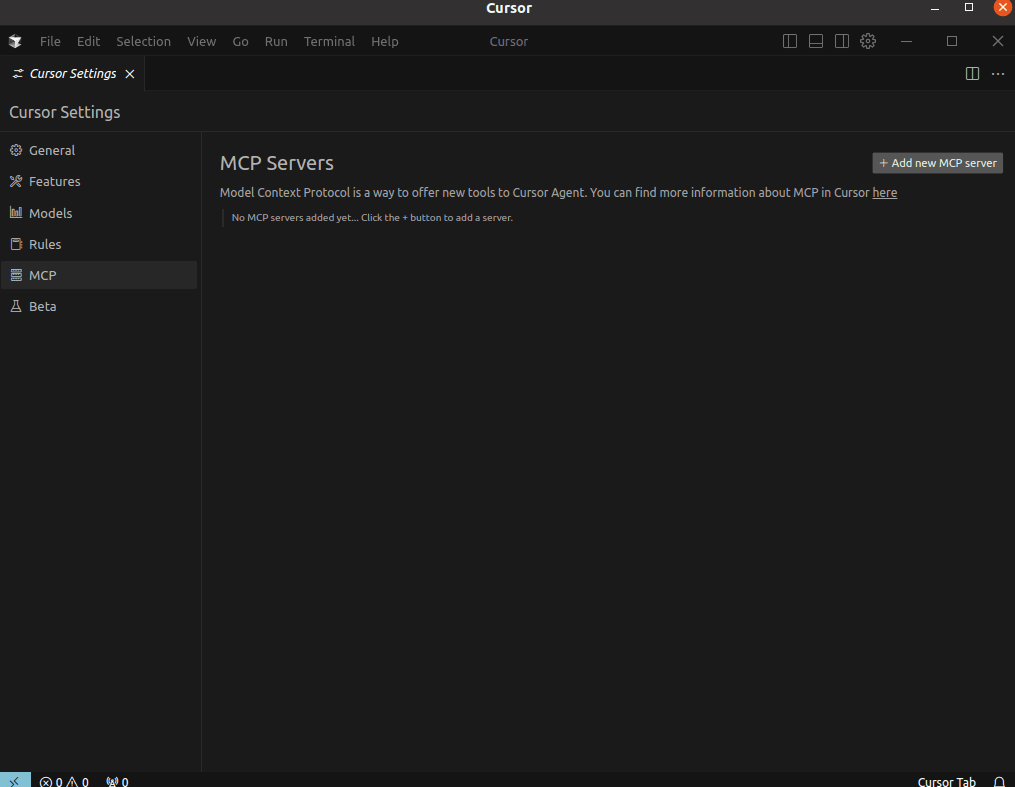
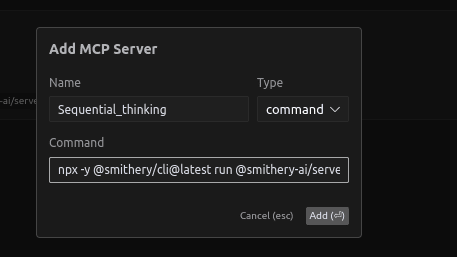
- Click on Create New MCP Server.
- Enter a name like Sequential Thinking.
- Paste the copied command from Smithery.
- Click Add to save and connect the server.
Once added, the server will appear in your list of configured MCPs ready to be used in your prompts.
Step 4: Test the Server with a Prompt
Let’s run a test in Cursor that requires sequential reasoning. Type the following prompt: “I want you to build a game and let’s do it using sequential thinking don’t give me any code.”
As shown in the previous video, when we run the prompt, the Sequential Thinking MCP server gets triggered and provides a clear, thoughtful response confirming that everything is working correctly.
DuckDuckGo Web Search MCP Server Setup
After integrating the Sequential Thinking MCP server, we’re now moving on to set up the DuckDuckGo Web Search MCP, a server that enables real-time web browsing capabilities directly from within Cursor AI.
This is especially helpful when you’re working on prompts that need live data, current news, or any web-based reference.
Step 1: Locating the DuckDuckGo MCP on Smithery
Just like we did for the Sequential Thinking server, navigate to Smithery AI and follow these quick steps:
- Use the search bar or explore the list of servers.
- Select DuckDuckGo Web Search MCP.
- Once on the server page, switch to the Overview tab.
- Open the Cursor section and copy the integration command.
Note: If you haven’t generated a Smithery API Key yet, refer to the previous steps where we explained how to generate and use it.
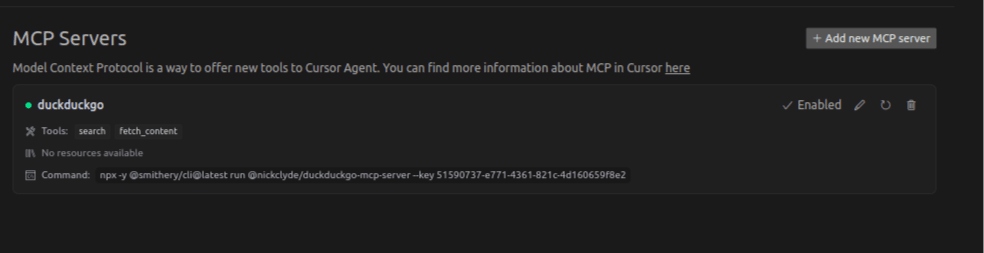
Step 2: Connecting DuckDuckGo Server to Cursor AI
Since we’ve already walked through how to connect an MCP server in Cursor IDE, follow the same flow here:
- Open Cursor IDE Settings.
- Go to the MCP Servers section.
- Click Create New MCP Server.
- Name it something like DuckDuckGo search.
- Paste the command you just copied.
- Hit Add to finalize.
Once added, this server will be listed alongside Sequential Thinking. Both are now ready for use.
Step 3: Test the Server with a Prompt
Let’s run a test in Cursor. Type a prompt that requires the web search MCP server.
Example: “Can you find the top three results for LangChain vs LlamaIndex”
As shown in the previous video, when we run the prompt, the DuckDuckGo MCP server is triggered and provides the service.
Cool Features to Try: 3D Modeling with MCP and Cursor
Beyond generating code and performing web searches, MCP can also step into the world of 3D modeling. With Cursor AI and Blender, you can create and manipulate 3D scenes using just natural language. Imagine typing, “Generate a 3D city with neon lights” or “Scale the cube by 150% on the X-axis”, and watching Blender bring your vision to life via Python scripts triggered behind the scenes. Setting it up is straightforward: configure the MCP server (e.g., using uvx blender-mcp), install the Blender add-on, and connect it to Cursor AI. This opens up a fluid, AI-assisted design workflow perfect for rapid prototyping, architectural visualization, game environments, or just experimenting with creative 3D art with no tedious scripting required.
Conclusion
Using MCP with Cursor AI makes coding not just faster but a lot smarter. Cursor AI lets you write code using plain English, and when you pair it with MCP servers, things really level up. For example, Sequential Thinking helps you break down complex problems into clear, logical steps. DuckDuckGo lets you search the web right from your editor with no need to switch tabs or open a browser. You just type, build, and see results instantly. This integration between Cursor AI and MCP doesn’t just streamline your workflow; it actually changes how you approach coding. And the best part? You can plug in other MCP servers based on what you need. It’s a straightforward way to bring AI assistance into your everyday development.
Frequently Asked Questions
What is Cursor AI?
Cursor AI is an AI-powered code editor. It lets you write code using natural language, while offering debugging help, documentation search, and version control integration. It works great with Model Context Protocol in Cursor AI, making development more intelligent and interactive.
How do I install Cursor AI?
Visit the official website and download Cursor AI. Run the installer for Windows or macOS. For Linux, use the AppImage file and follow the terminal setup instructions.
What is MCP?
MCP (Model Code Processing) is a backend system that uses pre-trained AI models to understand, generate, and refactor code. It automates repetitive tasks and enhances coding workflows. This is part of what makes the Cursor AI MCP integration so powerful.
How does Cursor AI use MCP servers?
Cursor connects to Cursor AI MCP servers like Sequential Thinking and DuckDuckGo. These servers add advanced capabilities, such as structured problem-solving and live web search, directly into the editor.
Can I add more than one MCP server in Cursor AI?
Yes. You can add multiple MCP servers through the settings in Cursor AI using the commands from Smithery. This is a key part of flexible Cursor AI MCP integration.
How do I test if an MCP server is working in Cursor?
Type a relevant prompt inside Cursor AI. If the server responds correctly (like planning steps or fetching live results), then it’s working. This validates your Model Context Protocol in Cursor AI setup.
Why should I use MCP with Cursor AI?
It saves time, boosts productivity, and eliminates context-switching. You get a smarter, seamless coding experience with automation and intelligence built in. The power of Cursor AI MCP servers helps you get more done with less effort.
Hi, I am Janvi, a passionate data science enthusiast currently working at Analytics Vidhya. My journey into the world of data began with a deep curiosity about how we can extract meaningful insights from complex datasets.


